
Growing Potatoes
For urban and suburban gardeners, potatoes can feel like a crop that belongs on farms, not patios, side yards, and small backyard beds. But the right variety and the right growing method can turn a few square feet into a surprisingly productive potato patch.
For urban and suburban gardeners, potatoes can feel like a crop that belongs on farms, not patios, side yards, and small backyard beds. But the right variety and the right growing method can turn a few square feet into a surprisingly productive potato patch.The determinate potato method is best for beginners and has smaller harvests. The indeterminate method is great for experienced gardeners and produces a huge harvest in a tiny space.
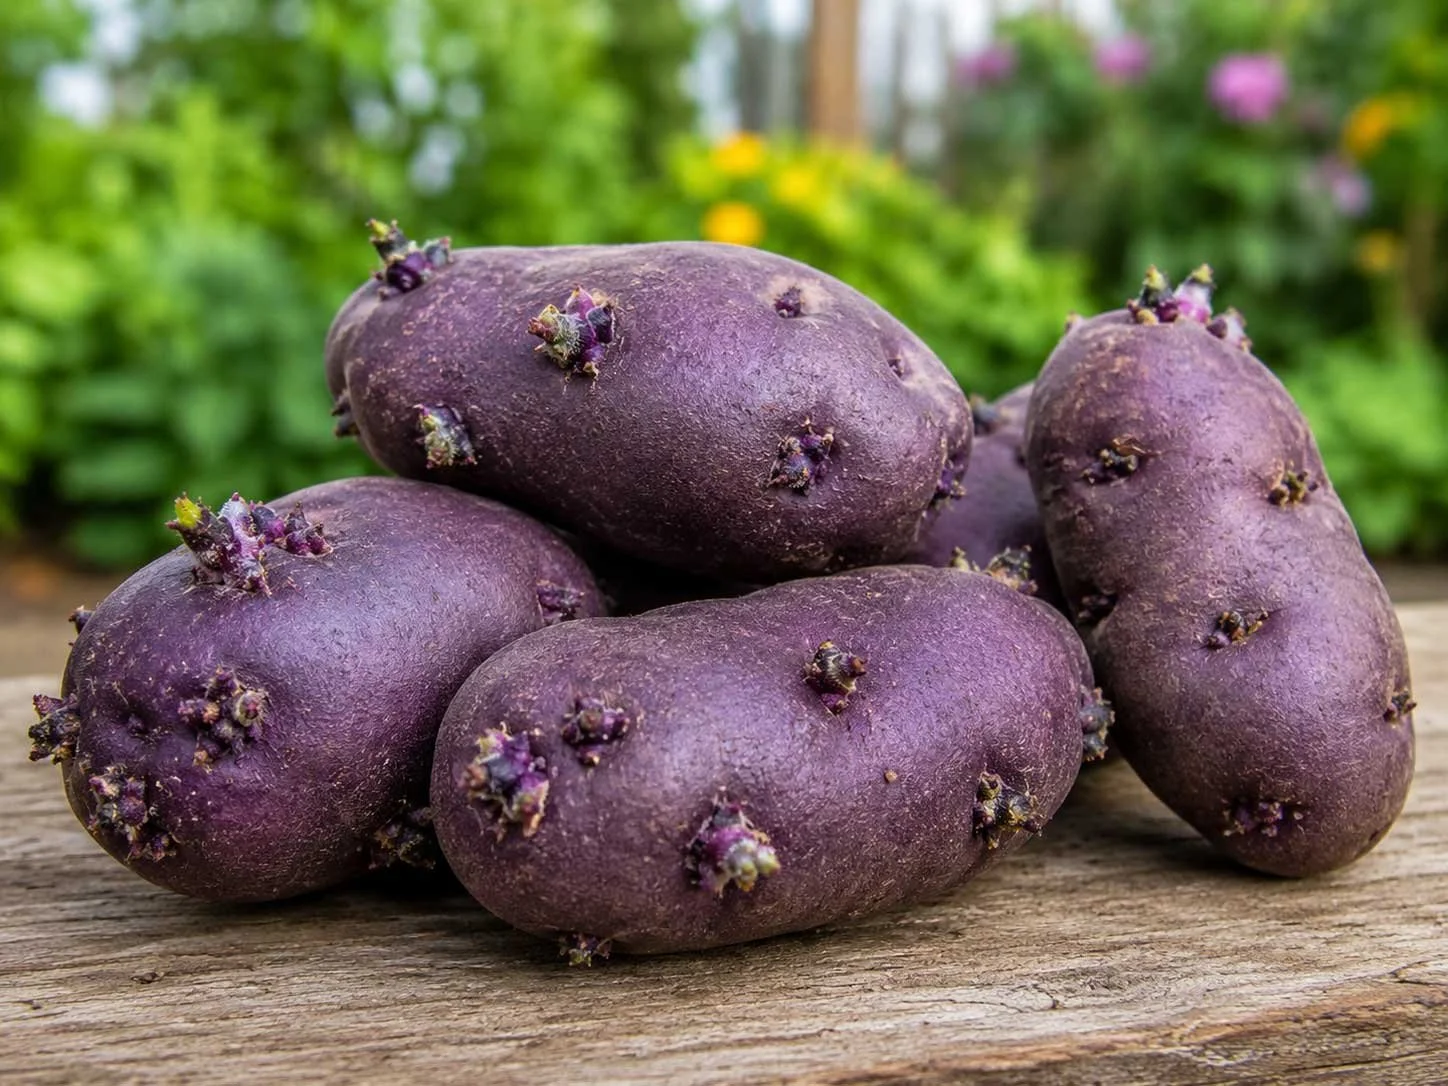
Magic Molly is one of our favorite potatoes
This Deep Roots guide focuses on Magic Molly, a striking purple potato with deep violet skin, richly colored flesh, and the kind of garden-to-table beauty that makes small-space gardening feel abundant.
It’s great for compact gardens because it offers more than novelty. Its purple color comes from anthocyanins, the same family of plant pigments that gives blueberries and eggplants their deep color, and purple potatoes are valued for these antioxidant-rich compounds. Magic Molly also holds its color well when cooked, making it especially fun for roasting, boiling, potato salads, and colorful weeknight meals. Cornell University describes Magic Molly as an extremely vigorous purple-fleshed potato that can be harvested young as “fingerlings” or left longer to size up into larger tubers.
Check Out These Blog Posts As Well
Potatoes & tomatoes are in the nightshade family.
Both potatoes and tomatoes can be determinate or indeterminate. Other nightshade veggies include eggplants, tomatillo, peppers, spices made from nightshade peppers. Both grow from “seed potatoes” instead of from. seeds. The sprout emerges form fuzzy of dark spots called “eyes” on the potato skin, visible in the photo above.
Determinate potato varieties grow as a compact, bush-like plant and reach a fixed mature size. They produce tubers in a single layer at a fixed point along the stem, just below the soil surface. They are often referred to as "early" or "mid-season" potatoes, typically maturing in 70 to 90 days. They require minimal “hilling/mounding” (covering leaves as they grow). While light mounding is recommended to prevent the tubers from turning green due to sunlight exposure, it will not increase the overall yield. No matter how carefully you add layers, determinate potatoes will not take full advantage of the stacked growing space and will have lower yields.
Indeterminate potato varieties are larger, sprawling plants that continue to grow and produce tubers underground along the length of their stems (“stolons”) throughout the season. They need a “stacked grow tower” to accommodate their much larger yield. They require a longer season (110–135 days) and must be continually hilled with soil & straw to cover new leaves for maximum production. Magic Molly purple fingerling potatoes are the Deep Roots favorite indeterminate variety.
Mix the soil blend
Potatoes need loose, fertile, well-drained soil. Hard, compact soil leads to misshapen potatoes, and potatoes need uniform moisture while tubers develop. Blend a loose potato soil mix:
50% high-quality low-nutrient potting soil
30% Deep Roots high-nutrient compost
20% Deep Roots dense leaf mulch
Blend in potassium fertilizer. Mix in a organic potassium fertilizer like Kelp Meal or “Sulfate of Potash” into your lower soil layer to ensure the tubers have food to bulk up later in the season. For a 30-inch diameter grow tower, mix in 1 to 2 cups of kelp meal total. Avoid leaving dense clumps of kelp meal, which can occasionally lock up moisture or concentrate salt.
Prepare certified organic seed potatoes
Conventional grocery store potatoes are not seed potatoes because they lack quality assurance, carry high risks of spreading soil-borne diseases, and are often treated with sprout inhibitors that prevent them from growing. While they look identical, their intended use and production processes differ entirely. Conventional grocery store potatoes are sprayed with chemicals (like chlorpropham) to prevent them from sprouting. If planted, they will likely rot in the ground before they ever grow into a plant. Some organic potatoes are not sprayed and can become seed potatoes if they develop “eyes” in storage. We use the organic potatoes sold at Sugar Beet Coop in Oak Park, IL
Potatoes are “tubers” (underground fruits) that form on underground stems called “stolons.” The "eyes" of a potato are small dormant buds located on the surface of the tuber where new growth begins. The photo above shows the “eyes.” When conditions like warmth and moisture are favorable, the buds in the eyes break dormancy to produce shoots.
These shoots grow upward to become leafy stems above ground, while also developing roots and “stolons” that eventually produce new tubers. The growing shoot fuels its initial development by drawing stored starch from the seed potato until it can photosynthesize on its own.
Chitting: About 5 to 10 days before planting put seed potatoes in a bright room with indirect light. Let them form short, sturdy green sprouts. This is called green sprouting or “chitting.” Do not let them grow long, pale, fragile sprouts.
Cutting the seed potatoes: One to three days before planting leave very small seed potatoes whole. Cut larger seed potatoes into chunks. Make sure every piece has at least one strong eye; two or three is better.
Callusing the seed potatoes: (“scabbing over.”) Place the cut potatoes in clean, dry, ventilated air at room temperature for a few days, with the cut sides exposed so they can dry and form a leathery protective surface. This step helps reduce the risk of rotting once the seed pieces are planted.
Growing determinate potatoes is easier
Determinate potatoes reach maturity faster and are the best choice for gardeners who are planting late in the season or who want the simplest small-space method. Unlike long-season indeterminate potatoes, determinate varieties set most of their tubers in one layer near the base of the plant. That means they do not need a tall stacked tower, and repeated deep hilling will not greatly increase the yield. For these varieties, the goal is simpler – give the plants loose soil, steady moisture, and enough light covering to keep the developing potatoes from turning green.
This matters especially for gardeners planting in late May in Zone 6a. By this point, the best choice is usually a faster-maturing determinate variety such as Yukon Gold, Red Norland, or Dark Red Norland. These varieties have a shorter growing season than late indeterminate potatoes, so they can still produce a useful harvest when planted after the ideal early-spring window. Late planting may produce more “new potatoes” or medium-size potatoes rather than maximum storage-size potatoes, but it is still worthwhile if you plant in late May and keep the soil evenly moist.
A simple no-dig method can be done without a potato tower. Place four seed potato pieces directly on bare soil in a loose cluster about two feet wide. Cover them with about six to eight inches of loose straw. When the shoots grow eight to ten inches tall, add more straw around the stems, leaving several inches of green foliage exposed. Repeat lightly as needed through the season, mainly to keep the tubers covered and protected from sunlight.
Because determinate potatoes do not produce heavily up a long buried stem, this mound does not need to become very tall. A finished mound of about 12 to 18 inches is usually enough. Focus on keeping the straw loose, the soil underneath moist, and the plants growing steadily. In hot weather, check moisture often because straw mounds can dry out quickly.
At harvest, pull the straw apart by hand and gather the potatoes from the soil surface and upper soil layer. This no-dig version may produce less than a tower planted earlier in the season, but it is inexpensive, beginner-friendly, and well suited to late planting. For urban and suburban gardeners, it is one of the easiest ways to grow a dependable potato crop in a small backyard space.
The potato tower method
Vertical potato growing is not magic. It is plant care. It is the experience of growing something unusual, nutritious, and generous in a space that might otherwise seem too small for potatoes at all. Potatoes still need full sun, loose soil, steady moisture, and enough growing medium to support tuber development. A tower can be useful where garden space is limited because it concentrates the crop into a compact footprint, keeps the growing area tidy, and makes harvest easier when the tower is opened at the end of the season.
Planning the DIY potato tower. This stacked vertical growing technique is for late-season indeterminate potatoes. Instead of planting potatoes in long rows, this method grows them upward in a wire tower. The purpose is to keep burying the underground potato stems (stolons) as they grow, giving the plant more covered stem area. This repeated covering encourages tubers to develop at multiple levels inside the tower.
Choose the right potato variety. This method works best with late-season indeterminate potatoes such as Magic Molly, Russet Burbank, Kennebec, Elba, or German Butterball. Avoid determinate varieties like Yukon Gold, Red Norland, and most fingerlings, because they usually set their tubers in one layer near the base of the plant.
Choose a sunny location that receives at least six to eight hours of direct sunlight each day. Potatoes need strong sun to produce healthy foliage and support tuber development. For gardeners in zones 5 through 7, planting is usually done two to three weeks after the last frost, once the soil temperature has reached about 45°F.
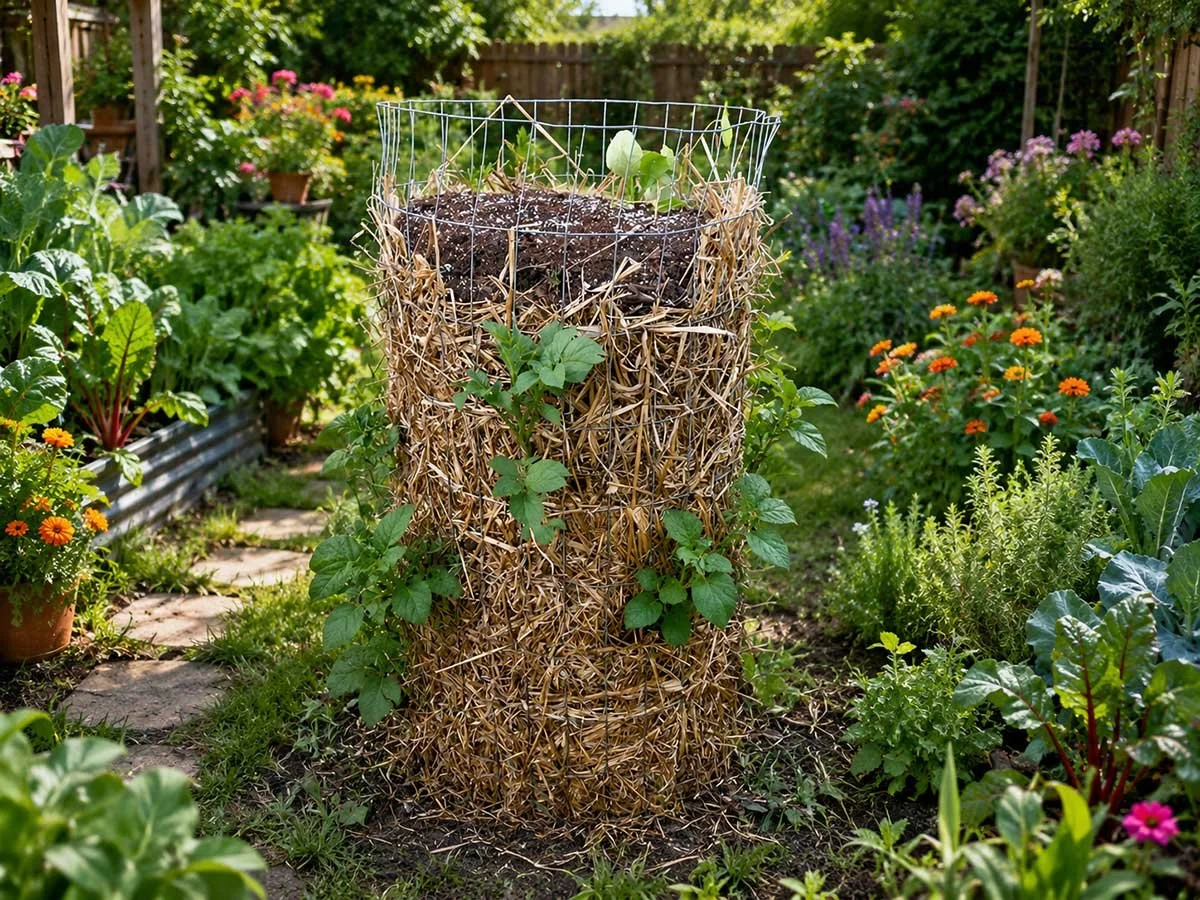
Building the Potato Tower
Choose the wire fencing. Use wire fencing that is 24 to 30 inches tall. Any sturdy wire fencing will work as long as the openings are about 3 by 5 inches. Deep Roots prefers green wire fencing because it blends naturally into the garden.
Cut the fencing to length. For a tower about 30 inches in diameter, cut a piece of fencing about 8 feet long. This will give you enough length to form the circle and overlap the ends slightly for fastening.
Shape the tower. Bend the fencing into a cylinder about 30 inches wide. Stand it upright in the garden where the potatoes will grow.
Secure the ends. Overlap the two ends of the fencing by a few inches and fasten them together with wire ties, zip ties, or short pieces of garden wire.
Check the finished size. The finished tower should be about 24 to 30 inches tall and about 30 inches across. This creates a compact growing space with a footprint of roughly 5 square feet, which is ideal for small-space potato growing.
Drainage is important. The tower should drain freely into the ground. Dig our any weed roots in the ground. A light 1- to 2-inch layer of loose straw at the very bottom is okay, if the tower sits on bare soil. But it should not be packed down or thick enough to block drainage.
Line the tower sides with straw. Line the first 12 inches inside vertical sides of the wire tower with straw, pressing it against the grid to keep the soil blend from spilling out through the wire openings.
Add the first 6” of soil. Add your first 6 inches of loose soil blend to the bottom area.
Add the seed potatoes. Place 10 to 15 seed potato cut-pieces on top of the first 6” of the soil with the eyes facing upward. 10 pieces spread further apart will produce larger potatoes. Space them evenly around the tower.
Add the second 6” layer of soil to cover the seed potatoes .
Water thoroughly. The tower should be evenly moist but not waterlogged.
What is “Hilling”?
Hilling is the heart of the potato tower method. Potatoes grow from underground branches called "stolons." By burying the stems as they grow upward, you trick the plant into producing more stolons, which means a much bigger harvest! Hilling also creates a dark underground environment. This is critical because any developing potatoes exposed to sunlight will turn green and become toxic.
The golden rule: Keep soil and straw in separate layers. In your tower, you will create a "lasagna" of distinct, alternating layers of soil and straw. Do not mix or blend the straw directly into the soil. Mixing straw into active soil causes a "nitrogen tie-up." Soil microorganisms will steal nitrogen from your potato roots just to break down the tough straw. Keeping them in separate layers gives your potatoes a light, fertile base that drains well, holds moisture, and keeps your plants fed.
The mounding schedule. Within one to two weeks of planting, green shoots will begin to emerge. Once they pop up, follow this step-by-step hilling schedule. (1) Wait until the green vines grow 8 inches above the surface. (2) Add another 10 inches of stray lining to the wire gred. (3) Add 4 inches of loose soil around the stems and leaves. (4) Immediately cover that new soil with 3 to 4 inches of loose straw. (5) Always leave the top 2 to 3 inches of green foliage exposed so the plant can breathe and get sunlight. (6) Repeat this alternating process (soil layer, then straw layer) every 2 to 3 weeks whenever the vines grow another 8 inches. (7) Most towers require 3 to 4 layering cycles.
Critical hilling milestones & tips. Straw compresses significantly over time. A loose 12-inch pile of straw will quickly settle into a layer of just a few inches, so don't be afraid to pack the outer edges tightly to block light. Stop adding layers once your tower reaches 2 to 3 feet tall. Indeterminate potato varieties lose growing efficiency if forced to climb any higher than this. Always finish your tower with a thick top layer of straw. This acts as a protective mulch to regulate soil temperature, conserve water and allow the vines to easily push through as they grow. Indeterminate potatoes are ideal for towers because they continuously grow new tubers all the way up the stem. The loose soil layers give the roots room to expand, while the sponge-like straw layers catch water from the top and slowly feed it down to the base of the tower.
Watering is especially important
A grow tower dries out faster. A wire tower filled with straw/soil mix dries out faster than potatoes grown in the ground because air moves around the sides. Check moisture by pushing your finger about three inches into the growing mix. If it feels dry at that depth, water deeply until moisture comes out of the bottom of the tower. In hot summer weather, this may be needed every other day. In cooler or rainy weather, twice a week may be enough.
Stop adding new layers when flowering begins. Flowering signals that tuber formation is already underway, and the plant should now focus its energy on swelling the potatoes it has set. But, continue watering evenly, but do not keep burying the leaves after this point.
After flowering, allow the plants to grow for another four to six weeks, or until the vines begin to yellow and die back naturally. This waiting period allows the potatoes to gain size and helps the skins toughen for better storage.
Avoid harvesting too early,
The final weeks can add meaningful weight to the crop. To harvest, cut the wire ties and unwrap the fencing. The column of straw, compost, and potatoes will collapse onto the ground. Pull the loose material apart by hand and collect the potatoes from each layer. A well-managed first-year tower using the right variety, full sun, and steady watering may produce about forty to sixty pounds from one four-square-foot tower.
Pest and disease watch
Check leaves at least twice a week. Watch for Colorado potato beetle eggs and larvae, Flea beetle feeding, Leafhopper damage, Yellowing, spotting, or early die-back, and chewed stems near soil level.

Colorado Potato Beetle
Pest prevention steps are:
Use certified seed potatoes.
Start with fresh clean soil mix.
Do not reuse potato/tomato soil from a diseased crop.
Keep foliage dry when possible.
Remove badly diseased leaves.
Do not compost diseased potato vines.

Shade Loving Veggies
A shady yard can feel discouraging to a food gardener. Most people look at a dim corner, a north-facing wall, or the space beneath trees and assume it is a dead zone where vegetables will never grow well. But that assumption is totally wrong.
A shady yard can feel discouraging to a food gardener. Most people look at a dim corner, a north-facing wall, or the space beneath trees and assume it is a dead zone where vegetables will never grow well. But that assumption is totally wrong.
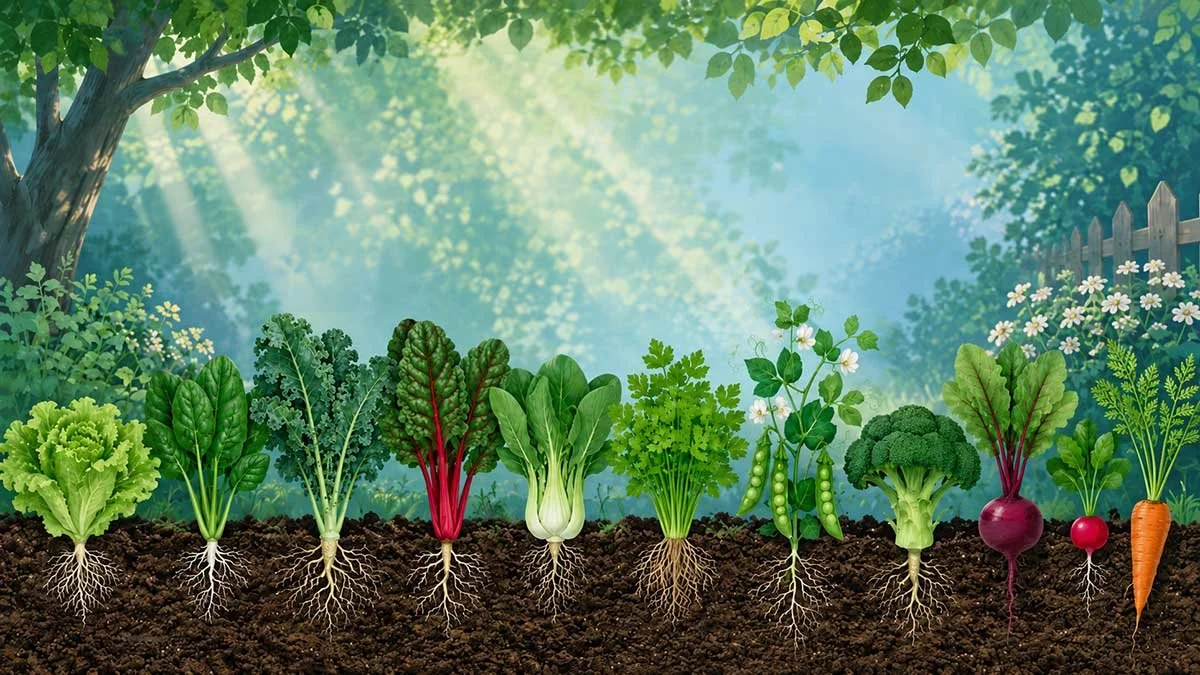
A shady yard can be a productive food garden
Some of the most flavorful, nutrient-dense, and dependable food crops actually perform better in partial shade than in full sun. While many gardeners compete for the brightest, hottest spaces in the yard, an entire group of vegetables, herbs, and root crops quietly prefers cooler, filtered light. These are the plants that often taste sweeter, stay tender longer, bolt more slowly, and need less water when they are protected from intense sun.
This is especially useful for small yards, urban balconies, north-facing beds, and gardens in zones 3 through 9. A space that receives fewer than four hours of direct sun does not have to sit empty. With the right crops, it can become one of the most productive parts of your garden.
Shade gardening is not a compromise
For thousands of years, people did not always grow food in wide-open fields under blazing sun. Much of early food cultivation happened in forest clearings, along woodland edges, beneath canopy trees, and in the dappled light between taller plants. In other words, shade gardening is not some modern workaround. It reflects the way many crops naturally evolved.
Modern agriculture has trained many gardeners to believe that vegetables need eight hours of direct sun every day. Some crops do. But many do not. Plenty of plants developed as understory crops, growing beneath taller vegetation and learning to use filtered light efficiently. Some create more chlorophyll. Others grow larger leaves to capture available light. Some even develop better flavor because they are not constantly stressed by heat and harsh sun.
Many of the crops on this list are not rare or obscure, either. They are common vegetables you may have already tried to grow in full sun — only to watch them bolt, turn bitter, become tough, or stop producing too soon. Often, the problem was not your gardening skill. The problem was that the plant was being forced into conditions it did not actually prefer. In partial shade, some of these crops can double their harvest window. Others become sweeter, milder, more tender, and more productive.
1. Lettuce
Lettuce is one of the clearest examples of a crop that gardeners often grow in the wrong place. It is a cool-season vegetable that struggles in strong sun and heat. When lettuce is exposed to intense light and warm temperatures, it bolts quickly. That means it sends up a flower stalk, turns bitter, and becomes nearly inedible within a short period of time.
In partial shade, lettuce behaves very differently. It stays in its leafy growth stage for weeks longer. The leaves remain sweet, crisp, and tender instead of becoming bitter and tough.
Commercial growers in hot climates often use shade cloth to create exactly the kind of environment lettuce naturally prefers. Historically, lettuce was grown under fruit trees in Persian gardens and in the shaded courtyards of Roman villas.
For the home gardener, lettuce is a perfect crop for the north side of a wall, beneath taller vegetables, or under light tree cover. Instead of harvesting for only a short spring window, you can often keep picking lettuce from spring into early fall.
2. Spinach
Spinach has a similar preference for shade, but its reaction to sun and heat can be even more dramatic. In full sun, spinach bolts faster than almost any other crop in the garden. Once temperatures climb above about 75°F and sunlight becomes intense, spinach acts as though it is under threat. It quickly shifts from leaf production into reproduction, sending up flower stalks and ending the harvest.
That response makes sense when you understand where spinach came from. It originated in the cooler mountainous regions of ancient Persia, where it grew among rocks and larger plants as a true understory crop.
When spinach is moved into partial shade, the leaves often grow larger to capture the available light. The plant stays in vegetative growth longer, and the flavor becomes noticeably sweeter because it is not producing as many stress compounds.Ancient Chinese agricultural texts from more than a thousand years ago even recommended growing spinach in the shadow of taller crops.
3. Arugula
Arugula grown in full sun can become almost too spicy to enjoy. The leaves turn tough, jagged, and intensely peppery, and the plant may bolt within just a few weeks.
In shade, arugula becomes a completely different vegetable.Instead of harsh heat and bitterness, shade-grown arugula develops a nutty, gently peppery flavor with more complexity. It becomes much better suited for salads and fresh eating.
This makes sense because arugula originated in the Mediterranean, not in open, sunbaked fields, but along woodland edges and in the partial shade of olive groves. Italian farmers traditionally grew it between taller crops as a quick-producing understory plant.The practical benefit is huge: in full sun, arugula may produce for only three weeks. In shade, it may continue producing for two to three months.
4. Kale
Kale is often described as nearly indestructible. It can tolerate a wide range of conditions, but that does not mean full sun is always best. In hot climates, kale grown in full sun can become tough and bitter because the plant is under constant heat stress. In partial shade, the leaves are often softer, more tender, and almost buttery in texture. The bitterness that causes many people to dislike kale can nearly disappear.
Scottish farmers traditionally planted kale in the partial shade of stone walls and farm buildings. They knew from experience that kale grown in the cooler, lower light of autumn had the best flavor. Kale also responds to lower light by producing more chlorophyll, which can increase its nutritional density.
5. Swiss Chard
Swiss chard is one of the most reliable crops for a shade garden. It can produce continuously for months in conditions where many vegetables struggle. Its wild ancestors grew in coastal Mediterranean areas where fog, cloud cover, and filtered light were common.
In full sun, chard’s large leaves lose a great deal of moisture through transpiration, which means the plant needs frequent watering. In partial shade, its water needs can drop significantly. The leaves stay crisp and vibrant, and the colorful stems often become even more intense because they are not being bleached by constant sunlight.
Medieval European monastery gardens often included chard in their shadiest corners because it was dependable, nutritious, and required very little attention.
6. Asian Greens
Asian greens include bok choy, mizuna, tatsoi, and many other brassicas. These crops evolved in agricultural systems that often imitated natural forest ecosystems.
They were commonly planted beneath fruit trees or in the dappled shade of bamboo groves. For these greens, shade is not a weakness or a limitation. It is close to their native growing environment.
In full sun, many Asian greens turn spicy, bitter, and tough. They may also bolt quickly. In partial shade, they become mild, slightly sweet, and tender enough for both raw and cooked dishes.
Chinese agricultural manuals from the Song Dynasty described careful planting systems where Asian greens were deliberately positioned in the shadow of taller crops. This was not accidental. It was sophisticated garden design based on generations of observation.
7. Cilantro
Cilantro frustrates countless gardeners. Many people plant it in full sun, watch it bolt within two weeks, and decide they simply cannot grow cilantro. But the real issue is usually not the gardener. It is the light exposure.
Cilantro is biologically programmed to bolt when it experiences heat stress and intense sunlight. That is part of its survival strategy. In full sun, it quickly shifts into flowering and seed production.
In partial shade, cilantro behaves like a completely different herb. It can stay leafy and productive for months rather than weeks. The leaves grow larger, and the flavor becomes stronger but less harsh.
The soapy flavor that some people dislike may also be partly intensified by stress from too much sun. Ancient Egyptian texts mention cilantro being grown in the shade of date palms, and medieval Persian gardens often grew it beside taller herbs.
8. Parsley
Parsley may prefer shade even more than cilantro. In its native Mediterranean habitat, parsley grows naturally in scrubland understories and along forest edges. It is adapted to dappled light and cooler soil.
In full sun, parsley can develop woody stems and lose some of its fresh flavor. In shade, it focuses more energy on leaf production. The leaves become larger, more tender, and more flavorful.
Shade-grown parsley may also be less attractive to pests because the plant is not weakened by heat stress and can maintain stronger natural defenses. Greek and Roman gardeners specifically noted that the best parsley came from shaded garden spaces.
9. Chives
Chives grown in full sun can become sharply onion-like, sometimes too strong for delicate dishes. In partial shade, their flavor softens. They develop a mild, slightly sweet onion taste that works beautifully as a finishing herb for soups, eggs, potatoes, salads, and sauces. Chives are native to cooler regions of Asia and Europe, where they naturally grew in meadows among taller grasses that provided dappled light.
Chinese herbalists more than two thousand years ago noted that chives grown in half-light had superior medicinal qualities. Modern analysis supports the idea that shade-grown chives can contain higher concentrations of beneficial sulfur compounds.
10. Mint
Mint evolved along stream banks and woodland edges, where moisture is consistent and light is filtered. Although mint can survive in full sun, heat and intense light can reduce the essential oils responsible for its signature flavor and aroma. In shade, mint often produces darker green leaves with a stronger fragrance and more complex flavor.
Shade-grown mint is usually less harsh, more aromatic, and more vigorous because it is not constantly battling heat stress. Ancient Roman gardens included mint beds placed in the shade of walls and buildings, and medieval monasteries continued the tradition by growing medicinal mint in cool, shady corners.
11. Peas
Peas need some sun in order to flower and set pods, but they benefit greatly from afternoon shade, especially in warmer climates.
Too much heat and intense light can shorten the pea harvest dramatically. In partial shade, peas often keep producing for weeks longer. Their pods stay tender instead of becoming tough and starchy, and the flavor is noticeably sweeter.
English cottage gardens often planted peas along north-facing walls or in the shade of taller crops. This was not random placement. Gardeners observed over generations that protected peas performed better than exposed ones.
12. Bush Beans
Bush beans can grow in partial shade, though they may produce a little more slowly than they would in full sun. The tradeoff is that they often produce over a longer period. In partial shade, the pods remain tender for days rather than becoming tough quickly. The plants may also resist pests better because they are not under as much heat stress.
The traditional Three Sisters planting system used by Indigenous farmers in Central America placed beans in the partial shade of corn stalks, with squash growing below. This was not primitive agriculture. It was a sophisticated ecosystem design that recognized how beans benefit from some protection from intense light.
13. Radishes
Radishes, especially summer types, can genuinely prefer partial shade. In full sun, they often become sharply peppery. They may also turn woody in the center or split before harvest. In partial shade, radishes develop a milder, crisper, slightly sweet flavor. Japanese daikon radishes were traditionally grown in the partial shade of rice paddies and beneath fruit trees. Korean gardeners also grew radishes in the filtered light of forest gardens.
The advantage for modern gardeners is important: partial shade can make it possible to grow radishes throughout the summer, which is often difficult or impossible in full sun.
14. Broccoli
Broccoli may be one of the most surprising shade-friendly crops. Most gardeners plant broccoli in full sun. It may grow well at first, but then suddenly bolt or form small, bitter heads. Many people blame the variety or the timing, but light and heat exposure are often the real problem.
Broccoli is a cool-season brassica. It evolved in coastal Mediterranean conditions with frequent cloud cover and cool temperatures. It is biologically designed to form heads in moderate light and cool weather. Intense sun can trigger premature bolting.
In partial shade, broccoli often produces larger heads, stays productive longer, and develops a sweeter, nuttier flavor. The side shoots may continue producing for months rather than weeks. Traditional Italian farmers grew broccoli in the shade of olive trees and grape vines because they knew protected broccoli was better broccoli.
15. Cauliflower
Cauliflower is famously difficult in home gardens, but shade can solve many of its problems. Too much sun can cause cauliflower heads to turn yellow or purple and develop unpleasant flavors. Temperature swings can make the heads separate into grainy sections, a problem often called “ricing.”
In partial shade, cauliflower becomes much easier to manage. The heads form more slowly and evenly. The white color stays cleaner, and the flavor becomes mild and sweet rather than bitter.
French market gardeners in the 1800s developed systems using shade cloth and strategic planting to protect cauliflower from harsh sun. This was not just a workaround. Shaded cauliflower brought premium prices because of its quality.
16. Cabbage
Cabbage develops better flavor and tighter heads when protected from strong afternoon light. This crop originated in coastal Europe, where cool temperatures, clouds, and filtered light were common. In full sun, cabbage heads may split as they mature. This splitting is often caused by rapid growth spurts triggered by heat and intense light. In partial shade, cabbage grows more steadily. The heads form tight and uniform, and the outer leaves remain more tender instead of turning tough.
German and Polish agricultural traditions noted that shade-grown cabbage was especially good for sauerkraut. Its firmer texture and slightly lower sugar content produced better fermentation results.
17. Celery
Celery may be the ultimate shade-loving crop. It is very difficult to grow well in full sun unless you provide constant water and careful attention. In partial shade, celery becomes much more manageable.
Celery is naturally a marsh plant. Its wild ancestors grew in wetlands where tall reeds and grasses provided constant shade and moisture. In full sun, celery’s shallow roots struggle to stay hydrated, and the stalks can become stringy, bitter, and hollow. In partial shade, celery needs much less water. The stalks grow thick, crisp, sweet, aromatic, and tender.
Even the traditional practice of blanching celery by mounding soil around the stalks is really an attempt to recreate shade conditions artificially. Growing celery in partial shade from the start is much simpler.
18. Beets
Beets offer two harvests: the roots and the greens. In shade, both can improve. The roots may size up faster in full sun, but in warm climates, full sun can make them woody and tough. They may develop growth rings that reduce their eating quality.
In partial shade, beets grow more slowly, but the roots often become sweeter and more tender. The greens are even better. Beet greens are highly nutritious, and in shade they become mild, soft, and pleasant instead of tough and strongly flavored.
Russian and Eastern European farmers often planted beets in the partial shade of sunflowers or corn, using companion planting to create better growing conditions.
19. Turnips
Turnips are often overlooked by modern gardeners, but they are highly productive in shade. In full sun, turnips can rush to maturity. Their flavor may become sharp or bitter, and the roots can turn pithy and woody unless harvested at exactly the right time. In partial shade, turnips grow more slowly. That slower growth produces a milder, slightly sweet flavor and a more versatile texture for both raw and cooked dishes.
Scottish and Irish agricultural traditions relied heavily on turnips grown in the partial shade of hedgerows and stone walls. These were not merely emergency crops. Generations of growers observed that turnips often performed better in those protected spaces.
20. Carrots
Carrots can also succeed in partial shade, and in some situations they may actually perform better there.
They do need some direct sun to develop good root size, so they will not thrive in deep shade. But in dappled shade or areas with four to five hours of direct sunlight, carrots can develop long, straight roots with excellent flavor.
In full sun and warm soil, carrots often rush through their growth cycle. This can produce short, thick, bitter roots. In partial shade, cooler soil slows growth. The roots elongate, develop a finer texture, and concentrate sugars instead of stress compounds.
French market gardeners in the 1700s used shade cloth over carrot beds during the hottest part of summer to produce the sweetest, most tender carrots for premium customers.
Shade is a garden asset
The deeper pattern is clear: shade-loving crops are not merely tolerating bad conditions. They are often expressing their true genetic potential.
Industrial agriculture has taught us to think maximum sun equals maximum production. But that idea comes from mechanized monoculture, not diverse home gardens. A home garden is not a factory field. It is a collection of microclimates.
Forest gardens in Asia, cottage gardens in Europe, and the Three Sisters planting system of the Americas all used layered growing spaces. These systems were not primitive. They were sophisticated ecological partnerships created through centuries of careful observation.
So that shady north side of your house is not a liability. It may be the perfect place for cool-season greens.
The area beneath your fruit trees is not wasted space. It may be an understory waiting to be planted.
Your shade is not a curse.
It is a secret weapon.
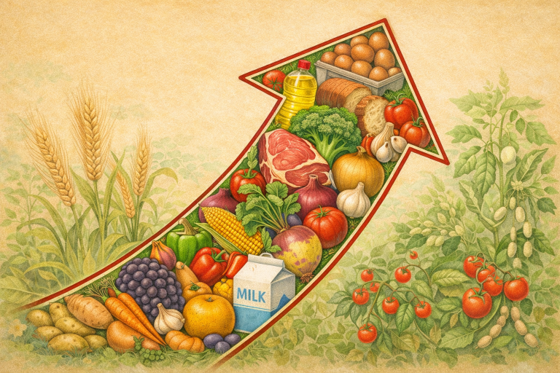
Crops to Grow When Food Costs Rise
Grow for the pantry before you grow for novelty – dependable calories, long storage, and crops that make simple meals taste good are what turn a garden into real food security.
Grow for the pantry before you grow for novelty – dependable calories, long storage, and crops that make simple meals taste good are what turn a garden into real food security. The Deep Roots method grows more plants in the same space. Our 100% nutrient and microbe-rich compost provides the science-based magic behind bigger harvests with less work.
Grow the crops that truly feed you
Grow a food security garden. When every grocery bill feels heavier, a garden has to do more than look beautiful. These are the crops that earn their space by feeding you well, storing gracefully, and making a home plot feel like real security.
A garden changes when food gets expensive. What once felt like a hobby starts to feel like infrastructure. You stop asking which crop is fun to try and start asking which one will actually carry weight through a season, through winter, and through the weeks when store prices climb faster than your paycheck.
The goal is resilience: Plenty of gardens are full of color, flavor, and good intentions, yet they still leave a family buying most of its calories somewhere else. If the goal is resilience, every bed has to justify itself. The best crops are the ones that give you nourishment, keep well after harvest, and turn a modest patch of soil into something close to a pantry.
Healthy satisfying meals: Calories first, then the crops that deepen flavor, support health, and help those staple meals feel satisfying instead of repetitive. Build your garden around that logic, and it begins to feel less like a seasonal project and more like a quiet kind of independence.
Potatoes
If one crop deserves the prime bed, it is the potato. Few plants offer this much return for the space: steady calories, strong yields, and a harvest that can sit in storage for months when cured and kept well. Homegrown potatoes also have range—boiled, roasted, mashed, fried in a skillet, tucked into soups—so they never feel like a one-note staple. A rich keeper like German Butterball or a productive fingerling can easily become the backbone of a practical food garden.
Sweet potatoes
Sweet potatoes belong high on the list for a different reason: they thrive where other crops sulk. In lighter, sandier soils, they can flourish with surprisingly little fuss, and their storage life is exceptional. They bring variety to the table too—baked whole, mashed, turned into soups, or worked into savory dishes—and even the greens can be cooked. When you want a crop that is nutritious, forgiving, and genuinely useful through the off-season, sweet potatoes are hard to beat.
Winter squash
A good winter squash plant does not just give you produce; it gives you volume. Large-fruited varieties can keep a household supplied for months, and they store beautifully without any special equipment beyond a cool, dry place. The flesh is rich, versatile, and welcome in everything from roasted wedges to soups to simple mashes. For gardeners thinking in terms of shelf life and winter meals, squash earns its place quickly.
Dry beans
Beans complete the calorie crop lineup because they do something the others do not: they bring staying power, protein, and long-term storage all in one package. Dry beans can sit on the shelf for years, and a bowl of beans beside potatoes or squash turns a side dish into supper. They are also one of the more satisfying crops to grow for self-reliance because the harvest is compact, durable, and easy to portion out through the year.
Crops that enhance simple foods
Once the heavy lifters are in place, the next layer is just as important. These are the crops that build flavor, support digestion, broaden nutrition, and make humble pantry meals feel deeply satisfying rather than repetitive.
Garlic
Garlic is small-space luxury with survival-garden usefulness. It is expensive to buy, easy to tuck into a corner, and essential in the kitchen. A modest patch yields enough bulbs to season food for months, and the harvest stores beautifully through winter. More than almost any other crop, garlic makes basic food feel abundant.
Onions
Onions do similar work on a larger scale. They anchor soups, stews, roasts, sautés, and sauces, and they store well enough to bridge one season into the next. Their value is not just culinary. A garden full of storage onions means the base of countless inexpensive meals is already waiting in the pantry.
Cabbage
Cabbage may be one of the most underestimated crops in the home garden. Fresh heads keep impressively well, and once fermented into sauerkraut they become even more useful. A forkful of kraut beside beans, potatoes, or roasted meat can brighten an otherwise heavy meal, while adding the kind of sharpness and liveliness that stored foods often lack in winter.
Ginger and turmeric
These are not staple crops in the calorie sense, but they are deeply worthwhile if you can grow them. Fresh ginger and turmeric are expensive in the store, and homegrown rhizomes bring brightness, warmth, and kitchen versatility. They can be grated into tea, folded into broths, or preserved in simple preparations that make everyday meals feel more restorative.
Tomatoes
Tomatoes belong on this list because they stretch a pantry garden further than their fresh summer glory suggests. Sauce tomatoes can be cooked down, dried, powdered, or canned into foundations for months of meals. A jar of tomato sauce can turn beans into chili, eggs into shakshuka, pasta into supper, and scraps from the garden into something complete.
Bell peppers
Bell peppers are one of the easiest ways to add color, sweetness, and nutritional value to practical cooking. They can be eaten fresh, roasted, frozen, fermented, or dried, and they lend themselves to preserving in ways that make them useful long after summer is gone. A surplus can even become homemade paprika—a small but satisfying reminder that preserving flavor is part of preserving food security too.
Fruits
Most fruits are seasonal, perishable, and better suited to preserving than long storage in their fresh form. That does not make them unimportant. It simply means they are often a second-wave investment, added after the garden is already producing the staples that keep a kitchen grounded. Fruit absolutely has a place in a home landscape. Peaches, apples, plums, berries, and grapes bring beauty, joy, and real harvests. But if the question is how to get the most food value from limited space, fruit is usually not where you begin.
Strong food gardens are rarely glamorous
Home economics: It is the one that quietly lowers the grocery bill, fills the cellar shelf, and keeps producing meals long after the season has turned. Grow beauty too, of course. But when prices rise, it is these dependable crops that make a garden feel like home economics in the best and oldest sense of the phrase.

How to Identify Pests & Diseases
A crop-by-crop symptom list is your starting point for addressing unhealthy veggie symptoms. The goal is not for gardeners to self-diagnose their crops, but to describe symptoms clearly when they call or email their local university cooperative extension office.
A crop-by-crop symptom list is your starting point for addressing unhealthy veggie symptoms. The goal is not for our gardeners to self-diagnose their crops, but to describe symptoms clearly when you contact gardening advice services and also when you do research on other websites and watch YouTube videos. Remember that almost all other gardening advisors don’t follow the Deep Roots method of using 100% compost as soil for above ground veggies, and worm castings as natural fertilizer.

Gardening Advice Services
For gardeners in the Chicago area, one of the best first stops for help with garden pests, plant diseases, and plant identification is the Chicago Botanic Garden Plant Information Service. Staffed by horticulture specialists and University of Illinois Extension Master Gardeners, the service offers guidance on insect and disease problems, cultural disorders, plant care, soil, composting, pruning, mulching, plant selection, and more. You can visit the Plant Information Desk at the Garden, call the Plant Information Hotline at (847) 835-0972, or submit questions online, including plant diagnosis or insect identification requests with photos. Hours vary by season; currently, and the hotline as Wednesday–Friday, 10 a.m.–4 p.m., closed holidays.
University agricultural extension programs are another excellent source for free, research-based gardening and horticulture advice. In Cook County, the University of Illinois Extension provides local support through programs such as Master Gardeners, urban agriculture education, youth development, nutrition education, and gardening resources. Gardeners can email Cook County Master Gardeners at Chicago-MG@illinois.edu and include photos when possible. ; phone 773-800-2557; email uie-cook@illinois.edu; hours Monday–Friday, 9 a.m.–3 p.m.
When contacting the extension include:
crop name,
variety if known,
when symptoms started,
whether old or new leaves are affected,
whether the plant wilts and recovers in the evening,
watering pattern,
photos of the whole plant and close-up leaves,
whether pests are visible on leaf undersides.
Common Mid-summer Symptoms by Crop
Tomatoes
Tomato problems vary widely by symptom, including leaf spots, wilting, mites, herbicide injury, and disease.
Lower leaves yellow first: could be normal aging, early blight, Septoria leaf spot, Fusarium wilt, water stress, or root stress.
Small gray or brown spots with yellowing on lower leaves: often Septoria leaf spot or early blight.
Tiny yellow or white speckles/stippling: check undersides for spider mites, especially in hot, dry weather.
New leaves twisted, curled, narrow, or distorted: possible herbicide drift or exposure.
Whole plant wilts during hot afternoons but perks up at night: often heat or water stress.
Wilting plus yellowing lower leaves and brown streaking inside the stem is possible Fusarium wilt. Fruit symptoms
Brown or black sunken spot on bottom of fruit: blossom-end rot, often related to uneven watering and calcium movement, not necessarily lack of calcium in the growing medium.
Pale, papery, sunken patches on fruit: sunscald.
Cracking fruit: often uneven watering after dry periods.
Cucumbers
Leaves look pale, yellow, wilted, or spotted. The University of Maryland’s cucumber guide lists mosaic/mottling, distortion, curling, mildew symptoms, mite injury, and bacterial wilt as common cucumber issues.
Yellow or green mottled “mosaic” pattern, curled or distorted leaves, stunted growth: possible virus.
Yellow stippling or dusty-looking leaves: check for spider mites.
Yellow angular spots on leaves, especially with humid weather: possible downy mildew.
White powdery coating on leaves: powdery mildew.
Sudden wilting of leaves or vines, especially after cucumber beetles are present: possible bacterial wilt.
Chewed leaves or scarred stems: inspect for cucumber beetles.
Squash, Zucchini, Melons
Leaves, pale, wilted, damaged
Maryland Extension notes spider mites can affect vine crops such as melons and cucumbers, causing yellow-white stippling; heavy feeding can turn leaves pale, dry, and cause leaf drop, especially in hot, dry weather.
Large leaves wilt in afternoon but recover by evening: often heat stress, especially during mid-summer.
Leaves stay wilted in the morning: check for squash vine borer, root damage, bacterial wilt, or severe drought.
Yellow-white stippling that spreads across leaves: check for spider mites; they commonly flare in hot, dry weather on vine crops.
White powdery patches: powdery mildew.
Yellow or green mosaic pattern with distorted leaves: possible virus.
Ragged holes or chewing: look for squash bugs, cucumber beetles, or caterpillars.
Beans
Leaves look pale, curled, scorched, chewed
Maryland Extension notes anthracnose can cause soft, sunken, dark spots on vegetables, including bush bean pods, and also notes bean leaf beetles as a snap bean pest.
Fine yellow stippling, bronzing, or dusty-looking leaves: check for spider mites.
Leaf edges look yellow, brown, or burned: possible leafhopper injury, drought stress, salt stress, or heat stress.
Holes chewed in leaves: check for bean leaf beetles, Mexican bean beetles, caterpillars, or slugs.
Leaves curled or distorted: look for aphids, herbicide drift, or virus-like symptoms.
Soft, sunken, dark spots on pods: possible anthracnose. Peppers: Leaves look pale, curled, or stunted
Pale green or yellow leaves with slow growth: possible root stress, water stress, cool nights, heavy fruit load, or pest pressure.
New leaves curled, puckered, or distorted: check for aphids, mites, thrips, or herbicide drift.
Leaves drop suddenly: water stress, heat stress, or root problems.
Tiny pale speckles or bronzing: check for mites.
Silvery streaking or scarring on leaves or fruit: possible thrips.
Fruit symptoms
Pale, papery, sunken patches: sunscald.
Dark, sunken spot on blossom end: blossom-end rot, often tied to uneven watering.
Misshapen or small fruit: heat stress, poor pollination, pest feeding.
Eggplant: Leaves look pale, spotted, or chewed
Many tiny round holes: flea beetles are common on eggplant.
Yellow-white stippling or bronzing: check for spider mites.
Leaves curling or distorted: possible aphids, mites, herbicide drift, or heat stress.
Wilting during heat but recovering later: often temporary heat stress.
Wilting that does not recover: check roots and stems; ask Extension about wilt disease or root damage.
Basil and herbs: Leaves look pale, spotted, distorted
Pale yellowing between veins, especially with gray-purple fuzzy growth underneath: possible basil downy mildew.
Brown or black spotting: possible leaf spot disease, cold injury, or water sitting on leaves.
Leaves cupped, curled, or distorted: aphids, mites, thrips, herbicide drift, or heat stress.
Plant gets woody, stretched, or stops producing tender leaves: it may be flowering or past its prime; regular harvesting helps.
Lettuce & leafy greens: Leaves look pale, bitter, limp, stretched
Plants stretch upward and taste bitter, bolting from heat & long days.
Leaves wilt in afternoon: heat stress or shallow roots drying out.
Leaf edges brown: heat, drought, salts, or uneven watering.
Yellow older leaves: normal aging, crowding, water stress, disease.
Holes in leaves: check for slugs, flea beetles, caterpillars, or grasshoppers.
Brassicas: kale, cabbage, collards, broccoli
Ragged holes or green pellets of frass: cabbageworms or caterpillars.
Tiny shot holes: flea beetles.
Lower leaves yellowing: normal aging, water stress, crowding, or disease.
Leaves wilt during heat but recover later: heat stress.
Distorted new growth: aphids, especially tucked into curled leaves or growing tips.
Yellow V-shaped patches from leaf edges on cabbage-family crops: ask Extension about black rot.
Alliums – onions, garlic, leeks, scallions: Leaves look pale, streaked, or collapsing
Whitish or silvery streaks on leaves: possible thrips feeding.
Leaf tips brown: heat stress, drought stress, salt stress, or natural maturation depending on crop stage.
Plants collapse or rot near base: possible bulb rot, excess moisture, or disease.
Yellowing from oldest leaves late in season: may be normal maturing, especially for onions and garlic.
General symptom words gardeners can use
Use these words when contacting the Extension:
Wilting: Does it happen only in afternoon, or all day?
Yellowing: Is it older lower leaves, new growth, one side of the plant, or the whole plant?
Stippling: Tiny pale dots, often from mites or insects.
Mosaic/mottling: Patchy yellow-green pattern, often virus-related.
Scorch: Brown crispy edges or tips.
Distortion: Twisted, curled, cupped, narrow, or puckered leaves.
Spots/blotches: Note color, shape, rings, yellow halos, and whether they start low on the plant.
Chewing damage: Holes, ragged edges, missing leaves, or frass.
Fruit load: Too many ripe or overripe fruits left on the plant can stress some crops.
Recovery pattern: Plants that perk up by evening may be heat stressed; plants that stay wilted need closer inspection.
A good email to Extension could say: “My cucumber leaves have yellow-green mottling and some leaves are curled. It started on July 20. The plant is watered every morning, does not recover fully at night, and I saw cucumber beetles last week. Photos attached: whole plant, top of leaf, underside of leaf, and nearby plants.”
Swede Midge Fly
Swede midge attacks only brassica veggies, and is often mistaken for nutrient problems, heat stress, herbicide drift, mechanical damage, or “weird growth.” Deep Roots is experimenting with the best ways to protect brassicas with bug netting. It is very tiny and is blown in by the wind. It over-winters in the soil. Agricultural science has only a very toxic herbicide that kills it. See our Swedish Midge Fly blog post for more details.
Club Root attacks broccoli roots
Deep Roots recommends NOT to grow broccoli in Chicago area gardens. Clubroot is not a quick, one-season problem. Illinois Extension says the pathogen can survive in soil up to 20 years, which is why gardeners may find that broccoli or other brassicas fail repeatedly in the same bed even when compost, watering, and care are good.
Summer and Fall Planting Guide
Welcome to your Summer + Fall planting guide for the Deep Roots method—built in the same spirit as our Spring step-by-step. Think of this as your two-season roadmap: surviving the heat, staying ahead of pests, and then pivoting smoothly into a wildly productive fall harvest.
Welcome to your Summer + Fall planting guide for the Deep Roots method—built in the same spirit as our Spring step-by-step. Think of this as your two-season roadmap: surviving the heat, staying ahead of pests, and then pivoting smoothly into a wildly productive fall harvest. Whether you're an experienced grower or just finding your rhythm, these pages will help you work smarter, not harder.
What Makes the Deep Roots Method Work
Before we get into the calendar, it helps to understand the handful of practices that drive everything else. These aren't complicated tasks—but doing them consistently is what separates a garden that barely survives summer from one that thrives into November.
Feed the Soil (Without Overdoing It)
Healthy soil is the engine behind healthy plants, and summer is when that engine gets tested. By mid-summer, some plants can start to look “tired and pale” even when they are growing in rich compost with plenty of nutrients available. In Deep Roots beds, this usually does NOT mean the plant needs more fertilizer. Our plants are grown in nutrient- and microbe-rich compost and are given worm castings when seeds and seedlings are first planted, so they generally have what they need to grow well. A pale or worn-out look in summer is more often a sign of stress from the season itself: not enough water during hot days, intense heat, cool nights, pests, a crowded or unfriendly companion plant nearby, soluble salts building up, or even ripe fruit left on the plant too long. These stresses can make a plant slow down, fade, or look exhausted, even though the compost is still feeding it. Learn more about how to Diagnose Unhealthy Food Plants.
Whenever you're transplanting summer crops or starting fall seedlings, work in some worm castings (vermicompost) around the root zone. They deliver a gentle, fast-acting nutrient boost that seedlings love, without the risk of burning tender roots the way synthetic fertilizers can. Add a cup of worm castings for a large plant like a cucumber or a tomato. And add about a half cup for smaller plants. View our blog posts Understanding Compost and Mulch and Worm Castings Fertilizer & Microorganisms
Mulch Like Your Garden Depends on It (Because It Does)
Mulching might be the single highest-return task in a summer garden. Once you have sown seeds or transplanted seedlings into your garden, you should mulch right away to help you keep the soil moist while those plants establish. Mulch is a barrier that reduces evaporation of moisture off the soil. Deep Roots gardeners use a one inch layer of our leaf mulch early in the season, and we plant densely so that plant leaves will shade the soil by mid-season, reducing the need to use more mulch. Alternatively, you can grow you own Miscanthus grass and use it as an organic straw mulch. You may wish to purchase organic straw mulch, but make sure never to use hay or non-organic straw as they may contain seeds, pesticides or herbicides.
Mulch whenever there is bare, exposed soil in the surface of your vegetable garden. Fall gardens still dry out faster than you'd expect, so don't skip mulching when the weather cools. It helps stabilize soil temperature, which matters a lot for the cool-season crops that love a steady, moderate root zone. View our blog post Moisture & Mulch
Biodiversity Is Your Best Pest Defense
Planting a wide variety of species in each bed—rather than single-crop rows—creates a living ecosystem that supports beneficial insects, birds, pollinators, and the invisible world of soil organisms. Plant marigolds in and around your beds to attract beneficial insects. All of that biological activity helps your garden handle summer stress and fight off pest pressure far better than any spray can. When you build true biodiversity into your beds, you also reduce the need for classic crop rotation, which is mainly a strategy for mono-culture-style growing. Learn about which companion plants protect your crops from pests. View our blog post Bio-diverse Community Landscape.
Plant in Waves to Keep Harvesting All Season
Succession planting is one of the most satisfying strategies in summer and fall gardening. Instead of sowing everything at once and ending up with a glut followed by a gap, stagger your plantings every two to three weeks. Quick crops like beans, lettuce, radishes, and cilantro are perfect for this approach. Your garden stays full, your harvests stay manageable, and you're far less likely to be drowning in zucchini while your next round of greens is still just a seedling. View our blog post Succession Planting Basics.
Grow Up, Not Just Out
Trellises and vertical supports are worth their weight in gold in a summer garden. Vining crops like cucumbers, pole beans, and winter squash take up far less ground space when grown vertically, and they're easier to harvest and less prone to disease because air can circulate around the leaves. If you're short on space—or even if you're not—training plants upward is almost always the smarter move. View our blog post Grow Vertically on a Trellis
Summer Planting (June–August)
Summer gardening is all about warmth, moisture, and momentum. This is the season for the crops that love the heat: beans, cucumbers, squash, melons, and the full range of summer herbs. It's also the time when your habits around watering and feeding matter most.
What to Plant in June to August
The warm-season stars of a summer garden are beans (both bush and pole varieties), cucumbers, summer squash, winter squash, and melons. These crops want heat, good drainage, and consistent moisture—give them that and they'll produce prolifically. On the herb side, basil, dill, and cilantro are summer staples, but keep in mind that cilantro bolts quickly in heat, so succession sow it every two to three weeks to keep a steady supply coming.
For greens in summer, forget spinach and head lettuce—they'll bolt before you can harvest them. Instead, lean into the heat-tolerant alternatives: Swiss chard, young kale leaves, Red Malabar spinach, amaranth, and purslane all thrive when the temperature climbs. They're not always the most glamorous greens, but they're productive and nutritious when most other greens have given up. View our blog post Leafy Greens Planting Calendar
Watering and Feeding Tips
In summer, the goal is deep, infrequent watering rather than frequent shallow watering. When you water deeply—enough to reach six to eight inches into the soil—you train roots to grow down toward moisture rather than staying near the surface. Surface-rooted plants suffer far more in heat waves. Water in the morning whenever possible to reduce evaporation and discourage the fungal diseases that thrive when foliage stays wet overnight. View our blog post Moisture & Mulch.
During heat waves, a light shade cloth over tender greens can be the difference between keeping them and losing them. It's a simple tool that buys you a lot of flexibility. View our blog post Installing Hoops on Raised Beds.
Fall Planting (August–November)
Fall is where Deep Roots methods really shine. Cooler air temperatures mean fewer pest problems, less evaporation, and conditions that bring out the best in leafy greens and root vegetables. Many growers find fall their most productive and most enjoyable season once they get the timing right.
What to Plant August to November
The fall garden belongs to cold-tolerant leafy greens: lettuce, spinach, arugula, mustard greens, kale, and collards all thrive as temperatures drop. Root vegetables—carrots, beets, radishes, turnips, and rutabaga—love fall's cool soil and often develop sweeter flavor after the first light frosts. On the herb side, parsley and cilantro (which struggled all summer) come back strong in cool weather.
Fall is also the time to plant garlic—not for this season, but for next summer's harvest. Plant garlic cloves in mid-October in Zone 6a so they overwinter in the ground, developing into full heads ready to harvest the following July. It's one of the most satisfying long-game crops in the garden. View our blog post Planting Garlic in Fall.
Timing Is Everything in Fall
The most common mistake in fall gardening is starting too late. You want your fall crops in the ground while the soil is still warm enough to support germination and early growth—not after the first cold snap when the soil has already chilled. A good rule of thumb: count back from your first expected frost date and give yourself at least six to eight weeks of growing time for most crops.
Once your crops are established and frost threatens, white row cover fabric becomes your most valuable tool. Even a single layer of lightweight fabric can protect plants through multiple hard frosts, extending your harvest by weeks. Pair it with wire hoops to keep the fabric off the foliage and it's a system you'll use every fall. View our blog post Installing Hoops on Raised Beds
Hardening Off Your Transplants
Whether you're moving summer seedlings outside in June or transitioning fall starts from a protected space in August, hardening off is a step you can't skip. Seedlings grown indoors or in a greenhouse are not ready for the wind, temperature swings, and intensity of direct sunlight in your garden. Moving them straight outside is a shock that sets them back significantly—and sometimes kills them outright.
Start the hardening off process one to two weeks before you plan to transplant. Begin by bringing seedlings outside for just an hour or two in a sheltered spot, then gradually increase their outdoor time each day. Avoid exposing them to very windy conditions early on—wind desiccates tender leaves quickly. After a week or so of this gradual transition, they'll be ready to move into the garden and hit the ground running. View our blog post Hardening Off Seedlings
Summer & Fall Planting Calendar (Zone 5–6)
The dates below are calibrated for Zone 5–6. Adjust slightly based on your local climate and first frost date. Use this as a living checklist—something you'll refer to throughout the season rather than read once and file away.
JUNE
Direct seed: Beans (bush and pole), cucumbers, squash, another round of basil and dill.
Transplant: Tomatoes, peppers, and eggplant if not already in the ground. Basil and other summer herbs.
JULY
Direct seed: Another round of beans for a second wave of harvest. Start carrots and beets for fall. Sow basil again—it's worth it.
Transplant: Begin fall brassicas from transplants if you grow them. Kale and collards are the easiest to establish. Important note: Swede Midge fly has recently spread throughout the Midwest and attacks only brassicas. We strongly recommend avoiding brassicas with large heads—cabbage, broccoli, and cauliflower are especially vulnerable. If you grow kale and collards, harvest leaves before they get too large to limit exposure. View our blog post Swede Midge Fly Management
AUGUST
Direct seed (fall begins): Lettuce, arugula, and radishes—repeat every 10 to 14 days. Spinach from late August into September. Turnips and beets, with early August often being the sweet spot for best results.
Transplant: Fall lettuce starts, kale, and chard.
SEPTEMBER
Direct seed: Spinach, lettuce, arugula, and radishes. Cilantro and parsley thrive again in cool weather.
Protect: Have row cover ready to deploy on nights that threaten frost. It's easier to put it on before you need it than to react the morning after a frost.
OCTOBER to NOVEMBER
Harvest hardy greens well into frost season—with row cover, many crops will keep producing far longer than you'd expect. Plant garlic in mid-to-late fall for next summer's harvest. Top-dress beds with about two inches of compost to recharge them for the following growing season. View our blog post Putting Your Bed to Bed for the Winter
Quick Companion Planting Ideas
Companion planting is an easy way to get more out of your space while supporting the natural relationships between plants. Cucumbers planted near dill attract the beneficial insects that keep pest populations in check. Lettuce thrives when tucked under taller plants that cast light shade during the hottest part of summer days. And the classic pairing of carrots with onions or leeks is one of the oldest tricks in the garden: their different scents confuse the pests that target each crop. But carrots prefer low nutrient soil, while onions an leeks need some compost with nutrients.View our blog post Companion Planting Guide.
Summer & Fall Pest Management
The best pest management strategy starts well before any pest shows up. Healthy soil grows resilient plants, and resilient plants resist pest pressure on their own. Biodiversity in your beds supports the predatory insects—ground beetles, lacewings, parasitic wasps—that keep pest populations naturally in check. When you combine rich soil, diverse plantings, and regular observation, you rarely need to reach for any kind of intervention.
That said, staying ahead of problems means checking your plants often—at least a few times a week during the height of summer. Catching issues early, when they're still small, makes a huge difference. When a crop is particularly vulnerable (think young brassica seedlings or ripening melons), hoops with netting provide reliable physical protection without chemicals. Careful placement of bug netting over brassicas can help protect against the swede midge fly. When you do need to treat, choose gentle, targeted organic tools that address the specific problem without disrupting the rest of the ecosystem you've worked to build. View our blog post Environmental Pest Management (EPM)
See Identifying Pests and Diseases for more information.
Your Two-Season Game Plan
Summer and fall can feel like a lot to manage, but they really come down to a handful of consistent habits. If you focus on just four things, let them be these:
Feed the soil. A light touch in summer, a more generous recharge in fall. The microbes do the rest.
Mulch for moisture. Lay it early, keep it on all season, and weed pressure drops dramatically.
Plant in waves. Succession sowing keeps your garden productive and your harvests manageable from June through November.
Use white row cover on hoops. It's the simplest tool for extending your fall season—sometimes by a month or more. Or use shade cloth to protect heat sensitive plants.
Do those four things well, and the rest of the season tends to take care of itself.
Happy Growing!
Companion Planting Guide
Companion planting is one of the simplest ways to create a healthier, more productive garden. By growing certain crops together, gardeners can naturally improve plant health, reduce pest problems, make better use of limited space, and even increase harvests.
Companion planting is one of the simplest ways to create a healthier, more productive garden. By growing certain crops together, gardeners can naturally improve plant health, reduce pest problems, make better use of limited space, and even increase harvests. Whether you are planting in raised beds, rows, or containers, a little planning can go a long way.
Smart Pairings for Spring Garden
Early spring is the perfect time to put companion planting into practice. Cool-season vegetables and herbs often grow well side by side, and thoughtful pairings can help you get the most from every square foot of soil. If you want steady harvests throughout the season, sow fast-growing crops every two to three weeks. This succession planting method keeps fresh produce coming while making sure your garden beds stay productive.
Another key to success is space efficiency. Use vertical supports such as trellises for peas and other climbing crops, and tuck smaller or quicker-growing plants between slower-maturing vegetables. This layered approach helps you harvest more from the same area while keeping the garden full and lively.
Why Companion Planting Works
Companion planting is based on the idea that plants can support one another in different ways. Some crops repel harmful insects, while others attract pollinators and beneficial predators. Some pairings make better use of light, water, and soil space. Others simply grow well together because they mature at different speeds and do not compete heavily for nutrients. Plua, get higher yields over time.
Crop combinations in your spring garden.
Carrots and Onions or Leeks Carrots and onions are one of the most well-known companion planting pairs. Onions and leeks help repel carrot rust flies, a common pest that can damage carrot roots. In return, carrots do not compete too aggressively with alliums, making them a practical match in the same bed. This pairing is especially useful for gardeners looking for a natural way to protect carrots without relying on sprays.
Peas and Spinach Peas and spinach make a great early-season team. As the weather begins to warm, peas can offer light shade that helps spinach stay cooler a little longer. Since spinach tends to bolt in rising temperatures, this extra protection can extend your harvest. Peas also grow upward when trained on a trellis, leaving more room below for leafy greens.
Beets and Lettuce Beets take time to size up, leaving open spaces between plants early in the season. Lettuce is an ideal companion because it grows quickly and fills those gaps efficiently. While the beets are still developing, you can harvest lettuce from the same bed. This is a smart way to maximize garden space and avoid leaving bare soil exposed.
Radishes and Carrots Radishes are often planted with carrots because they sprout much faster. As radishes grow, they help loosen the soil, making it easier for slower-germinating carrots to push through. Radishes also act as a marker crop, showing you where your carrot rows are before the carrots become visible. By the time carrots need more space, the radishes are often ready to harvest.
Lettuce and Cilantro Lettuce and cilantro grow well together in cool spring weather, but their benefits go beyond timing. Cilantro can help deter aphids, which are a frequent nuisance on tender leafy greens. This pairing works especially well in small kitchen gardens where gardeners want both beauty and function in one planting space.
Parsley and Carrots Parsley and carrots belong to the same family, but they can still be useful companions when grown thoughtfully. Parsley helps attract beneficial insects such as hoverflies, whose larvae feed on soft-bodied pests like aphids. Adding more insect-friendly herbs to the garden supports a healthier growing environment overall.
Peas and Mint Peas and mint can be a helpful combination because mint may deter aphids. However, mint is an aggressive spreader and should always be planted in containers rather than directly in the garden bed. Kept under control, it can still provide its pest-repelling benefits without taking over nearby crops.
Pairings to Avoid
Just as some plants help one another, others can cause problems when grown too close together. Avoiding poor matches is just as important as choosing good ones.
Carrots and Dill Although carrots and dill are related, dill can stunt carrot growth. Keeping them apart helps carrots develop properly without unnecessary competition or interference.
Peas and Onions Peas generally do not grow well near onions and other alliums. Onions can inhibit pea growth, so it is best to plant them in separate areas of the garden.
Beets and Pole Beans Beets and pole beans are not the best companions because they can compete for nutrients. When plants are too demanding in the same space, neither may perform at its best.
Fennel and Most Vegetables Fennel is known for being a difficult garden neighbor. It releases chemicals that can interfere with the growth of many other vegetables. Because of this, fennel is usually best planted on its own, away from the main garden beds.
Best results from companion planting
Think of your garden as a system rather than a collection of individual crops. Combine plant pairings with a few practical strategies:
Succession sowing is one of the easiest ways to keep beds productive. Fast-growing crops like lettuce, spinach, radishes, and cilantro can be sown every two to three weeks for a continuous harvest.
Vertical growing also makes a major difference. Trellising peas saves ground space and opens room for lower-growing companions.
Interplanting is another valuable technique. Place smaller or quick-maturing crops between vegetables that take longer to develop, such as beets or carrots. This helps reduce wasted space and keeps the garden working harder for you.
Finally, observe your garden closely. Companion planting is part science and part experience. What works especially well in one climate or soil type may need slight adjustments in another.
Final Thoughts
Companion planting is a practical, natural way to build a more resilient spring garden. With the right combinations, you can discourage pests, support beneficial insects, improve space usage, and enjoy better harvests throughout the season. Start with a few proven pairings, avoid known problem combinations, and keep planting in succession for fresh crops over many weeks.
A well-planned garden does not just grow more food. It grows smarter.
Hardening Off Seedlings
You’ve babied your seedlings indoors for weeks. Before they go into the garden, they need one more step – hardening off.
You’ve babied your seedlings indoors for weeks. Before they go into the garden, they need one more step – hardening off. Hardening off is the gradual process of getting indoor-grown seedlings used to outdoor conditions before transplanting. It helps them adjust to stronger sunlight, wind, cooler temperatures, rain, and lower humidity. Without it, tender seedlings can wilt, scorch, or stall after planting.
Get your indoor seedlings used to outdoors
This matters because indoor seedlings have lived a protected life. Their leaves are softer, their stems are weaker, and they are not ready for the stress of open air and direct sun. A proper hardening-off period helps plants develop tougher leaves, sturdier stems, and better resistance to transplant shock.
Start gradually: Start hardening off seedlings 7 to 14 days before transplanting. In general, put them outside for 1 to 2 hours on the first day in a sheltered, shady spot. Then add about an hour of outdoor time each day. Gradually increase light exposure too, moving from shade to morning sun and eventually to longer periods outside.
Always watch the forecast. A cold snap or strong wind can undo a week of progress. Bring plants in if strong wind, heavy rain, or cold temperatures are expected. For most warm-season crops, do not leave them out if temperatures fall below 45°F, and some crops need warmer conditions than that.
A simple hardening-off schedule looks like this:
Days 1–2: Sheltered shade for 1–2 hours
Days 3–4: Morning sun and afternoon shade for 3–4 hours
Days 5–7: Longer outdoor exposure with some direct sun and light wind
Days 8–10: Outdoors most of the day
Days 11–14: Outdoors day and night, as long as frost is not expected
Different crops harden off at different speeds.
Tomatoes need about 10–14 days and should only be hardened when nights are consistently above 50°F. Start them in shade and increase sun exposure slowly.
Peppers and chilies are even more cold-sensitive than tomatoes and should not be exposed to temperatures below 55°F. Give them a sheltered, warm starting spot and take your time.
Cucumbers, squash, zucchini, and melons usually need 7–10 days. Their large leaves sunburn easily, so shade is especially important at the beginning.
Brassicas such as cabbage, broccoli, kale, and Brussels sprouts are among the easiest seedlings to harden off. Most can handle cooler weather and usually need 7–10 days, though cauliflower is more sensitive.
Lettuce and salad greens often need only 5–7 days. They handle cool weather well, but heat and intense midday sun can cause stress and bolting.
Beans and peas can also harden off in about 5–7 days if started indoors, though many gardeners prefer to direct sow them.
Herbs vary widely. Basil needs a long, warm hardening-off period and dislikes cool temperatures. Parsley is far tougher. Cilantro and dill harden quickly but can bolt in heat. Woody herbs such as thyme, oregano, rosemary, and chives are usually forgiving.
Common Mistakes
Moving too fast: Gardeners often make the same few mistakes when hardening off seedlings. The biggest is moving too fast. A warm, sunny day can make it tempting to leave plants out all day, but that often leads to sun-scald and wilting.
Ignoring wind: Another common mistake is ignoring wind. Even light wind can dehydrate tender seedlings quickly. And of course, skipping hardening off altogether is risky; healthy-looking indoor seedlings may collapse within hours of transplanting if they are not prepared.
How do you know your plants are ready? Hardened seedlings usually have thicker, tougher-looking leaves and sturdier stems. They can handle a full day outdoors without wilting or scorching. Once they have spent several days outside successfully, including overnight when conditions are safe, they are ready to go into the garden.
For the final transplant, choose a calm or cloudy day if possible, and water well after planting. That extra patience pays off in stronger, more resilient plants.

Watering, Moisture and Mulch
Although deep watering is usually best, over watering can also stress your plants. Of course, there will be a lot of variables to take into consideration – such as the amount of rain and other weather conditions. Do a simple moisture test with your finger on the top 2 to 4 inches of soil before you water. Be careful about the watering tips you see circulating on the internet or in Youtube videos!
Different plants need different kinds of watering. Some veggies need more frequent and deeper watering than others. Seeds and seedlings need to be constantly moist. Although deep watering is best, over watering can also stress your plants, making good drainage essential. Of course, there will be a lot of variables to take into consideration – such as the amount of rain and other weather conditions. Do a simple moisture test with your finger on the top 2 to 4 inches of soil before you water. Be careful about the watering tips you see circulating on the internet or in YouTube videos!
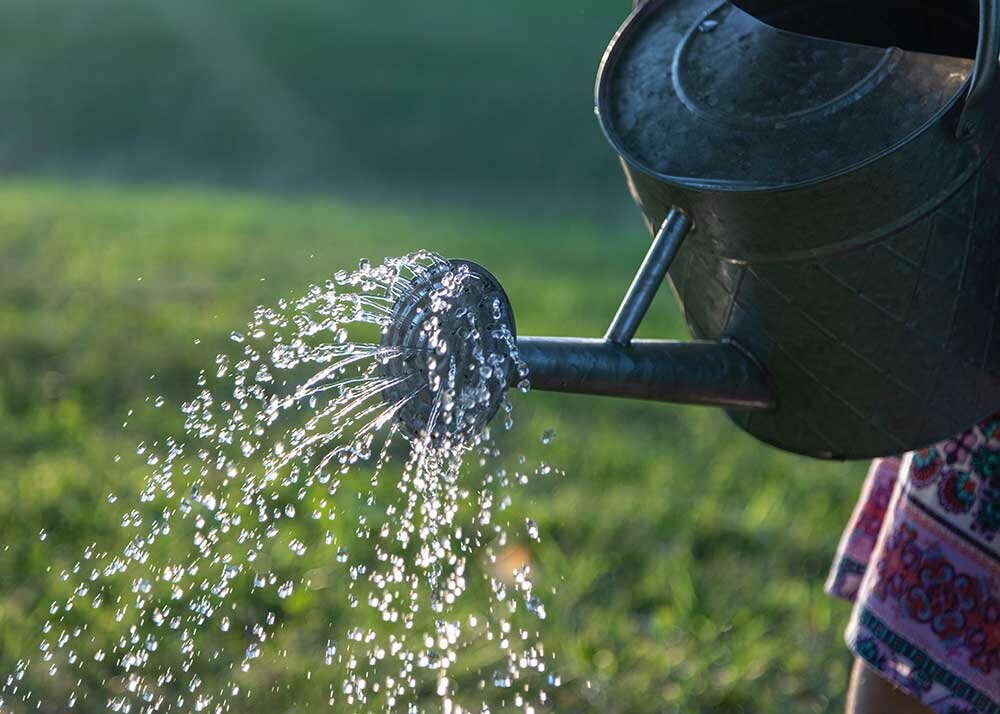
Proper watering is critical to plant health
Just as soil health depends on the latest soil science – the same is true of about watering edible plants. The Deep Roots method creates the best environment for your plants because our compost used as soil has good drainage and lets the water get to the plant roots quickly. We recommend installing drip irrigation if you don’t have time to water or go out of town often. Take time to correctly set the irrigation timing and amount. Past the seedling stage water deeply 2 or 3 times a week so the roots grow deep. Test soil moisture with your finger 2 to 3 inches down.
Cover soil with mulch.
Save water and time: Retaining as much moisture as possible saves watering time and keeps your plant healthy and happy. Plants grow faster and get bigger harvests if protected from temperature and dehydration. The two best options for mulching vegetable gardens are either a one inch layer of our organic leaf mulch, which you can purchase in our webstore, or organic straw mulch. Don’t use hay since it adds unwanted weed seeds to your garden. Never use any mulch that is not organic, as it could contain herbicides or pesticides which can ruin your garden and severely damage your plants.
Sourcing straw mulch can be a challenge. You can grow Miscanthus grass and allow it to overwinter, cutting it down in the fall. If you don’t have space for this, you may wish to purchase organic straw mulch from garden centers. Since certified organic straw mulch is hard to find, we recommend that you speak with local garden center owners to find out if the straw they sell is grown on farms that are functionally organic, even if they may not be certified. Once such center selling straw mulch from a local farm is The Feed Store, 5408 S. Harlem, Summit IL 60501, (708) 458-1327. Closed on Wednesdays.
Seed watering tips
When direct sowing seeds in your garden, keeping them moist is essential — peek under your mulch and if the soil looks and feels dry on the surface, go ahead and water. Daily is best, mornings are ideal. When you are planting in Deep Roots compost in raised beds or containers with good drainage, overwatering isn’t a big concern. However, if you are direct sowing in a growing medium or vessel that doesn’t drain well, you’ll need to be careful that your seeds don’t become waterlogged which can cause them to rot. Learn through observation the difference between soil that is moist, and waterlogged soil which is more like mud. You want moist soil, not soil soup.
If conditions are exceptionally hot, dry, or windy, check the soil moisture and consider a second light watering to prevent the soil from drying out. Water gently so you do not wash seeds out of place, and always check the soil before watering again. Raised beds and containers dry out faster than in-ground beds, so they usually need more frequent attention.
Transplanted seedlings watering tips
When you have just transplanted new seedlings into your garden, they should be kept moist consistently just like your direct sown seeds. Mulch around new seedlings and water whenever the soil under the mulch appears dry. If you are unsure, touch the surface. Keep up watering whenever the first inch or so is dry until you start to see new growth on the plant that wasn’t there when you transplanted it.
DON’T water mature plants a little everyday!
You have been watering daily early in the season as seeds are being sown and new seedlings are going into the garden. But once those plants are established, DON’T keep watering every day. It promotes shallow roots. One of the worst practices is to water your garden lightly every day or every few days. This frequent sprinkling provides water to only the top layer of the soil and promotes shallow root systems. Instead, water deeply whenever the top two inches of soil is dry.
Simple, standard suggestions like: water every day and “make sure you give your plants an inch of water each week” are now being questioned and re-evaluated. Because the plant’s roots are not close to the soil surface, we now know that the water needs to get deep enough and the roots need to have enough time to soak it up to allow the plants to develop deep root systems that are necessary to be healthy.
While overwatering, and waterlogging, can stress plants out, the risk of this is low if you are using Deep Roots compost as your growing medium and have a well-draining raised bed or vessel. If your vessels don’t have good drainage, or your not sure how well your soil drains, you should observe how long it takes your garden to drain after a heavy rain.
If top 2 inches of soil feels dry it’s time to water. Soak the soil to a depth of 4 to 6 inches. Test for soil moisture also after you water. It can take some time if you are watering with a hose, but it is worth it to do this deep watering less frequently to encourage root development.
Overhead watering (sprinklers) is the least efficient and least preferred method of watering. Far too much of the water is lost to evaporation, and the water tends to sit on the plants instead of making it to the soil, which can lead to fungal issues. Apply water directly to the soil, not the plants, with a soaker hose, drip irrigation, watering can or watering wand.
Watering tips from our horticulturist
Some conventional soils can have drainage problems, so too much water does not allow plant roots to breathe and will cause plants to wilt from lack of oxygen.
Don’t water too fast. Water gently at all times. When watering with a hose, avoid a hard stream of water, which risks injuring your plants and the soil. Use a steady, gentle shower of water instead – but only on the soil, not the plants.
If you are using municipal water, put a water filter on your hose or water source. Municipal water often has levels of chlorine that kill essential microorganisms. There are also many harmful pollutants in some city water. Chlorine filters used for RV water intakes are available online and can be connected directly to your hose.
Lack of water stresses plants. Drought may produce stunted fruit, produce no fruit at all, or may produce tasteless, woody, or unpalatable fruit.
Over watering stresses plants. Over watering can cause as much stress as severe drought. Too much water will saturate soils, displace air which starves the roots of oxygen. The compost Deep Roots used instead of conventional soil (Microbe Rich Compost) has good drainage properties.
Keep SEEDS moist at all times. Germinating seeds must be constantly moist. Watering seeds twice a day may be needed on dry hot days. It’s easiest to let drip irrigation water your seeds. Some gardeners without irrigation have found a work-around that saves time and constant attention.
Place a board or large tiles over tiny carrot seeds. This keeps the moisture in the soil longer, even longer than a standard mulch, and protects them from being washed away by heavy rain. Make note of how many days it takes for the first sign of germination. Check the seeds everyday when it is close to germination. Remove the cover when the first seed sprouts. Some seeds will sprout sooner and some later. Carrot seeds are very tiny and need to be kept constantly moisturized more carefully. Once you see them sprout, remove the board and add your mulch.
Keep SEEDLINGS moist at all times and water daily or more often for 2 weeks. When the seedling is at least 5 inches tall its roots are stronger and constant monitoring is not necessary. Test soil before and after watering and water gently and deeply as needed.
Don’t over water seeds! Finding the right amount of water for your seeds is difficult. Not enough and they will not germinate - BUT too much and they could rot. Just to be safe - water seeds lightly twice a day - you just need to moisten the top layer.
When plant leaves wilt on a very hot day, it could be from the heat and not lack of water. If you are following all the above tips, the wilting is likely from heat and not lack of water. In this case, try a shade clothe instead of more water.
Prune off lower foliage of plants prone to fungal diseases that prefer damp environments like powdery mildew on cucumbers and squash) and like tomato blights. Water very close to the soil with a watering wand on a hose or a watering can. Avoid wetting the leaves. Water early in the day
Health of mature plants is dependent on correct watering. Remember that large plants need a lot more water than seedlings. We want mature plants to have deeper roots that suck lots of water out of the soil.
A drip irrigation system nurtures healthier plants and less stressed gardeners. If you can’t or don’t want to water and monitor your soil moisture constantly get a drip irrigation system. Drip irrigation should be the watering method of choice. It will save you time and make your plants stronger, happier and healthier. The larger your garden the more critical drip irrigation becomes. Contact the Deep Roots team for advice on installing the new system we designed.Seed watering tips
Use our Planting Calendar blog posts for more useful seed starting tips like spring/ simmer/fall planting dates, soil temperature, temperature tolerances, direct seed vs transplants, seed depth, sunlight, and days to maturity. Choose from 9 planting calendar blog posts organized by crop group on our Planting Calendar and Climate blog category page: brassicas, cucurbits, fruiting crops, leafy greens, legumes, root crops, herbs, and berries.
“Grow Your Own Food” blog posts
Questions, comments, suggestions? We’d love to hear from you! Send photos of your garden too!
See the full list of our Grow Your Own Food blog posts. Our blog posts are divided into 6 categories – each with its own page of blog post photos and summaries.
Questions, comments, suggestions? We’d love to hear from you! If you need a quick answer to a gardening question give us a call or send a text. We are here to solve your gardening problems. Please call OR text our Customer Service team at 708-655-5299 OR send an email to: support@deep-roots-project.org.
Deep Roots online store
See our online store for details about prices, ordering and delivery of raised beds, planter boxes, microbe-rich compost, worm castings, leaf mulch and more. We don’t sell traditional soil, since we use 100% compost as our growing medium. Our online store has 2 sections – (1) raised beds and planter boxes and (2) compost, worm castings, fertilizer.
Please contact our customer support team before placing an order online so we can assist you with the details and answer your gardening questions. You can pay by credit card on the store or by check.
(708) 655-5299 and support[at]deep-roots-project.org
Gardening connects you to the Earth. Our community connects you to each other.
SIGN UP FOR OUR NEWSLETTER
(Use green rectangle and white type button style)
Please leave your cell phone number when you sign up for our eNewsletter, if you want text message announcements now and then.
Donations help us provide organic kitchen gardening education to individuals, organizations, and entire communities. Thank you in advance for contributing to our community and for sharing our website and blog with friends and family.