Summer and Fall Planting Guide
Welcome to your Summer + Fall planting guide for the Deep Roots method—built in the same spirit as our Spring step-by-step. Think of this as your two-season roadmap: surviving the heat, staying ahead of pests, and then pivoting smoothly into a wildly productive fall harvest.
Welcome to your Summer + Fall planting guide for the Deep Roots method—built in the same spirit as our Spring step-by-step. Think of this as your two-season roadmap: surviving the heat, staying ahead of pests, and then pivoting smoothly into a wildly productive fall harvest. Whether you're an experienced grower or just finding your rhythm, these pages will help you work smarter, not harder.
What Makes the Deep Roots Method Work
Before we get into the calendar, it helps to understand the handful of practices that drive everything else. These aren't complicated tasks—but doing them consistently is what separates a garden that barely survives summer from one that thrives into November.
Feed the Soil (Without Overdoing It)
Healthy soil is the engine behind healthy plants, and summer is when that engine gets tested. By mid-summer, some plants can start to look “tired and pale” even when they are growing in rich compost with plenty of nutrients available. In Deep Roots beds, this usually does NOT mean the plant needs more fertilizer. Our plants are grown in nutrient- and microbe-rich compost and are given worm castings when seeds and seedlings are first planted, so they generally have what they need to grow well. A pale or worn-out look in summer is more often a sign of stress from the season itself: not enough water during hot days, intense heat, cool nights, pests, a crowded or unfriendly companion plant nearby, soluble salts building up, or even ripe fruit left on the plant too long. These stresses can make a plant slow down, fade, or look exhausted, even though the compost is still feeding it. Learn more about how to Diagnose Unhealthy Food Plants.
Whenever you're transplanting summer crops or starting fall seedlings, work in some worm castings (vermicompost) around the root zone. They deliver a gentle, fast-acting nutrient boost that seedlings love, without the risk of burning tender roots the way synthetic fertilizers can. Add a cup of worm castings for a large plant like a cucumber or a tomato. And add about a half cup for smaller plants. View our blog posts Understanding Compost and Mulch and Worm Castings Fertilizer & Microorganisms
Mulch Like Your Garden Depends on It (Because It Does)
Mulching might be the single highest-return task in a summer garden. Once you have sown seeds or transplanted seedlings into your garden, you should mulch right away to help you keep the soil moist while those plants establish. Mulch is a barrier that reduces evaporation of moisture off the soil. Deep Roots gardeners use a one inch layer of our leaf mulch early in the season, and we plant densely so that plant leaves will shade the soil by mid-season, reducing the need to use more mulch. Alternatively, you can grow you own Miscanthus grass and use it as an organic straw mulch. You may wish to purchase organic straw mulch, but make sure never to use hay or non-organic straw as they may contain seeds, pesticides or herbicides.
Mulch whenever there is bare, exposed soil in the surface of your vegetable garden. Fall gardens still dry out faster than you'd expect, so don't skip mulching when the weather cools. It helps stabilize soil temperature, which matters a lot for the cool-season crops that love a steady, moderate root zone. View our blog post Moisture & Mulch
Biodiversity Is Your Best Pest Defense
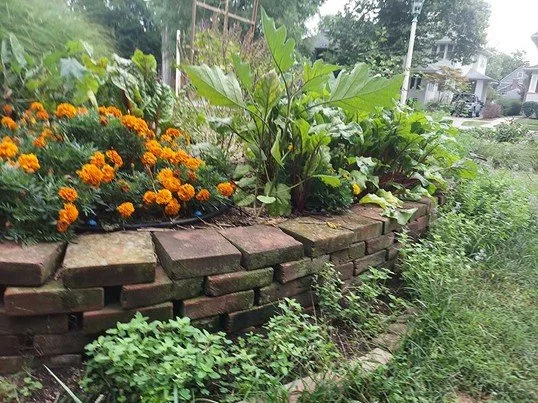
Planting a wide variety of species in each bed—rather than single-crop rows—creates a living ecosystem that supports beneficial insects, birds, pollinators, and the invisible world of soil organisms. Plant marigolds in and around your beds to attract beneficial insects. All of that biological activity helps your garden handle summer stress and fight off pest pressure far better than any spray can. When you build true biodiversity into your beds, you also reduce the need for classic crop rotation, which is mainly a strategy for mono-culture-style growing. Learn about which companion plants protect your crops from pests. View our blog post Bio-diverse Community Landscape.
Plant in Waves to Keep Harvesting All Season
Succession planting is one of the most satisfying strategies in summer and fall gardening. Instead of sowing everything at once and ending up with a glut followed by a gap, stagger your plantings every two to three weeks. Quick crops like beans, lettuce, radishes, and cilantro are perfect for this approach. Your garden stays full, your harvests stay manageable, and you're far less likely to be drowning in zucchini while your next round of greens is still just a seedling. View our blog post Succession Planting Basics.
Grow Up, Not Just Out
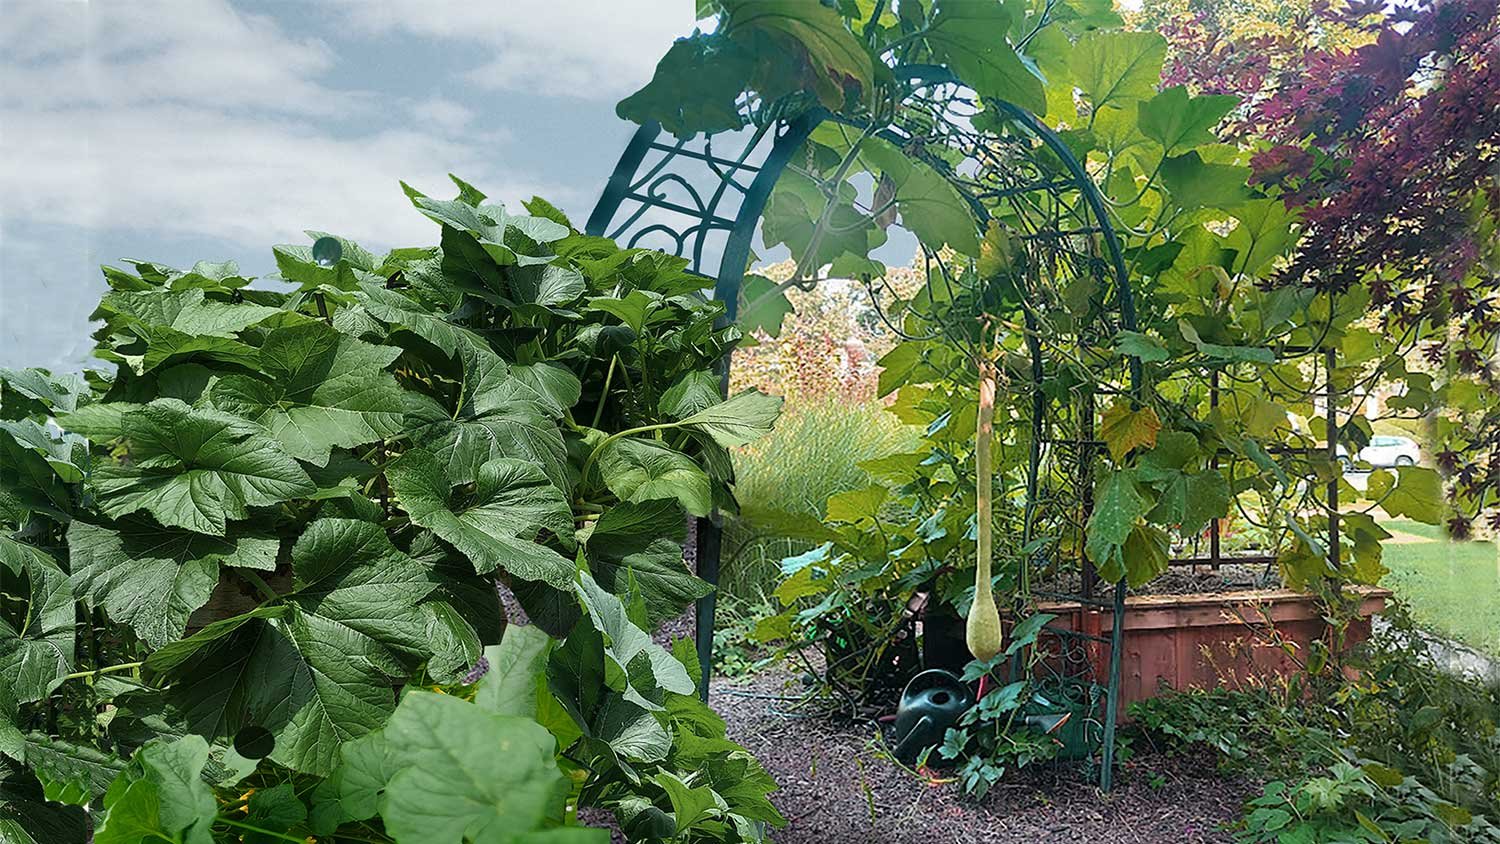
Trellises and vertical supports are worth their weight in gold in a summer garden. Vining crops like cucumbers, pole beans, and winter squash take up far less ground space when grown vertically, and they're easier to harvest and less prone to disease because air can circulate around the leaves. If you're short on space—or even if you're not—training plants upward is almost always the smarter move. View our blog post Grow Vertically on a Trellis
Summer Planting (June–August)
Summer gardening is all about warmth, moisture, and momentum. This is the season for the crops that love the heat: beans, cucumbers, squash, melons, and the full range of summer herbs. It's also the time when your habits around watering and feeding matter most.
What to Plant in June to August
The warm-season stars of a summer garden are beans (both bush and pole varieties), cucumbers, summer squash, winter squash, and melons. These crops want heat, good drainage, and consistent moisture—give them that and they'll produce prolifically. On the herb side, basil, dill, and cilantro are summer staples, but keep in mind that cilantro bolts quickly in heat, so succession sow it every two to three weeks to keep a steady supply coming.
For greens in summer, forget spinach and head lettuce—they'll bolt before you can harvest them. Instead, lean into the heat-tolerant alternatives: Swiss chard, young kale leaves, Red Malabar spinach, amaranth, and purslane all thrive when the temperature climbs. They're not always the most glamorous greens, but they're productive and nutritious when most other greens have given up. View our blog post Leafy Greens Planting Calendar
Watering and Feeding Tips
In summer, the goal is deep, infrequent watering rather than frequent shallow watering. When you water deeply—enough to reach six to eight inches into the soil—you train roots to grow down toward moisture rather than staying near the surface. Surface-rooted plants suffer far more in heat waves. Water in the morning whenever possible to reduce evaporation and discourage the fungal diseases that thrive when foliage stays wet overnight. View our blog post Moisture & Mulch.
During heat waves, a light shade cloth over tender greens can be the difference between keeping them and losing them. It's a simple tool that buys you a lot of flexibility. View our blog post Installing Hoops on Raised Beds.
Fall Planting (August–November)
Fall is where Deep Roots methods really shine. Cooler air temperatures mean fewer pest problems, less evaporation, and conditions that bring out the best in leafy greens and root vegetables. Many growers find fall their most productive and most enjoyable season once they get the timing right.
What to Plant August to November
The fall garden belongs to cold-tolerant leafy greens: lettuce, spinach, arugula, mustard greens, kale, and collards all thrive as temperatures drop. Root vegetables—carrots, beets, radishes, turnips, and rutabaga—love fall's cool soil and often develop sweeter flavor after the first light frosts. On the herb side, parsley and cilantro (which struggled all summer) come back strong in cool weather.
Fall is also the time to plant garlic—not for this season, but for next summer's harvest. Plant garlic cloves in mid-October in Zone 6a so they overwinter in the ground, developing into full heads ready to harvest the following July. It's one of the most satisfying long-game crops in the garden. View our blog post Planting Garlic in Fall.
Timing Is Everything in Fall
The most common mistake in fall gardening is starting too late. You want your fall crops in the ground while the soil is still warm enough to support germination and early growth—not after the first cold snap when the soil has already chilled. A good rule of thumb: count back from your first expected frost date and give yourself at least six to eight weeks of growing time for most crops.
Once your crops are established and frost threatens, white row cover fabric becomes your most valuable tool. Even a single layer of lightweight fabric can protect plants through multiple hard frosts, extending your harvest by weeks. Pair it with wire hoops to keep the fabric off the foliage and it's a system you'll use every fall. View our blog post Installing Hoops on Raised Beds
Hardening Off Your Transplants
Whether you're moving summer seedlings outside in June or transitioning fall starts from a protected space in August, hardening off is a step you can't skip. Seedlings grown indoors or in a greenhouse are not ready for the wind, temperature swings, and intensity of direct sunlight in your garden. Moving them straight outside is a shock that sets them back significantly—and sometimes kills them outright.
Start the hardening off process one to two weeks before you plan to transplant. Begin by bringing seedlings outside for just an hour or two in a sheltered spot, then gradually increase their outdoor time each day. Avoid exposing them to very windy conditions early on—wind desiccates tender leaves quickly. After a week or so of this gradual transition, they'll be ready to move into the garden and hit the ground running. View our blog post Hardening Off Seedlings
Summer & Fall Planting Calendar (Zone 5–6)
The dates below are calibrated for Zone 5–6. Adjust slightly based on your local climate and first frost date. Use this as a living checklist—something you'll refer to throughout the season rather than read once and file away.
JUNE
Direct seed: Beans (bush and pole), cucumbers, squash, another round of basil and dill.
Transplant: Tomatoes, peppers, and eggplant if not already in the ground. Basil and other summer herbs.
JULY
Direct seed: Another round of beans for a second wave of harvest. Start carrots and beets for fall. Sow basil again—it's worth it.
Transplant: Begin fall brassicas from transplants if you grow them. Kale and collards are the easiest to establish. Important note: Swede Midge fly has recently spread throughout the Midwest and attacks only brassicas. We strongly recommend avoiding brassicas with large heads—cabbage, broccoli, and cauliflower are especially vulnerable. If you grow kale and collards, harvest leaves before they get too large to limit exposure. View our blog post Swede Midge Fly Management
AUGUST
Direct seed (fall begins): Lettuce, arugula, and radishes—repeat every 10 to 14 days. Spinach from late August into September. Turnips and beets, with early August often being the sweet spot for best results.
Transplant: Fall lettuce starts, kale, and chard.
SEPTEMBER
Direct seed: Spinach, lettuce, arugula, and radishes. Cilantro and parsley thrive again in cool weather.
Protect: Have row cover ready to deploy on nights that threaten frost. It's easier to put it on before you need it than to react the morning after a frost.
OCTOBER to NOVEMBER
Harvest hardy greens well into frost season—with row cover, many crops will keep producing far longer than you'd expect. Plant garlic in mid-to-late fall for next summer's harvest. Top-dress beds with about two inches of compost to recharge them for the following growing season. View our blog post Putting Your Bed to Bed for the Winter
Quick Companion Planting Ideas
Companion planting is an easy way to get more out of your space while supporting the natural relationships between plants. Cucumbers planted near dill attract the beneficial insects that keep pest populations in check. Lettuce thrives when tucked under taller plants that cast light shade during the hottest part of summer days. And the classic pairing of carrots with onions or leeks is one of the oldest tricks in the garden: their different scents confuse the pests that target each crop. But carrots prefer low nutrient soil, while onions an leeks need some compost with nutrients.View our blog post Companion Planting Guide.
Summer & Fall Pest Management
The best pest management strategy starts well before any pest shows up. Healthy soil grows resilient plants, and resilient plants resist pest pressure on their own. Biodiversity in your beds supports the predatory insects—ground beetles, lacewings, parasitic wasps—that keep pest populations naturally in check. When you combine rich soil, diverse plantings, and regular observation, you rarely need to reach for any kind of intervention.
That said, staying ahead of problems means checking your plants often—at least a few times a week during the height of summer. Catching issues early, when they're still small, makes a huge difference. When a crop is particularly vulnerable (think young brassica seedlings or ripening melons), hoops with netting provide reliable physical protection without chemicals. Careful placement of bug netting over brassicas can help protect against the swede midge fly. When you do need to treat, choose gentle, targeted organic tools that address the specific problem without disrupting the rest of the ecosystem you've worked to build. View our blog post Environmental Pest Management (EPM)
See Identifying Pests and Diseases for more information.
Your Two-Season Game Plan
Summer and fall can feel like a lot to manage, but they really come down to a handful of consistent habits. If you focus on just four things, let them be these:
Feed the soil. A light touch in summer, a more generous recharge in fall. The microbes do the rest.
Mulch for moisture. Lay it early, keep it on all season, and weed pressure drops dramatically.
Plant in waves. Succession sowing keeps your garden productive and your harvests manageable from June through November.
Use white row cover on hoops. It's the simplest tool for extending your fall season—sometimes by a month or more. Or use shade cloth to protect heat sensitive plants.
Do those four things well, and the rest of the season tends to take care of itself.
Happy Growing!
Workshop - Edible Garden Planning
Here is the slideshow from the Deep Roots Project Edible Garden Planning interactive workshop held Sunday, March 8, 2026 at the Oak Park Main Library.
Here is the presentation from our Deep Roots Project Edible Garden Planning workshop held on Sunday, March 8, 2026, at the Oak Park Main Library.
This workshop from Deep Roots was designed to help gardeners prepare for successful growing season.
We are posting here the presentation we gave at our March 8th, 2026 workshop.
Participants had the opportunity to review and develop their garden layouts, explore plant selection strategies, and learn how to use compost and natural fertilizers such as worm castings and fish emulsion to build healthy soil and increase harvests. The workshop also covered best practices for preparing and cleaning up garden spaces in advance of planting.
Additional topics included identifying sunlight patterns to select the right plants for different areas, effective watering techniques, and planning gardens to suit varying conditions and spaces. Expert gardeners will be on hand throughout the event to answer questions and provide individualized guidance.
This workshop is ideal for new, experienced or novice gardeners, experienced growers, and community groups looking to start or strengthen shared garden spaces. Attendees were encouraged to bring garden plans, questions, or ideas they would like to discuss and review.
“Grow Your Own Food” blog posts
See the full list of our Grow Your Own Food blog posts. Each post is assigned ”tags” which are under the post title. If you need a quick answer to a gardening question give us a call or send a text to our customer support team – support[at]deep-roots-project.org AND 708-655-5299.
Deep Roots online store
See our online store for details about prices, ordering and delivery of raised beds, planter boxes, microbe-rich compost, worm castings, leaf mulch and more. We don’t sell traditional soil, since we use 100% compost as our growing medium. Our online store has 2 sections – (1) raised beds and planter boxes and (2) compost, worm castings, fertilizer.
Please contact our customer support team before placing an order online so we can assist you with the details and answer your gardening questions. You can pay by credit card in the store or by check.
(708) 655-5299 and support[at]deep-roots-project.org
Sign up for our newsletter
Please leave your cell phone number when you sign up for our eNewsletter, if you want text message announcements now and then.
Donations help us provide organic kitchen gardening education to individuals, organizations, and entire communities. Thank you in advance for contributing to our community and for sharing our website and blog with friends and family.

Spring Planting Step-by-Step
Welcome to your ultimate Spring gardening guide! In this step-by-step roadmap, you'll discover all the essential tasks needed to kickstart your garden for the season. Along the way, you’ll find links to additional blog posts that invite you to explore each topic in greater depth, ensuring you have all the knowledge and inspiration you need to cultivate your green oasis.
Welcome to your ultimate Spring gardening guide! In this step-by-step roadmap, you'll discover all the essential tasks needed to kickstart your garden for the season. Unleash Your Green Thumb. Along the way, you’ll find links to additional blog posts that invite you to explore each topic in greater depth, ensuring you have all the knowledge and inspiration you need to cultivate your green oasis.Get inspired? Learn to grow Abundant, Stress Free, Delicious and Nutritious Veggies
Here are the Basics
• Start planting in March: In Zone 5 and 6, March is an excellent time to plant cold-hardy vegetables that can tolerate the cool temperatures of early spring. View our 8 Planting Calendars for Zone 6a blog posts – brassicas, cucurbits (squash, melons, cucumbers), fruiting veggies, leafy greens, legumes (peas & beans), root veggies, herbs, berries, alliums (garlic & onions).
• Spread compost in spring and fall: Spread 2-inch layer of our microbe rich compost on your existing beds to replenish microbes and nutrients.
• Plant with worm castings: Use our top quality worm castings fertilizer, also called ”vermicompost” to plant seeds and seedlings.
• Planting seeds and seedlings: View our blog posts on:
Planting for Beginners
Next Level Planting
Seed Starting Indoors
Winter Sowing outdoors.
Maximizing Your Results
• Biodiversity planting: Cultivating a variety of different plant species within a given area, aiming to create a diverse ecosystem that supports a wider range of wildlife, including pollinators, insects, and birds, by providing food and shelter throughout the growing season. View our blog post on Biodiversity
• No need to rotate crops when you practice biodiversity. Rotation is for monoculture planting (same crops all in one field or one bed).
• Succession Planting: Sow fast-growing crops every 2-3 weeks for a continuous harvest. View our blog post on Succession Planting.
• Maximize space: Use trellises for peas, red malabar spinach, cucumbers, indeterminate tomatoes, small melons, and squash varieties like spaghetti or butternut. Companion plant smaller crops between slow-growing ones. View our blog post on Trellises
• Mulch early: Use straw to retain moisture and suppress weeds after seedlings are 3 inches tall. Try not to mix straw with soil since it dilutes the soil & compost nutrients. Don’t use hay or anything that contains weed seeds. View our blog post on Moisture and Mulch.
Managing Pests
• Pest alert Swede Midge: Protect from Swede Midge fly which attacks only Brassica crops like broccoli, collards, cabbage, kale, Brussel sprouts. We got decent harvests from kale and collards last year by protecting our beds with bug netting, and harvesting all big leaves quickly. Wash the leaves well. Swede Midge is a recent invasive pest in the Northeast and Midwest.View blog post on Swede Midge fly.
• Pest alert Club Root disease: Review multiple ways to repel and kill pests in our blog post Environmental Pest Management (EPM).We stopped growing broccoli altogether because protection from Club Root disease is very difficult. Watch this video on club root disease. View our blog post Roundup Pesticide Is a Poison
• Install Hoops and Netting to stop pests. See Installing Hoops on Raised Beds.
Biodiversity planting methods harness the forces of nature to help protect your garden as well as individual plants from pests and disease. View our blog post on how Biodiversity Helps Control Pest.

Cold Tolerant Veggies
All of these can be direct-seeded outdoors as soon as the soil is workable and above freezing. If you want a head start, you can start some of these indoors and transplant them in mid to late March. Remember that Deep Roots no longer plants root veggies in our 100% compost. Learn our low-nutrient soil method in our Growing Root Vegetables blog post. Learn the soil blend we use for alliums in our blog post Growing Onions & Garlic. Find more details in Larger Harvest in Cool Seasons blogpost.
Leafy Greens:
• Lettuce (Romaine, Butterhead, Leaf varieties)
• Spinach (doesn’t transplant well, direct seed in November)
• Swiss Chard
• Arugula
• Endive
Root Vegetables: Growing Root Vegetables blog post
• Carrots
• Beets
• Parsnips
• Radishes
• Turnips (is in Brassica family)
Alliums: Growing Onions & Garlic
• Onions (sets or seeds)
• Shallots
• Garlic (if not already planted in fall)
• Leeks (start indoors or plant young starts)
Legumes:
• Peas (snap peas, shelling peas, snow peas, all need a trellis)
• Fava Beans (needs a trellis)
Herbs:
Cilantro
Basil
Dill
Oregano
Sage
Parsley
Lavender
Parsley
Chives
Growing in Partial Sunlight
If you have less than 8 hours of full sun, you can still grow a variety of spring vegetables, including leafy greens like lettuce, kale, spinach, and chard, as well as root vegetables like carrots, radishes, and beets. Here's a list of vegetables that can tolerate less than 8 hours of full sun:
Leafy Greens:
• Lettuce: Most lettuce varieties thrive in partial shade.
• Kale: Kale can tolerate partial shade and will still produce edible leaves, though they may not be as stocky as those grown in full sun.
• Spinach: Spinach is another excellent choice for partial shade.
• Chard (Swiss Chard): Swiss chard is a great option for partial shade, and its leaves can bolt and become bitter if exposed to too much sun.
• Arugula: Arugula also does well in partial shade.
• Mustard Greens: These greens are also shade-tolerant.
• Collard Greens: Collard greens can also thrive in partial shade.
Root Vegetables:
• Carrots: Carrots can tolerate partial shade, though they may take longer to mature.
• Radishes: Radishes are relatively shade-tolerant.
• Beets: Beets also prefer full sun, but can tolerate partial shade.
• Turnips: Turnips can tolerate partial shade.
• Rutabaga: Rutabaga is another root vegetable that can tolerate partial shade.

Planting Tips for Early Spring Veggies
Since March in Zone 6 can still have frost, it's best to focus on cold-hardy vegetables that tolerate chilly soil. Here are some tips for direct seeding and transplanting:
1. Soil preparation
• For non-root veggies fill new raised beds or in-ground beds with our microbe-rich compost. For existing beds cover with 2 inches of our microbe-rich compost. For root veggies that prefer low nutrient soil view Growing Root Vegetables blog post.
• Make sure the soil is workable (not too wet or frozen). If it crumbles in your hand and isn’t sticky, it’s good to go.
• Use “row cover” light-weight white fabric to warm up the soil faster and provide a slight frost buffer.
2. Direct-seeding cold-hardy vegetables (best for March)
These seeds can go directly in the ground when soil reaches 35–40°F:
• Peas (Trellis them to save space)
• Spinach (best to direct seed in November, can also sow every 2 weeks in spring for continued harvest)
• Carrots (Thin seedlings to avoid crowding)
• Beets (Soak seeds overnight for better germination)
• Radishes (Quick-growing; ready in 25-30 days)
• Parsnips (Long germination time; sow with radishes as a marker)
3. Transplanting young plants
Certain cold-hardy plants do better when started indoors and transplanted out in early spring. A quick alternative is to buy seedlings. “Winter sowing” using clear plastic milk jugs is also an option:
• Lettuce (Start indoors 3-4 weeks before planting out)
• Swiss Chard (Tolerates cold but grows faster from transplants)
• Leeks (Need a long season, so start early indoors) View Growing Onions & Garlic blog post
• Onions (Plant sets or seedlings rather than seeds for an earlier harvest) View Growing Onions & Garlic
Succession Planting for a Continuous Harvest
Instead of planting everything at once, stagger your plantings for a continuous supply of fresh vegetables. Read more in Succession Planting Basics blog post.
1. Quick-growing crops for succession planting
• Radishes – Every 10-14 days (harvests in 25-30 days)
• Spinach – Every 2 weeks (harvest young leaves continuously)
• Lettuce – Every 2-3 weeks (mix different varieties for variety)
• Cilantro & Parsley – Every 3 weeks (bolt-resistant varieties last longer)
2. Slow-growing crops that can be inter-cropped: Intercropping is when two or more crops grow simultaneously in the same bed
• Carrots & Radishes – Plant together; radishes sprout first and loosen the soil for carrots.
• Beets & Lettuce – Beets take longer; lettuce matures quickly between rows.
• Peas & Spinach – Spinach can grow underneath peas before they take off.
3. Succession planting strategy – Once an early crop is harvested, immediately replant with something that can take its place:
• March: Radishes → Follow with carrots or bush beans (after frost risk)
• March: Peas → Follow with cucumbers or summer squash
• March-April: Spinach → Follow with basil or peppers in late spring
• March-April: Lettuce: Follow with warm-season greens (Malabar spinach
Early Spring Planting (March-May)
This early spring calendar for Zone 6 outlines when to direct sow (DS), transplant (TP), or start seeds indoors (IN) for your early spring vegetables. Check our Planting Calendars for Zone 6a for when to transplant purchased seedlings. Start Indoors (IN) for “Succession Crops” lettuce, radishes, cilantro, spinach for future plantings.
March Planting
March soil is workable, but it’s still cold, and there is some frost risk.
Direct seed (DS) outdoors:
• Peas (Sugar snap, shelling, snow) – Use trellises for vertical growth.
• Spinach – Best germination at 35–45°F soil temp.
• Carrots – Cover with burlap to maintain moisture.
• Beets – Soak seeds overnight for faster sprouting.
• Radishes – Successive plantings every 10-14 days.
• Parsnips – Takes 14-21 days to germinate, plant in loose soil.
Transplant (TP) outdoors.
Gradually expose young plants grown indoors to outdoor conditions like sunlight, wind, and temperature fluctuations. This is called “hardening off.”
• Lettuce – Choose cold-hardy varieties like 'Winter Density.'
• Swiss Chard – Can tolerate frost but grows faster if started indoors.
• Leeks – Space 6 inches apart for full-size bulbs.
Start indoors (IN) for later transplanting:
• Celery – Needs 10-12 weeks indoors before transplant.
• Parsley & Cilantro – Succession plant every 3 weeks.
April Planting
It’s still cool but warming with moderate frost risk.
Direct seed (DS) outdoors:
• More lettuce, spinach, radishes, carrots, beets – Continue succession planting.
• Green onions (scallions) – Can be grown densely.
• Fava Beans – Tolerate cool weather well.
Transplant (TP) outdoors:
• Swiss Chard – If not already planted in March.
• Leeks, onions, and celery – After hardening off.
Start indoors (IN) for warm season crops:
• Malabar Spinach (heat-loving alternative to spinach)
• Basil, Dill, and other tender herbs – Start for later transplant.
May Planting
Frost risk decreasing, more growth
Direct seed (DS) outdoors:
• Bush Beans – Only if soil reaches 55°F+ consistently.
• New rounds of radishes, lettuce, spinach, carrots, beets.
Transplant (TP) outdoors:
• Basil, Red Malabar Spinach, Summer Herbs – Once nighttime temps stay above 50°F.
• Celery & Parsley – Need regular watering.
Companion Planting Guide
Companion planting boosts plant health, repels pests, and enhances yields. Sow fast-growing crops every 2-3 weeks for a continuous harvest. Maximize space – use trellises for peas, companion plant smaller crops between slow-growing ones. Here’s how to pair your early spring crops:
Good companion pairings
• Carrots + Onions/Leeks – Onions repel carrot rust flies.
• Peas + Spinach – Peas provide shade for spinach in warming months.
• Beets + Lettuce – Lettuce fills gaps between slow-growing beets.
• Radishes + Carrots – Radishes loosen soil for slow-sprouting carrots.
• Lettuce + Cilantro – Cilantro helps deter aphids.
• Parsley + Carrots – Encourages beneficial insects like hoverflies.
• Peas + Mint – Mint deters aphids (but plant mint in containers!).
Avoid these pairings
• Carrots + Dill – Dill can stunt carrot growth.
• Peas + Onions – Onions inhibit pea growth.
• Beets + Pole Beans – Compete for nutrients.
• Fennel + Any Veggies – Fennel secretes chemicals that stop growth.
Join the Deep Roots movement
We’re not just about gardening; we’re about changing the way people grow food. Whether you have a tiny balcony or a full backyard, we’ll help you grow like a pro.
Stay in the loop: Signup for our email newsletter. If you also provide your phone number you will get text message updates that link to our best blog posts.
Get involved: Attend a free workshop, become a volunteer, order a raised bed, order our compost or simply follow along for expert tips. Contact our support team any time you have a question at 708-655-5299 and support@deep-roots-project.org.
Learn. Share. Grow. Volunteer: We invite you to be a part of our sustainable movement right here in our own backyards! We want all our volunteers to have fun and learn while they contribute to expanding the Deep Roots community. We can customize a volunteer assignment to your time, interests and skills. Learn more on our Volunteer page
Let’s make this your most delicious year yet!
Dive Deeper
Click on the Blog Posts Below for more about our Innovative methods.
Beautify your yard with elegant cedar raised beds!
Our Deep Roots handcrafted cedar raised beds are designed to endure outdoors while adding a touch of style to your yard. As a bonus, they are the perfect depth to hold just the right amount of our nutrient-rich compost growing medium, which comes free with each bed.
Deep Roots Supports Gardeners
We provide our gardeners with the best products for success – like cedar raised beds, microbe-rich compost and microbe-rich worm castings. Check our online store. Always talk to our customer support team before placing your order online. If you need help or have a question contact us at support[at]deep-roots-project.org and 708-655-5299.
Deep Roots Online Store
See our online store for details about prices, ordering and delivery of raised beds, planter boxes, microbe-rich compost, worm castings, leaf mulch and more. We don’t sell traditional soil, since we use 100% compost as our growing medium. Our online store has 2 sections – (1) raised beds and planter boxes and (2) compost, worm castings, fertilizer.
Please contact our customer support team before placing an order online so we can assist you with the details and answer your gardening questions. You can pay by credit card in the store or by check.
Please leave your cell phone number when you sign up for our eNewsletter, if you want text message announcements now and then.
Donations help us provide organic kitchen gardening education to individuals, organizations, and entire communities. Thank you in advance for contributing to our community and for sharing our website and blog with friends and family.

Spring Is Peeking Around the Corner
And that means one thing – it’s time to DIG IN! Whether you’re a gardening guru or a total newbie, Deep Roots Project is here to make this year your most abundant, stress-free, and delicious growing season yet.
"Winter dreams manifest spring greens. Use this moment to immerse yourself in seed catalogs and choose some new varieties that we never see on supermarket shelves.”
– Rafa Crevoshay, Horticulturist, Deep Roots Project
Get Ready to Grow Your Own Food!
Spring means – it’s time to DIG IN! Whether you’re a gardening guru or a total newbie, Deep Roots Project is here to make this year your most abundant, stress-free, and delicious growing season yet.
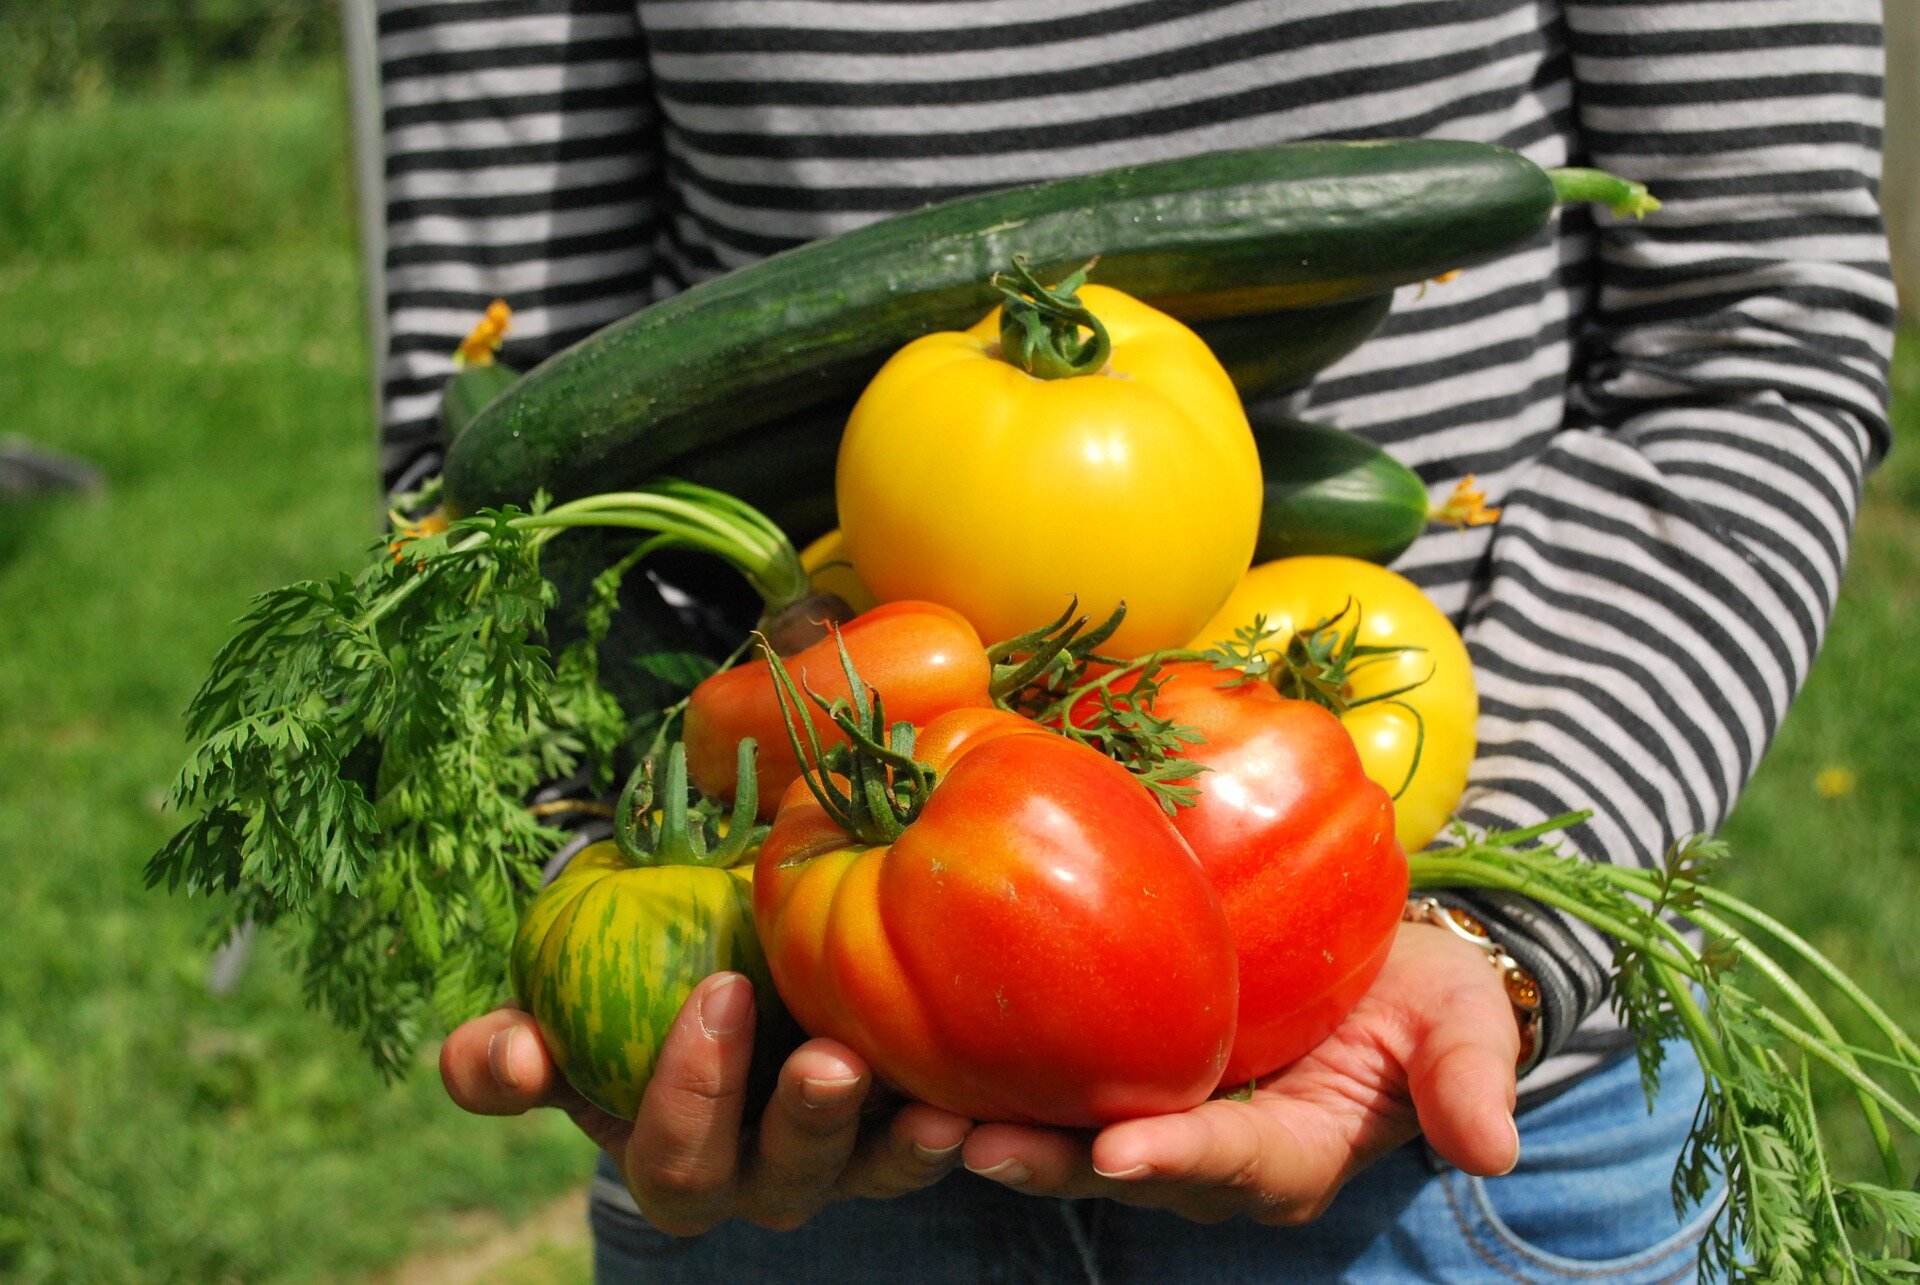
Nothing beats the satisfaction of plucking a sun-ripened tomato straight from your backyard and taking that first juicy bite. But, of course, your tomatoes taste great too, after ripening in your kitchen.
Why grow your own healthy food?
Because grocery store tomatoes taste like cardboard, let’s be honest! Store-bought produce just doesn’t cut it. When you grow your own vegetables, you get:
• Explosively flavorful, nutrient-packed food that tastes the way nature intended. View our blog post on the growing health revolution.
• A fatter wallet—save hundreds of dollars on overpriced organic groceries.
• Peace of mind knowing exactly what’s in your food (hint: NO harmful pesticides or chemicals!).
• A natural mood booster—fresh air, sunshine, and playing in the dirt = instant stress relief. View our blog post Benefits of Food Gardening.
• Street “cred” with your neighbors—who doesn’t admire a thriving food garden? Learn how to grow an edible landscape.
Secret ingredient to your best garden ever
So, what makes Deep Roots Project different from every other gardening guide? We don’t mess around with traditional soil blends. Nope. We go straight to the gold—100% microbe- and nutrient-rich compost that transforms any garden into a thriving paradise. Think of it like a probiotic superfood for your plants, packed with living microbes that supercharge soil health and fuel unstoppable growth. It’s like rocket fuel for your lettuce, without the actual rocket.
What’s the #1 reason most gardeners struggle?
So many gardeners give up before they even get to their first harvest. Why? Because they don’t have the right guidance or the right foundation. That’s where we come in! Deep Roots Project is your shortcut to success. We take the guesswork out of growing by giving you:
• Step-by-step guidance—so you know exactly what to do (and when to do it!) Check out our Grow Your Own Food blog posts.
• Raised bed gardening support—get top-notch custom-built cedar raised beds and compost delivered to your yard, instantly ready to start planting. View our raised beds online store page.
• Worm castings fertilizer - also called “vermicompost” - is 100% worm poop. But the nutrient density depends on what the worms eat. Our Wisconsin farmer makes the absolute best nutrient and microbe dense worm castings. View our worm castings online store page.
• Workshops & events—hands-on learning and a vibrant community of fellow growers.
• Personalized advice—because every garden (and gardener) is unique.
What to do right now to have your best garden yet
If you want to be harvesting lot of crisp greens, juicy peppers, tomatoes and homegrown herbs ASAP, start NOW in the spring! Learn more from our blog posts “Larger Harvests in the Cool Seasons.”
Here’s what you can do today:
• Plan your dream garden—think about what you want to grow and how much space you have.
• Start with the best soil (ahem, we mean 100% compost!) - good soil = thriving plants. Period.
• Pick your plants wisely—choose high-yield crops suited to your climate.
• Get ready to plant—early crops can go in sooner than you think!
Join the Deep Roots movement
We’re not just about gardening; we’re about changing the way people grow food. Whether you have a tiny balcony or a full backyard, we’ll help you grow like a pro.
Stay in the loop: Signup for our email newsletter. If you also provide your phone number you will get text message updates that link to our best blog posts.
Get involved: Attend a free workshop, become a volunteer, grab a raised bed, or simply follow along for expert tips. Contact our support team any time you have a question at 708-655-5299 and support@deep-roots-project.org.
Learn. Share. Grow. Volunteer: We invite you to be a part of our sustainable movement right here in our own backyards! We want all our volunteers to have fun and learn while they contribute to expanding the Deep Roots community. We can customize a volunteer assignment to your time, interests and skills. Learn more on our Volunteer page
Let’s make this your most delicious year yet!
Dive Deeper
Click on the Blog Posts Below for more about our Innovative methods.
Beautify your yard with elegant cedar raised beds!
Our Deep Roots handcrafted cedar raised beds are designed to endure outdoors while adding a touch of style to your yard. As a bonus, they are the perfect depth to hold just the right amount of our nutrient-rich compost growing medium, which comes free with each bed.
Deep Roots Supports Gardeners
We provide our gardeners with the best products for success – like cedar raised beds, microbe-rich compost and microbe-rich worm castings. Check our online store. Always talk to our customer support team before placing your order online. If you need help or have a question contact us at support[at]deep-roots-project.org and 708-655-5299.
Deep Roots Online Store
See our online store for details about prices, ordering and delivery of raised beds, planter boxes, microbe-rich compost, worm castings, leaf mulch and more. We don’t sell traditional soil, since we use 100% compost as our growing medium. Our online store has 2 sections – (1) raised beds and planter boxes and (2) compost, worm castings, fertilizer.
Please contact our customer support team before placing an order online so we can assist you with the details and answer your gardening questions. You can pay by credit card in the store or by check.
Please leave your cell phone number when you sign up for our eNewsletter, if you want text message announcements now and then.
Donations help us provide organic kitchen gardening education to individuals, organizations, and entire communities. Thank you in advance for contributing to our community and for sharing our website and blog with friends and family.

Larger Harvests in the Cool Seasons
Maximizing your harvests in both spring and fall, especially in northern climates with short growing seasons, requires smart planning and efficient use of space.
Maximizing your harvests in both spring and fall, especially in northern climates with short growing seasons, requires smart planning and efficient use of space. By focusing on cool-season crops and utilizing techniques like succession planting, frost protection, and soil enrichment, you can enjoy larger, more plentiful harvests in both seasons. In this blog post, we’ll share tips on how to boost your spring and fall yields, helping you make the most of your limited garden space. View blog post Spring is Peeking Around the Corner.
Bigger Harvests in Spring
Growing a bountiful spring harvest in a limited space, particularly in a northern climate zone with cold winters, can be challenging. However, with proper planning and management, it's still possible to get maximum harvest from such spaces. In this article, we'll discuss how to achieve this goal, including when to plant, what to plant, how to plant, when to harvest, and how to protect your plants from frost during climate change temperature surprises.
Getting maximum harvest from limited space in a northern climate zone with cold winters requires careful planning and management. Starting seeds indoors, choosing the right crops, maximizing available space, timing your harvests, and protecting your plants from frost are all essential steps to ensure a bountiful spring harvest. With these tips, you can enjoy fresh, homegrown produce even in challenging growing conditions.
When to plant: In northern climate zones, the ground is often frozen until late April or early May. Thus, it's essential to start your seeds indoors under grow lights in late winter or early spring to ensure that your plants will be ready to be transplanted outdoors when the ground thaws. There are also ways to start seeds outdoors like “cold frames” and special “winter sowing” milk jugs. See the chapter on “winter sowing” for more details on method and timing. Depending on the specific plant, you can start seeds indoors anywhere from 4-12 weeks before the last expected frost date in your area.
What to plant: For spring harvests in limited spaces, you should choose plants that grow quickly, produce a lot of food, and are cold-tolerant. Some examples of suitable crops include leafy greens like spinach, lettuce, and kale; root vegetables like carrots, beets, and radishes; and cool-season herbs like parsley, chives, and cilantro. Since spinach is especially cold hardy seeds can be direct sowed in the bed in November in cold climates. It will germinate in the spring
How to plant: In limited spaces, it's essential to maximize the use of available space. You can do this by planting in containers or raised beds, using vertical space, or interplanting. Planting in containers and raised beds allows for more control over soil quality and drainage, while vertical space can be utilized by growing crops on trellises, fences, or walls. Interplanting involves planting multiple crops in the same space, allowing for more efficient use of the area.
When to harvest: The timing of your harvest will depend on the specific crop you're growing, but generally, it's best to harvest leafy greens when they reach full size, But pick them before they “bolt” (when the plant begins to flower) since the taste often comes bitter. Root vegetables can be harvested when they reach maturity, usually between 2-3 months after planting, while herbs can be harvested continually throughout the season.
Protecting from frost: In northern climate zones, unexpected frosts can damage or kill crops that are not cold-tolerant. To protect your plants from frost, you can cover them with blankets or tarps, use “row cover” fabric, or bring potted plants indoors during cold snaps. You can also choose cold-hardy varieties of plants that are less susceptible to frost damage. See our blog post Installing Hoops on Raised Beds.
Bigger Harvests in Fall
While focusing on spring harvests is key, maximizing your fall harvests can directly impact your spring production. Preparing your garden for a successful fall harvest allows your soil to rest, regenerate, and replenish nutrients needed for the next growing season. Here are some tips for making the most of your fall garden to ensure larger, healthier harvests come spring:
Extend the Growing Season: In northern climates, the frost-free growing season can often feel too short. However, there are several ways to extend this period. Consider using row covers, cloches, or even cold frames to protect your fall crops from the first frost. These simple structures trap warmth and create a micro-climate that allows for continued growth even as temperatures drop. Adding a layer of mulch around plants also helps retain warmth and moisture, further protecting them from the chill.
Focus on Late-Season Crops: Choosing crops that thrive in cooler temperatures will help you make the most of your fall harvests. Plant hardy vegetables such as cabbage, Brussels sprouts, kale, and leeks, all of which improve in flavor after a frost. Root vegetables like carrots and parsnips can be left in the ground through the fall, allowing them to mature even as the weather cools. Certain herbs, like thyme and sage, are also very frost-tolerant and can continue growing into late fall, offering fresh seasoning for your winter dishes.
Harvest at the Right Time: To optimize your fall harvest, timing is crucial. For crops like root vegetables, waiting until after the first frost often results in sweeter flavors. For leafy greens, harvest before the weather turns too cold, as they can become bitter after frost. Early harvesting also prevents overcrowding, allowing your crops to continue growing into the cooler months. When you harvest, leave some of the root systems intact—many root crops can regrow in the fall for a second harvest, offering more food in the months ahead.
Compost and Feed the Soil: Fall is an ideal time to replenish the soil after a long growing season. Adding organic matter such as compost or well-aged manure ensures that your soil is rich with the nutrients needed for an abundant spring harvest. Mix this compost into your raised beds or garden beds so that it can break down over the winter, creating nutrient-rich soil for the upcoming planting season. Worm castings, a rich source of nutrients, are also great for improving soil quality and promoting healthy root growth for next spring.
Plan for Succession Planting: To make the most of your space, use the fall season for succession planting. As early crops are harvested, new crops can be planted in their place. Fast-growing vegetables like radishes, turnips, and quick-maturing greens such as arugula or mustard greens can still be grown in the late summer or early fall and harvested before the first frost. This technique allows you to grow multiple crops in the same area, increasing your overall yield.
Prepare for Spring: Preparing for spring begins in the fall. Use the cooler months to clean, tidy, and reset your garden, which will make planting easier come spring. You can also plan for new crops that will be ready for early spring, such as peas and onions, by setting up your raised beds, containers, or seed-starting area. Planting cover crops like clover or vetch during the fall helps prevent soil erosion, fix nitrogen, and add organic material, creating a healthy, thriving environment for your spring crops.
By increasing your fall harvests, you ensure a more abundant and healthier spring harvest. Maximizing your garden’s potential during the colder months will set you up for a season of bountiful produce, helping you grow fresh, flavorful food even when space is limited.
Spring Planting Step-by-Step
The basics with links to more posts:
• Start planting in March: In Zone 5 and 6, March is an excellent time to plant cold-hardy vegetables that can tolerate the cool temperatures of early spring. View our blog post on Climate Zones.
• Spread compost in spring and fall: Spread 2-inch layer of our microbe rich compost on your existing beds to replenish microbes and nutrients. Read our blog post on Compost, Microbes and Soil Science.
• Plant with worm castings: Use our top quality worm castings fertilizer, also called ”vermicompost” to plant seeds and seedlings. Explore more with our article Worm Casting Fertilizer and Microorganisms.
• Planting seeds and seedlings: View our blog posts on Planting for Beginners, Next Level Planting, Seed Starting Indoors, Winter Sowing outdoors.
• Biodiversity planting: Cultivating a variety of different plant species within a given area, aiming to create a diverse ecosystem that supports a wider range of wildlife, including pollinators, insects, and birds, by providing food and shelter throughout the growing season. View our blog post on Biodiversity
• Planting seedlings and seeds: View our blog posts on planting using
No need to rotate crops when you practice biodiversity. Rotation is for mono culture planting (same crops in one field or one bed).
Succession Planting: Sow fast-growing crops every 2-3 weeks for a continuous harvest. View our blog post on Succession Planting.
Maximize space: Use trellises for peas, companion plant smaller crops between slow-growing ones. View our blog post on Trellises.
Mulch early: Use straw or compost to retain moisture and suppress weeds after seedlings are 3 inches tall. If you use both, put the straw on top.Try not to mix straw with soil/compost since it dilutes the compost nutrients. Don’t use hay or anything that contains weed seeds. View our blog post on Moisture and Mulch.
Pest alert Swede Midge: Protect from Swede Midge fly which attacks only Brassica crops like broccoli, collards, cabbage, kale, Brussel sprouts. We got decent harvests from kale and collards last year by protecting our beds with bug netting, and harvesting all big leaves quickly. Wash the leaves well. Swede Midge is a recent invasive pest in the Northeast and Midwest.View blog post on Swede Midge fly.
Pest alert Club Root disease: We stopped growing broccoli altogether because protection from Club Root disease needs a large garden and takes to much time and planning. Watch this video on club root disease.
Cold tolerant veggies:
All of these can be direct-seeded outdoors as soon as the soil is workable and above freezing. If you want a head start, you can start some of these indoors and transplant them in mid to late March.
Leafy Greens:
• Lettuce (Romaine, Butterhead, Leaf varieties)
• Spinach (doesn’t transplant well, direct seed in November)
• Swiss Chard
• Arugula
• Endive
• Radicchio
Root Vegetables:
• Carrots
• Beets
• Parsnips
• Radishes
• Turnips (not Brassica but closely related)
• Salsify
Alliums (Onion Family):
• Onions (sets or seeds)
• Shallots
• Garlic (if not already planted in fall)
• Leeks (start indoors or plant young starts)
Legumes:
• Peas (snap peas, shelling peas, snow peas)
• Fava Beans
Herbs:
• Cilantro
• Parsley
• Chervil
Planting tips for early spring veggies
Since March in Zone 6 can still have frost, it's best to focus on cold-hardy vegetables that tolerate chilly soil. Here are some tips for direct seeding and transplanting:
1. Soil preparation
Fill new raised beds or in-ground beds with our microbe-rich compost
Cover the existing beds with 2 inches of our microbe-rich compost.
Make sure the soil is workable (not too wet or frozen). If it crumbles in your hand and isn’t sticky, it’s good to go.
Use “row cover” light-weight white fabric to warm up the soil faster and provide a slight frost buffer.
2. Direct-seeding cold-hardy vegetables (best for March)
These seeds can go directly in the ground when soil reaches 35–40°F:
Peas (Trellis them to save space)
Spinach (best to direct seed in November, can also sow every 2 weeks in spring for continued harvest)
Carrots (Thin seedlings to avoid crowding)
Beets (Soak seeds overnight for better germination)
Radishes (Quick-growing; ready in 25-30 days)
Parsnips (Long germination time; sow with radishes as a marker)
Salsify (A lesser-known root vegetable; plant deep)
3. Transplanting young plants
Certain cold-hardy plants do better when started indoors and transplanted out in early spring. A quick alternative is to buy seedlings. “Winter sowing” using clear plastic milk jugs is also an option:
Lettuce (Start indoors 3-4 weeks before planting out)
Swiss Chard (Tolerates cold but grows faster from transplants)
Leeks (Need a long season, so start early indoors)
Onions (Plant sets or seedlings rather than seeds for an earlier harvest)
Succession planting for a continuous harvest
Instead of planting everything at once, stagger your plantings for a continuous supply of fresh vegetables.
1. Quick-growing crops for succession planting
Radishes – Every 10-14 days (harvests in 25-30 days)
Spinach – Every 2 weeks (harvest young leaves continuously)
Lettuce – Every 2-3 weeks (mix different varieties for variety)
Cilantro & Parsley – Every 3 weeks (bolt-resistant varieties last longer)
2. Slow-growing crops that can be inter-cropped
Carrots & Radishes – Plant together; radishes sprout first and loosen the soil for carrots.
Beets & Lettuce – Beets take longer; lettuce matures quickly between rows.
Peas & Spinach – Spinach can grow underneath peas before they take off.
3. Relay planting strategy
Once an early crop is harvested, immediately replant with something that can take its place:
March: Radishes → Follow with carrots or bush beans (after frost risk)
March: Peas → Follow with cucumbers or summer squash
March-April: Spinach → Follow with basil or peppers in late spring
March-April: Lettuce: Follow with warm-season greens (Malabar spinach
Early spring planting calendar (March-May)
This early spring calendar for Zone 6 outlines when to direct sow (DS), transplant (TP), or start seeds indoors (IN) for your early spring vegetables. Check the calendar for when to transplant purchased seedlings. Start Indoors (IN) for “Succession Crops” – more lettuce, radishes, cilantro, spinach for future plantings.
March planting
March soil is workable, but it’s still cold, and there is some frost risk.
Direct seed (DS) outdoors:
Peas (Sugar snap, shelling, snow) – Use trellises for vertical growth.
Spinach – Best germination at 35–45°F soil temp.
Carrots – Cover with burlap to maintain moisture.
Beets – Soak seeds overnight for faster sprouting.
Radishes – Successive plantings every 10-14 days.
Parsnips – Takes 14–21 days to germinate, plant in loose soil.
Salsify – Long season crop, plant deep.
Transplant (TP) outdoors.
“Harden off” first. Gradually expose young plants grown indoors to outdoor conditions like sunlight, wind, and temperature fluctuations.
Lettuce – Choose cold-hardy varieties like 'Winter Density.'
Swiss Chard – Can tolerate frost but grows faster if started indoors.
Leeks – Space 6 inches apart for full-size bulbs.
Start indoors (IN) for later transplanting:
Celery – Needs 10-12 weeks indoors before transplant.
Parsley & Cilantro – Start now and succession plant every 3 weeks.
April planting
It’s still cool but warming with moderate frost risk.
Direct seed (DS) outdoors:
More lettuce, spinach, radishes, carrots, beets – Continue succession planting.
Green onions (scallions) – Can be grown densely.
Fava Beans – Tolerate cool weather well.
Transplant (TP) outdoors:
Swiss Chard – If not already planted in March.
Leeks, onions, and celery – After hardening off.
Start indoors (IN) for warm season crops:
Malabar Spinach (heat-loving alternative to spinach)
Basil, Dill, and other tender herbs – Start for later transplant.
May planting
Frost risk decreasing, more growth
Direct seed (DS) outdoors:
Bush Beans – Only if soil reaches 55°F+ consistently.
New rounds of radishes, lettuce, spinach, carrots, beets.
Sweet Corn – Wait until soil is 60°F+ for best germination.
Transplant (TP) outdoors:
Basil, Malabar Spinach, Summer Herbs – Once nighttime temps stay above 50°F.
Celery & Parsley – Need regular watering.
Companion planting guide
Companion planting boosts plant health, repels pests, and enhances yields. Sow fast-growing crops every 2-3 weeks for a continuous harvest. Maximize space – use trellises for peas, companion plant smaller crops between slow-growing ones. Here’s how to pair your early spring crops:
Good companion pairings
• Carrots + Onions/Leeks – Onions repel carrot rust flies.
• Peas + Spinach – Peas provide shade for spinach in warming months.
• Beets + Lettuce – Lettuce fills gaps between slow-growing beets.
• Radishes + Carrots – Radishes loosen soil for slow-sprouting carrots.
• Lettuce + Cilantro – Cilantro helps deter aphids.
• Parsley + Carrots – Encourages beneficial insects like hoverflies.
• Peas + Mint – Mint deters aphids (but plant mint in containers!).
Avoid these pairings
• Carrots + Dill – Dill can stunt carrot growth.
• Peas + Onions – Onions inhibit pea growth.
• Beets + Pole Beans – Compete for nutrients.
• Fennel + Any Veggies – Fennel secretes chemicals that stop growth.
Happy Gardening!
By following the Deep Roots Project’s transformational gardening methods through the seasons, you will create a thriving, nutrient-rich garden that supports both your plants and the soil. See the full list of our Grow Your Own Food blog posts. Each post is assigned ”tags” which are under the post title.
Deep Roots Supports Gardeners
We provide our gardeners with the best products for success – like cedar raised beds, microbe-rich compost and microbe-rich worm castings. Check our online store. Always talk to our customer support team before placing your order online. If you need help or have a question contact us at support[at]deep-roots-project.org and 708-655-5299.
Deep Roots Online Store
See our online store for details about prices, ordering and delivery of raised beds, planter boxes, microbe-rich compost, worm castings, leaf mulch and more. We don’t sell traditional soil, since we use 100% compost as our growing medium. Our online store has 2 sections – (1) raised beds and planter boxes and (2) compost, worm castings, fertilizer.
Please contact our customer support team before placing an order online so we can assist you with the details and answer your gardening questions. You can pay by credit card in the store or by check.
Please leave your cell phone number when you sign up for our eNewsletter, if you want text message announcements now and then.
Donations help us provide organic kitchen gardening education to individuals, organizations, and entire communities. Thank you in advance for contributing to our community and for sharing our website and blog with friends and family.

Cover Crops in Raised Beds
Cover crops are an effective way to improve soil health, suppress weeds, and provide other benefits to a raised bed food garden.
Cover crops are an effective way to improve soil health, suppress weeds, and provide other benefits to a raised bed food garden. By choosing the right cover crop for your growing conditions, planting at the right time, and following good maintenance practices, you can enjoy a healthier and more productive garden. Whether you are an experienced gardener or just starting out, incorporating cover crops into your raised bed garden is a great way to maximize the benefits of this popular gardening method.

Our favorite is mustard
What are cover crops?
Cover crops, also known as green manure, are plants that are grown to cover and protect the soil. They are usually planted between crops, one bed per year or during the off-season. Although traditional organic gardeners till the cuttings into the soil, we never use tilling in transformational gardening. Cover crops can include legumes, grasses, or a mixture of both.
Why use cover crops in raised beds?
• Improved soil health: Cover crops can help to improve soil structure, nutrient cycling, and organic matter content. They can also help to reduce soil erosion, improve soil aeration and improve water infiltration.
• Weed suppression: Cover crops can help to suppress weeds by shading the soil and competing with weeds for nutrients and water.
• Pest and disease management: Some cover crops can attract beneficial insects, such as pollinators and predators of garden pests. They can also help to reduce the incidence of soil-borne diseases.
• Nutrient management: Cover crops can help to scavenge nutrients from the soil that might otherwise be lost, and then return those nutrients to the soil when their cuttings become mulch.
How to use cover crops in raised beds
Choose the right cover crop: Select a cover crop that will thrive in the growing conditions of your raised bed garden. For example, if you have a sunny bed with well-draining soil, you might choose a cover crop like clover or buckwheat. If you have a shadier bed with heavier soil, you might choose a cover crop like oats or rye.
Timing: Determine the best time to plant the cover crop based on the growing season and crop rotation. In general, it is best to plant cover crops in the fall, after the summer crops have been harvested, or in the early spring before the summer crops are planted.
Planting: Broadcast the cover crop seed evenly over the soil surface, and then gently rake the soil to cover the seed. Be sure to follow the recommended seeding rate for the particular cover crop you are planting.
Maintenance: Water the cover crop as needed to ensure good germination and growth. If the cover crop becomes too tall, cut it down to prevent it from going to seed and becoming a weed.
Don’t till in the dead cover crop cuttings. Follow the ”no till, no dig, no pull” rule. Instead cut it down at soil level and use as a mulch on top of the soil. If the cuttings are more that 6” long cut them up.
Making mulch: Mix other clipping and straw into the cover crop cuttings.
Succession planting: After the cover crop has been tilled into the soil, you can plant your summer crops. If you are using a cover crop in the fall, you may need to plant a winter cover crop to protect the soil during the winter months.

Succession Planting Basics
Succession planting is a popular farming and gardening method which gets maximum harvest from limited space by immediately filling empty spaces with new seedlings or seeds. Succession planting Increases your harvest and is part of our biodiversity planting method.
Succession planting is a popular farming and gardening method which gets maximum harvest from limited space by immediately filling empty spaces with new seedlings or seeds. Succession planting Increases your harvest and is part of our biodiversity planting method.

Biodiversity and succession planting
First learn how to use the biodiversity planting method – not placing the same veggie types next to each other. Then add succession planting to your garden plan to increase your harvest by filling empty spaces as you harvest individual new plants throughout the season.
You need a planting calendar for your climate zone which will tell you when to plant and harvest. We provide a Planting Calendar Guide for the great Chicago area (Climate Zones 5b and 6a) since most Deep Roots gardeners are in the Chicago area. Ask your local state university agricultural extension for a planting calendar.
Fill empty spaces with a fresh seedling or plant seeds if there is enough space and enough sun.
Don’t fill an empty space with the same crop that was previously in that spot. This is important for some crops more than others.
Some crops can be planted more than once because they tolerate a range of temperatures and they need a shorter number of days to maturity. (See below a list of crops with short days to maturity.)
Replace crops that slow down production in mid-season by planting fresh young seedlings or new seeds.
Most root crops can only grow from seeds like beets, carrots, radishes. Other crops are healthier if grown from seeds like peas and beans. Carrots are harder to grow since their seeds are very tiny.
You can grow your own new seedlings from seeds in small pots outdoors or directly in your raised bed.
If you prefer growing from purchased seedlings check with your garden center when they will re-stock seedlings. Buy them young and healthy immediately after delivered to the store.
Buy seedlings before you have empty spots to make sure you have them when you need them.
Immediately re-pot purchased seedlings into 5” to 8” diameter pots filled with a mixture of our compost and worm castings so their roots can expand while you wait for empty spots. Keep the soil constantly moist.
Try NOT to buy seedlings that are unhealthy – “root bound” (tangled roots around the root ball), yellowing leaves and tiny fruit.

Benefits of fast maturing crops
The veggies with the “shortest days to maturity” have the least problems with pests and diseases. If you like planting veggies from seed outdoors or are a beginner and want to grow from seed for the first time, we encourage you to try our favorite veggie varieties that come to maturity quickly and can be harvested sooner. (See our list below)
Fast maturing crops have advantages for beginner gardeners. You don't have to wait long for results. If you wait the normal days to maturity for these crops your garden is more vulnerable to pests and diseases. It also frees up space to replant more diverse crops. We have a chance to start more new plants which we call “accelerating” the garden.
Below are examples of 9 fast growing veggies to grow from seed that you can order from seed catalogs online. High Mowing sells all organic seeds and Baker Creek includes unusual mostly organic selections. Order early since seed stock sometimes sell out. If you can’t find the varieties in our list, pick other ones with similar days to maturity. We normally don’t recommend garden supply companies, but in this case there are far too many seed companies, and we want you to start out with the highest quality.
Veggies with short days to maturity
Find seeds that have similar days to maturity as the ones listed below. Learn more about planting seeds in our 2 blog posts.
Beet: (40 days to maturity)
Fast maturing, scaled-down, but fully formed and full-flavored beet. Regular seed, not pelletedBroccolini: (33 days to maturity)
Fast maturing spring harvest mini-broccoli called “broccolini”Carrot: (34 days to maturity)
Baby carrot at early harvest can be left in the soil for another month for full-size harvest.Swiss Chard: (55 days to maturity)
Rainbow chard selection, develops all-season, just keep picking.Green Onion: (50 days to maturity)
A short season scallion.Lettuce: (54 days to maturity)
Butterhead lettuce type.Pea: (51 days to maturity)
A fast maturing sweet spring pea.Radish: (21 days to maturity)
Fastest of all crops.Spinach: (30 days to maturity)
Reliable early crop, full-leaved spinach.
Plant in FALL for spring germination
Plant garlic cloves and spinach seeds in fall for early spring germination. Plant garlic cloves in mid-October for a July harvest. Although the easiest time to plant spinach seeds is mid-November, you can also plant them in March when the ground thaws. Get larger spinach plants and bigger harvests when planting seeds in fall. The spinach seedlings don’t mind a little snow in March. Harvest spinach before warm weather starts which will cause it to go to seed (called ”bolting”) which makes the leaves bitter. Spinach is fully harvested on May 21 or earlier.
April planting and harvesting tips
If you plant spinach seeds in fall you will have lots of spinach seedlings by April. Gradually harvest the spinach by picking big leaves first. With the first sign of ”bolting” cut down all the spinach plants carefully on a dry sunny day. Do NOT pull up by the roots. Cut the stem at the soil level. Shake off any soil. Replant the area with your next crops – NOT more spinach.
Sensitivity to cold varies between spring crops. Crops that CAN NOT take a “hard freeze” (below 32 degrees for many hours) are lettuce, broccolini, radishes, carrots, Swiss chard, kale, leeks, green onions and more. If you plant around April 25 be prepared for a possible hard-freeze below 32 degrees by having “floating row cover” on hand. It’s a light-weight white fabric that boosts the temperature and lets in sun and water. Buy it online.
Plant new lettuce seeds every 2 weeks so your new crop is ready when the old crop has been harvested. Plant beets on April 21 all at once and begin harvesting in 60 days. Plant peas all at once on April 15 to harvest in early June. Check the planting calendar about planting from seeds or seedlings.
May planting and harvesting tips
Frost free dates in Zones 5b and 6a is May 10-15. We used to have a fixed date. But the destabilizing effect of climate change has changed all that. Add to the bed between May 1 and 15 at least 2 or 3 kinds of flowers and 2 or 3 kinds of herbs. They can be placed anywhere in the bed and must include marigolds and basil, but can also include dill, cilantro, parsley, arugula, ginger, nasturtiums, cosmos, sunflowers and calendula flowers. Check the planting calendar for other crops that can also be added in early May.
Put some large perennial herbs like sage and oregano in a large container cloth pot near the bed, but not in the bed. Sage and oregano are perennial in our climate zone 5b and 6a and will return next season if protected over winter with straw. Plant another perennial mint, near the raised bed in a large pot by itself since it is “invasive” (tends to take over all empty spaces).
In the raised beds start planting seeds and seedlings of the rest of the early May crops – tomatoes, peppers, eggplants, cabbage, lettuce, corn, bush beans and pole beans. Near the south side of the bed plant seeds of small crops in clusters (carrots, beets, radishes). Check the planting calendar for which crops must be planted from seed.
Water the soil before you place your tiny seeds. Gently water your seeds with a sprayer nozzle on your hose or watering can. Keep your seeds and seedlings constantly moist. Drip irrigation makes growing from seeds much much easier.
Plant the tiny carrot seeds about an inch apart. Try the “board trick” with tiny carrot seeds. Save watering time by placing a small board over a cluster of carrot seeds to stop evaporation. Carrots don’t need sun to germinate. Check them daily for germination. Remove the board when the first seed germinates. Pick some baby carrots to make room for some of the carrots to grow longer.
Plant in separate large containers or in separate raised beds the larger crops – cucumbers, summer squash, zucchini, winter squash (butternut, acorn, etc), and potatoes. They will take over and need lots of space. Grow them vertically on a trellis whenever possible. The separate pots or raised beds for very large plants need herbs and flowers on edges in spots where they get the most sun.
There is lots of sun in your entire bed until mid-June when the plants are still small and the garden lacks shade. Take advantage of the shade cast by large mature plants later in the season for crops like lettuce that don’t need lots of light and suffer from high heat (like lettuce).
June planting and begin harvesting
By mid-June you can begin to harvest the April plantings. Start your harvest of cherry tomatoes in late June and continue to harvest all season long.
Which plants to harvest in June and which to keep growing? For example, If you are still eating lots of kale and chard, keep these plants in the bed. If you are eating less of a crop, harvest it now and store it for later. As you harvest, fill empty spaces with warm weather salad greens (salad amaranth and New Zealand spinach), culinary herbs, bush beans, radishes, and carrots.
When harvesting leafy greens (kale, swiss chard, spinach, lettuce, collards) harvest the largest outer leaves first to make more room for neighboring plants. Plants NOT in the same biodiversity family group could touch each other since diseases and pests prefer one plant family.
The first exception to the rule of NOT planting the same plant variety as neighbors is spinach in the fall or spring. It’s the only popular leafy green veggie that will grow in cold temperatures.
The second exception to the neighbors rule applies to clusters of small crops like carrots, beets, radishes, green onions, broccolini. Plant seeds in small clusters (8” diameter area) and rows (8” long) of small plants along the southern edge of your bed and containers to maximize sunlight and avoid shadows cast by larger plants.
Plant large plants like zucchini, squash and cucumbers in large cloth or wood containers (about 2 feet in diameter and 15” tall) because these big plants take up too much raised bed space. But, if you have a huge garden with lots of raised beds, dedicate some of the beds to large plants with lots of flowers and herbs around the edges or in small pots around the exterior of the bed. But remember that the small pots will need more attention and frequent watering. Try to set up irrigation for them. Although it’s okay if the huge leaves of vining squash plants overflow onto a deck or lawn it is better to grow vertically in limited space. My butternut squash sprawling on my lawn didn’t hurt the lawn at all. Spray with a OMRI certified fungicide to prevent and manage powdery mildew.
Vining plants like peas, pole beans, and tomatoes need a way to grow vertically. Plant them at the north side of a raised bed or container so they don’t shade the other plants. Learn more about vertical growing in an upcoming post.
August planting for a fall harvest
Some plants that were planted earlier in the season that you have already harvested can actually be planted again - in a “second-round”. Sometimes, if planted in the hotter time of year, harvested in the cool temperatures, the plants are sweeter and more tender.
Timing is key. Start early to think about what comes next after their beautiful summer veggies have been eaten. They should think about what to plant now and when to plant. This is determined by how long it will take before the veggie matures. Getting the timing down to finish one harvest and start growing for another takes time and experience. It is an art. You don’t want to plant a veggie that takes a long time to mature, and risk it failing due to frost.
Weather is unpredictable, especially now during climate change. Any plant that we suggest for August planting could be overwhelmed by an unexpected heat wave. Best to choose veggies that love both hot and cool weather. Plant more than one of each crop – so, if one doesn’t make it – you’ve got some others!
“Grow Your Own Food” blog posts
See the full list of our Grow Your Own Food blog posts. Each post is assigned ”tags” which are under the post title. If you need a quick answer to a gardening question give us a call or send a text to our customer support team – support[at]deep-roots-project.org AND 708-655-5299.
Deep Roots online store
See our online store for details about prices, ordering and delivery of raised beds, planter boxes, microbe-rich compost, worm castings, leaf mulch and more. We don’t sell traditional soil, since we use 100% compost as our growing medium. Our online store has 2 sections – (1) raised beds and planter boxes and (2) compost, worm castings, fertilizer.
Please contact our customer support team before placing an order online so we can assist you with the details and answer your gardening questions. You can pay by credit card in the store or by check.
(708) 655-5299 and support[at]deep-roots-project.org
Sign up for our newsletter
Please leave your cell phone number when you sign up for our eNewsletter, if you want text message announcements now and then.
Donations help us provide organic kitchen gardening education to individuals, organizations, and entire communities. Thank you in advance for contributing to our community and for sharing our website and blog with friends and family.

Harvesting & Storing Food
Know the the “no till, no dig, no pull rule.” Avoid pulling out crops by the roots. Know the tricks for the biggest harvest. Allow nature to improve the soil. Stop and think before you harvest. Think about how you will cook, store or share the harvest.
Know the the “no till, no dig, no pull rule.” Avoid pulling out crops by the roots. Know the tricks for the biggest harvest. Allow nature to improve the soil. Stop and think before you harvest. Think about how you will cook, store or share the harvest.
Tricks for the biggest harvest
Harvest from the same plant as long as it is producing. Don’t remove healthy prolific plants too soon.
Encourage growth by frequently picking salad greens, tomatoes, beans, peppers, cucumbers, squash, herbs, etc. Harvest frequently the large leaves from leafy green veggies like spinach, lettuce, kale and swiss chard so pests don’t damage them.
Harvest outer leaves of leafy greens to make room for airflow between neighboring plants and to encourage the plant to produce more foliage.
Learn to recognize when a plant is past its prime. Aging plants lose taste and take up precious space.
Stop and think before you harvest
Avoid pulling out crops by the roots. You can undo all the great work you’ve done building up your soil if you don’t give some thought to the root zone or Rhizosphere which includes the roots and everything that surrounds them in the soil. Soil microorganisms interact with a host of chemicals released by plant roots. Any harsh pulling of plants without sensitivity to its roots can upset the soil micro-organisms.
Pulling a plant out by its roots interferes with bacterial colonies and fungal networks. Think of tiny soil structures as invisible towns and cites that the microflora (fungi and bacteria) build and live in. Maintain maximum soil health by leaving the micro-organisms attached to the roots undisturbed.
The “no till, no dig, no pull rule” is an essential part of the Deep Roots innovative growing method. If you avoid interference in the lives of soil fungi and bacteria they will be healthier and happier. They will do a better job of transporting essential nutrients and substances to the plant’s roots. Huge populations of microflora make the critical difference for growing super-healthy plants.
Allow nature to improve the soil. Avoid any digging except for a seedling hole or a furrow for planting seeds. Although traditional farmers and gardeners turn over their soil every season, modern soil scientists now know that digging destroys the soil structures that build up over time which greatly harms the health of the soil.
Pull out roots for only root veggies. Pull out root veggies like carrots and beets when the top peeks out from the soil and they are easy to pull out. For non-root veggies leave the roots in the soil undisturbed and cut the stem close to the ground. Roots supply critically important food for soil microbes. The exception to this rule is harvesting root crops like beets, onions, carrots, garlic, radishes, etc.
Add organic materials like compost and worm castings to the top of the soil. Worms, bugs, plant roots and weather will mix it in for us. But at least you can add organic material when necessary.
Storing your harvest
Think about how you will cook, store or share the harvest. Make a list and research how to use and store your harvest – recipes, freezing, canning, fermenting, drying, storing in sand, storing in a basement, “vacuum sealing” before freezing, and more.
Store leafy greens for a few days in a tight closing plastic bag with all the air squeezed out.
Chop the leafy greens before freezing in tightly closed plastic bags. Freeze in small bags that will be the right amount for a meal.
Freeze cooked foods like stews, smoothies and soups in jars with wide-mouth jars. Leave a half to one inch empty at the top so the food can expand as it freezes. If there is no space at the top the jar could crack.
Fermented foods can be stored for many months at room temperature. There are lots of YouTube videos and online courses on how to ferment many types of foods.
A “vacuum sealer” is a counter-top appliance that allows you to freeze your harvest in small plastic bags for longer and also compresses some foods into a smaller space. Whether you buy in bulk, freeze small portions for meal prep or hunt, vacuum sealing helps most food from going stale as quickly as it would in a non-airtight container. It also helps prevent freezer burn, which affects taste and texture. There are many brands of vacuum sealing machines.
An inexpensive chest-style freezer that opens from the top in storage room or basement makes harvesting and storing food faster and easier.
Store carrots in the ground during winter. Leaving unharvested carrots and parsnips in the ground over winter makes them sweeter.
Canning food in Mason Jars allows you to store food without freezing or refrigerating. It takes time and skill. Find out how to do do home canning at the National Center for Home Food Preservation.
Our Innovative Food Gardening Method
Learn more in our two recently revised blog posts.
Our online store
See our online store for details about prices, ordering and delivery of raised beds, compost, worm castings and more. Please contact our customer support team before placing an order online so we can assist you with the details and answer your gardening questions.
QUESTIONS? COMMENTS?
Contact us at (708) 655-5299 or support[at]deep-roots-project.org.
Stay in touch
Please leave your cell phone number when you sign up for our eNewsletter, if you want text message announcements now and then.
Donations help us provide organic kitchen gardening education to individuals, organizations, and entire communities. Thank you in advance for contributing to our community and for sharing our website and blog with friends and family.