
Place Raised Beds on Native Soil
Raised bed soil should touch the native soil below. If you're installing a raised bed on gravel, place the gravel around the bed, not directly under the bed. Also, using landscape fabric under raised beds creates more risks and hassles than benefits.
At Deep Roots Project, we carefully research best practices using a wide range of trusted sources before making gardening recommendations. Our goal is to teach a method that makes food gardening not only successful, but also as easy and low-maintenance as possible—especially for busy people who want great results with less work.
Raised bed soil should touch the native soil below.
If you're installing a raised bed on gravel, place the gravel around the bed, not directly under the bed. Also, using landscape fabric under raised beds creates more risks and hassles than benefits.
Placing raised garden beds directly on compacted gravel or cement can significantly impede plant health and productivity. If you want gravel around your raised beds for convenience or aesthetics make sure you leave an area without gravel directly below the bed frame.
Drainage challenges and root development: Compacted gravel lacks the porosity necessary for proper water drainage. This can result in water pooling at the base of the raised bed, leading to waterlogged soil conditions. Such conditions deprive plant roots of essential oxygen, potentially causing root rot and stunted growth. Moreover, the hard surface of compacted gravel can act as a barrier, preventing roots from extending into the native soil below, thereby limiting access to deeper nutrients and moisture reserves.
Disruption of soil ecosystem: A thriving garden relies on a dynamic soil ecosystem, rich with microorganisms, fungi, earthworms and beneficial insects. These organisms play a crucial role in nutrient cycling and soil structure maintenance. When a raised bed is isolated from the native soil by a compacted gravel layer, it restricts the movement of these organisms into the bed. This isolation can lead to a less active soil ecosystem, reducing the natural fertility and resilience of the garden bed.
Landscape fabric under raised beds
causes more harm than good
Soil leakage and weeds: Most gardeners worry that soil will leak into the gravel or that weeds will creep up from below. But research and experience show that weeds rarely grow up through 15 inches of compost. Instead, they arrive from windblown seeds landing on the surface. And gravel itself is a natural weed deterrent. So putting plastic fabric between your gravel and raised bed won’t stop weeds—it just creates more work later.
Drainage issues: Landscape fabric also traps moisture and can interfere with drainage. If it gets clogged or pressed against uneven gravel, water may build up instead of draining freely, leading to soggy roots. Worse, it blocks the natural exchange of air, microbes, and moisture between the soil and the earth below. Over time, that hurts soil health and the thriving underground ecosystem your plants depend on.
Microplastic and chemical contamination: Another downside? Landscape fabric eventually breaks down into microplastics. Polypropylene, the most common material in these fabrics, doesn’t biodegrade. As it ages, it sheds plastic fibers into the soil—polluting your garden for years to come. Some fabrics also leach chemical into the soil over time.
In short, landscape fabric and gravel under raised beds may seem like a good idea, but it causes more harm than good. Stick with natural solutions, and you’ll support healthy soil, clean pathways, and a garden that grows stronger every year.
Ways to contain soil leakage onto gravel
So what can you do if you’re worried about raised bed soil (compost) leaking into your decorative gravel surrounding your bed? There are smart, ways to contain soil:
Add coarse gravel pebbles: The best solution with the least work is to spread coarse gravel pebbles over your fine gravel extending about a foot around the bed. If soil leaks out of the bottom it will mix with the fine gravel and be hidden by the course gravel. Best choice is gray pebbles (also called pea gravel) with same gray color as your fine gravel.
Recess the bed slightly—dig a shallow trench (2–3 inches) into the gravel so the bed frame sits lower. This helps hold in compost at the base.
Line the bottom inside edge with cedar boards, bricks. These act as a gentle barrier without sealing off water flow.
Add a natural breathable liner like burlap or straw inside the base of the bed. These will decompose safely over time while filtering fine soil particles during the first rains.
Ensure optimal garden health
A bonus tip: when you use 100% compost as you new “soil,” as Deep Roots Project recommends, it holds together better than blended soils. Compost's rich microbial structure helps it settle firmly and resist leaking.
By ensuring raised beds have direct contact with the native soil and are free from obstructive layers, gardeners can promote a healthier, more productive growing environment. Recommendations for optimal garden health to ensure the success of raised beds:
• Establish direct soil contact: Position raised beds so they rest directly on native soil, facilitating root expansion and organism movement.
• Enhance soil structure: Incorporate organic matter, such as compost, to improve soil aeration and water retention.
Avoid physical barriers: Refrain from using landscape fabric or similar materials beneath the bed, as they can hinder drainage and organism migration.
Join the Deep Roots movement
We’re not just about gardening; we’re about changing the way people grow food. Whether you have a tiny balcony or a full backyard, we’ll help you grow like a pro.
Stay in the loop: Signup for our email newsletter. If you also provide your phone number you will get text message updates that link to our best blog posts.
Get involved: Attend a free workshop, become a volunteer, grab a raised bed, or simply follow along for expert tips. Contact our support team any time you have a question at 708-655-5299 and support@deep-roots-project.org.
Learn. Share. Grow. Volunteer: We invite you to be a part of our sustainable movement right here in our own backyards! We want all our volunteers to have fun and learn while they contribute to expanding the Deep Roots community. We can customize a volunteer assignment to your time, interests and skills. Learn more on our Volunteer page
Dive Deeper
Click on the Blog Posts Below for more about our Innovative methods.
Beautify Your Garden with Our Cedar Raised Beds!
Our Deep Roots handcrafted cedar raised beds are designed to endure outdoors while adding a touch of style to your yard. As a bonus, they are the perfect depth to hold just the right amount of our nutrient-rich compost growing medium, which comes free with each bed.
Deep Roots Supports Gardeners
We provide our gardeners with the best products for success – like cedar raised beds, microbe-rich compost and microbe-rich worm castings. Check our online store. Always talk to our customer support team before placing your order online. If you need help or have a question contact us at support[at]deep-roots-project.org and 708-655-5299.
Deep Roots Online Store
See our online store for details about prices, ordering and delivery of raised beds, planter boxes, microbe-rich compost, worm castings, leaf mulch and more. We don’t sell traditional soil, since we use 100% compost as our growing medium. Our online store has 2 sections – (1) raised beds and planter boxes and (2) compost, worm castings, fertilizer.
Please contact our customer support team before placing an order online so we can assist you with the details and answer your gardening questions. You can pay by credit card in the store or by check.
Please leave your cell phone number when you sign up for our eNewsletter, if you want text message announcements now and then.
Donations help us provide organic kitchen gardening education to individuals, organizations, and entire communities. Thank you in advance for contributing to our community and for sharing our website and blog with friends and family.
Installing Hoops on Raised Beds
If you're new to gardening with raised beds, adding hoops is one of the smartest, most affordable upgrades you can make. Hoops let you cover your plants with protective materials like shade cloth, bird netting, row covers, or plastic—helping you grow more successfully through all seasons.
grow more successfully through all seasons.
If you're new to gardening with raised beds, adding hoops is one of the smartest, most affordable upgrades you can make. Hoops let you cover your plants with protective materials like shade cloth, bird netting, row covers, or plastic—helping you grow more successfully through all seasons.

Easy Inexpensive Hoop Systems for Raised Beds
Whether you want to block harsh sun, stop birds and rabbits, warm up your soil in spring, or shield your crops from early frosts, there's a hoop system that can help. Below are four types of hoops you can make yourself using easy-to-find materials. Each method is simple and ideal for beginners. Watch video How to Make Hoops for Raised Beds.
Contact our customer support team about buying bug netting bags and sheets from us. The bug netting page is not yet on our store.
Tips for First-Time Gardeners
Start with a simple material like poly tubing or PVC. Choose your hoop height based on how big your plants will get and what kind of protection they need. Use shade cloth in hot summer months to protect cool-season crops from burning. In spring and fall, cover your hoops with row cover or plastic to warm up the soil and shield from cold. And always secure your hoops well—wind can lift lightweight covers if they’re not anchored.
With just a small investment in materials and time, hoops can help protect your plants, extend your harvest, and give you more gardening success all year round.
Black Poly Tubing – Light, Simple, Inexpensive
Black poly tubing (½-inch wide) is one of the easiest and cheapest materials to work with. It’s ideal for supporting lightweight materials like row cover fabric, insect netting, or bird netting. When you cut it into 5-foot lengths, the resulting hoop stands about 16 inches above the soil—perfect for small plants like strawberries or young seedlings.
You can cut the tubing with a utility knife or a plastic pipe cutter. Pipe cutters are safer and easier for beginners—just squeeze and twist to get a clean cut. To install the hoops, you can push the ends into the soil if your raised bed isn’t too wide. However, for more stability, especially if you’re using wooden beds, attach tube straps to the inside of your bed walls and slide the tubing into them. These straps screw into the wood and hold the tubing firmly in place. If you use ¾-inch straps, you’ll have the flexibility to upgrade to thicker tubing later without replacing the hardware.
This setup is incredibly affordable. You can build a full hoop system for one bed for less than five dollars.
PVC Pipe – Sturdier for bug netting, plastic & more
For more durability and strength, many gardeners turn to schedule 40 PVC pipe, either ½-inch or ¾-inch in diameter. This option can handle heavier covers like plastic or shade cloth. If you cut the pipe into 6-foot lengths, you’ll get hoops about 24 inches tall. That’s enough height for medium-sized crops or for general spring and summer protection. If you're growing taller plants or want a tunnel-like structure in fall, leave the 10-foot pipes uncut to make hoops that reach about 50 inches above the soil.
Just like with poly tubing, you can use tube straps to secure the ends to your bed. But when working with taller hoops, a better method is to drive short metal stakes—called rebar—into the ground, then slide the ends of the PVC pipe over the rebar. This gives your hoops more stability and keeps them upright even in wind or rain.
Tall hoops can be a bit floppy, especially when covered with plastic, so it helps to support the structure using long wooden strips. A simple 1 x 2-inch fir strip works well. Place one strip across the top of the hoops and one on each long side of the bed, tying them to the PVC using twine. This keeps the entire system firm and resistant to wind. A basic medium-height PVC hoop setup costs about five to eight dollars. A taller system with rebar and bracing runs closer to ten dollars.
Metal Conduit – Durable & Professional
Metal conduit (also called EMT) is a galvanized steel tube used for running electrical wire, but it makes fantastic, long-lasting garden hoops. These hoops are stronger and more stable than PVC, and they don’t degrade in sunlight. Many gardeners use ¾-inch conduit for high hoops, which makes them great for large covers, heavy winds, or repeated seasonal use.
Conduit doesn’t bend easily by hand, so you’ll need a special metal hoop bender (also called a jig), available from garden suppliers. Once mounted to a sturdy surface, the jig lets you gradually bend the conduit into a smooth arch. You’ll need to move the pipe slowly along the jig, making the bend in sections to get a nice even curve. When done, the hoops are typically sized to span a 4-foot-wide raised bed.
To install metal conduit hoops, drive rebar stakes into the ground, just as with PVC hoops, and slide the ends of the metal pipe over them. You can tie a fir strip across the top for added support, using twine or clamps. While metal conduit hoops cost about twice as much as PVC (closer to $20 for a full setup), they’re incredibly sturdy and will last for many seasons. For serious gardeners, they’re often worth the extra investment.
Cattle Panels – Super Sturdy & Dual-Purpose
Cattle panels are another excellent option for hoops, especially if you want something that doubles as a trellis. These are heavy-duty, welded wire grids used for fencing livestock, and they come in 16-foot lengths. Cut into 6-foot sections, they can be bent into low arches that stand about two feet above your raised bed. They're perfect for shade cloth, row cover, or netting—and sturdy enough to last for decades.
To cut a cattle panel, use bolt cutters to snip through the wire. Then, place one end of the panel on the ground and bend it into a hoop using your body weight. Start in the middle and gradually curve the sides until you have the shape you want. Once shaped, press the ends into the soil or secure them with stakes.
Cattle panels are strong enough to hold up to wind, snow, and even climbing plants. In fact, many gardeners let beans, cucumbers, or peas grow up through the panel, using it as both a cover and a vertical trellis. One downside is transportation. At 16 feet long, you’ll need a truck or trailer to bring them home from the store. But once you have them, cattle panels are among the longest-lasting and most useful hoop systems available. Surprisingly, they cost less than the metal conduit option.
Choosing the Right Hoop System
Choosing the right hoop depends on your plants and your goals. Low hoops, around 16 to 24 inches tall, are perfect for protecting small plants and seedlings in early spring. Medium hoops, 24 to 36 inches high, are great for general use throughout the growing season. High hoops, about 50 inches tall, work best later in the season or for tall crops like tomatoes and pole beans.
Most gardeners use different hoop types at different times. You might use low hoops in spring to protect lettuce from a late frost, then switch to tall hoops in fall to extend the growing season for your tomatoes. Medium hoops can be helpful all season long, especially if you're dealing with birds, bugs, or hail.
Join the Deep Roots movement
We’re not just about gardening; we’re about changing the way people grow food. Whether you have a tiny balcony or a full backyard, we’ll help you grow like a pro.
Stay in the loop: Signup for our email newsletter. If you also provide your phone number you will get text message updates that link to our best blog posts.
Get involved: Attend a free workshop, become a volunteer, grab a raised bed, or simply follow along for expert tips. Contact our support team any time you have a question at 708-655-5299 and support@deep-roots-project.org.
Learn. Share. Grow. Volunteer: We invite you to be a part of our sustainable movement right here in our own backyards! We want all our volunteers to have fun and learn while they contribute to expanding the Deep Roots community. We can customize a volunteer assignment to your time, interests and skills. Learn more on our Volunteer page
Let’s make this your most delicious year yet!
Dive Deeper
Click on the Blog Posts Below for more about our Innovative methods.
Beautify Garden with Our Cedar Raised Beds!
Our Deep Roots handcrafted cedar raised beds are designed to endure outdoors while adding a touch of style to your yard. As a bonus, they are the perfect depth to hold just the right amount of our nutrient-rich compost growing medium, which comes free with each bed.
Deep Roots Supports Gardeners
We provide our gardeners with the best products for success – like cedar raised beds, microbe-rich compost and microbe-rich worm castings. Check our online store. Always talk to our customer support team before placing your order online. If you need help or have a question contact us at support[at]deep-roots-project.org and 708-655-5299.
Deep Roots Online Store
See our online store for details about prices, ordering and delivery of raised beds, planter boxes, microbe-rich compost, worm castings, leaf mulch and more. We don’t sell traditional soil, since we use 100% compost as our growing medium. Our online store has 2 sections – (1) raised beds and planter boxes and (2) compost, worm castings, fertilizer.
Please contact our customer support team before placing an order online so we can assist you with the details and answer your gardening questions. You can pay by credit card in the store or by check.
Please leave your cell phone number when you sign up for our eNewsletter, if you want text message announcements now and then.
Donations help us provide organic kitchen gardening education to individuals, organizations, and entire communities. Thank you in advance for contributing to our community and for sharing our website and blog with friends and family.

Are Black Fabric Grow Bags Safe?
Black fabric grow bags have become a favorite among gardeners for their lightweight design, excellent drainage, and root-air pruning capabilities. Yet concerns have emerged about potential micro-plastic shedding and chemical leaching from recycled plastic materials. In this post, we’ll explore the safety of these bags…
Black fabric grow bags have become a favorite among gardeners for their lightweight design, excellent drainage, and root-air pruning capabilities. Yet concerns have emerged about potential microplastic shedding and chemical leaching from recycled plastic materials. In this post, we’ll explore the safety of these bags, examine what materials and certifications to look for, and offer recommendations for reputable brands and safe alternatives—including natural fiber options and hard plastic pots.
Microplastics, Materials, & Safer Alternatives
Many fabric grow bags are made of recycled plastics, such as polypropylene (PP) or polyethylene terephthalate (PET). Their fibrous, breathable construction can improve root growth but may also shed tiny plastic particles over time. This microplastic release is primarily a concern because the bags degrade under UV exposure and regular watering. Shedding is much more of a concern with fibrous versus solid plastics.
While research is still ongoing, early studies suggest that virgin plastics may be safer than recycled plastics. Solid plastics are also preferable to fibrous plastics simply due to the fact that a solid is less likely to break down with handling. Consider these strategies:
Invest in Quality: BPA-free virgin plastics that are solid may cost a few dollars more, but last longer in addition to being potentially safer for health and environment. Choosing these more durable plastics also reduces overall waste.
Gentle Handling: If you’re already using these bags and can’t replace them right away, minimizing abrasion during cleaning or moving can lessen fiber shedding.
Containment Solutions: It may be possible to reduce shedding from your grow bags to surrounding soil by placing your grow bags into a secondary container.
Material Safety and Chemical Leaching
Beyond the physical issue of microplastics, many gardeners wonder if any chemicals might leach from fabric grow bags into the soil. The safety of a plastic product largely depends on the type of plastic used:
Food-Grade Plastics: Materials like high-density polyethylene (HDPE), low-density polyethylene (LDPE), polypropylene (PP), and PET are considered safe for food contact. These plastics are commonly used in food containers because they do not leach harmful chemicals under normal use.
Avoiding Certain Plastics: Products made from PVC or polycarbonate (often categorized as “#7” or “other”) may release toxins such as BPA or phthalates. Reputable grow bag manufacturers avoid these materials in favor of food-safe options.
Recycled Material Cautions: While recycling in general is aimed at reducing overall waste to help the environment, recycled materials must be carefully processed to avoid contaminants such as heavy metals. Additionally, bonding agents used to get recycled materials to hold their shape could be unsafe additives. Look for manufacturers who verify that their recycled content meets stringent standards.
Many trusted brands state that their products are BPA-free, phthalate-free, and use either virgin or properly processed recycled plastic. This transparency is crucial for ensuring that the products remain inert in your garden. Research companies to find out whether they adhere to the standards they claim to in their marketing.
Certifications and Transparency
When shopping for grow bags, certain certifications can provide extra peace of mind:
Global Recycled Standard (GRS): This certification verifies that recycled content is processed under strict criteria, ensuring the material is free from harmful contaminants.
Food-Grade Labels: Look for any indication that the plastic is “food safe” or that the product is tested to be BPA-free. While these labels don’t cover every potential issue, they do indicate that the manufacturer is aware of chemical safety concerns.
If a product’s labeling or website provides detailed information on the materials used, it’s a sign that the company may prioritize safety and quality.
Exploring Natural Fiber Grow Bags
For gardeners who prefer to avoid plastics entirely, natural fiber grow bags present an attractive alternative. Options include bags made from jute, burlap, or hemp. These materials are entirely biodegradable and completely free of synthetic microplastics.
Advantages of Natural Fiber Bags
Zero Microplastic Risk: Made entirely from plant fibers, these bags will not shed plastic particles.
Eco-Friendly: Being biodegradable, natural fiber bags can be composted after their useful life.
Breathable: Like synthetic fabric bags, natural fibers allow for excellent air and moisture movement, promoting healthy root growth.
Considerations When Using Natural Fiber Bags
Shorter Lifespan: Natural fibers decompose over time. You may need to replace them after one or two growing seasons.
Structural Strength: Natural fibers might not hold up as well with larger volumes of soil or frequent handling. They are often best used for smaller crops or as liners.
Availability: While options are growing, natural fiber bags are still somewhat niche. Some hybrid products combine natural fibers with a small percentage of plastic to extend lifespan while still reducing overall synthetic content. Read product descriptions carefully to make sure you know what you’re buying.
If you are environmentally cautious and willing to invest in a short-term solution that can be composted, natural fiber grow bags offer a compelling alternative.
Safer Hard Plastic Containers
For those who prefer the stability of a rigid container over a fabric grow bag, hard plastic pots are another safer option—provided you choose the right material. Hard containers made from food-grade plastics such as HDPE and PP are widely used in food storage and are less prone to microplastic shedding because they lack the fibrous structure of fabric bags.
Recommendations for Hard Plastic Pots
EarthBox® Planter: The EarthBox system is a popular self-watering planter designed for growing vegetables. These containers are made from UV-stable, BPA-free plastic, ensuring safety over many seasons. EarthBox products have a longstanding reputation in both home and school gardens for their durability and safety.
Air-Pot® Containers: Air-Pot containers feature a unique design with holes that encourage air-pruning of roots, similar to fabric grow bags. Made from recycled HDPE, Air-Pots are designed for longevity. HDPE is a proven, food-safe plastic used in everyday items like milk jugs, and its use in Air-Pots reinforces the safety and durability of the product.
High-Quality Nursery Pots: Many traditional nursery pots are constructed from polypropylene. Trusted brands such as Bloem and Akro-Mils offer durable, food-grade plastic pots that can be used safely for edibles. These are often available in various sizes, including repurposed food-grade 5-gallon buckets (after ensuring they have not previously contained harmful substances).
Restaurant discards: It is often possible to collect food-safe plastic vessels from local restaurants. Many receive large quantities of food in BPA free containers that they simply discard after use. As these are designed to be food safe, they can provide a cheap or free alternative to purchasing garden vessels. In the Chicagoland area, Portillo’s restaurant sells pickle buckets for $2 as part of an ongoing heart health fundraiser. Options like this may exist in any community with restaurants. It can’t hurt to stop into an establishment and ask!
When choosing any hard plastic container, check for clear labels indicating food-grade material and BPA-free status. This ensures that your container remains inert and safe for growing edibles.
Final Thoughts
While black plastic grow bags are accessible and affordable, they come with potential health risks to the environment and to the health of the person eating food produced in them. These risks come both from the potential for microplastic shedding as well as chemical leaching. Avoiding use of plastics in the garden altogether is best practice, but not always affordable. Solid, virgin plastics that are labeled food safe are the safest plastics to use in the garden.
Happy gardening—and may your harvests be as bountiful as they are safe!
Happy Gardening!
By following the Deep Roots Project’s transformational gardening methods through the seasons, you will create a thriving, nutrient-rich garden that supports both your plants and the soil. See the full list of our Grow Your Own Food blog posts. Each post is assigned ”tags” which are under the post title.
Deep Roots Supports Gardeners
We provide our gardeners with the best products for success – like cedar raised beds, microbe-rich compost and microbe-rich worm castings. Check our online store. Always talk to our customer support team before placing your order online. If you need help or have a question contact us at support[at]deep-roots-project.org and 708-655-5299.
Deep Roots Online Store
See our online store for details about prices, ordering and delivery of raised beds, planter boxes, microbe-rich compost, worm castings, leaf mulch and more. We don’t sell traditional soil, since we use 100% compost as our growing medium. Our online store has 2 sections – (1) raised beds and planter boxes and (2) compost, worm castings, fertilizer.
Please contact our customer support team before placing an order online so we can assist you with the details and answer your gardening questions. You can pay by credit card in the store or by check.
Please leave your cell phone number when you sign up for our eNewsletter, if you want text message announcements now and then.
Donations help us provide organic kitchen gardening education to individuals, organizations, and entire communities. Thank you in advance for contributing to our community and for sharing our website and blog with friends and family.

Common Mistakes by Beginner Food Gardeners
Gardening is a rewarding and enjoyable hobby that can provide a sense of fulfillment, relaxation, and fresh produce. It is also a great way to connect with nature and reduce stress. However, for beginners, starting a food garden can be a daunting task, especially if they are not familiar with the essential practices and common mistakes that can hamper the success of their efforts. In this article, we will discuss some of the common mistakes made by beginner food gardeners and how to avoid them.
Gardening is a rewarding and enjoyable hobby that can provide a sense of fulfillment, relaxation, and fresh produce. It is also a great way to connect with nature and reduce stress. However, for beginners, starting a food garden can be a daunting task, especially if they are not familiar with the essential practices and common mistakes that can hamper the success of their efforts. In this article, we will discuss some of the common mistakes made by beginner food gardeners and how to avoid them.
Not choosing the right location
One of the most common mistakes that beginner food gardeners make is choosing the wrong location for their garden. It is essential to select a spot that receives at least six hours of sunlight daily and has good soil drainage. Many novice gardeners make the mistake of planting their garden in a shaded area or a place where the soil is poor, and the plants cannot thrive. To avoid this mistake, gardeners should assess their outdoor space and identify an area that is sunny, well-drained, and has access to water.
Overcrowding the garden
Another common mistake that novice gardeners make is planting too many vegetables in their garden. This can result in overcrowding, which can lead to a lack of nutrients and water for the plants, as well as increased susceptibility to diseases and pests. To avoid overcrowding, gardeners should plan their garden carefully and make sure to provide enough space between plants for adequate growth and airflow. They should also consider the size of the plants when they are fully grown and avoid planting them too close together.
Not preparing the soil properly
Preparing the soil is crucial for the success of a food garden. Novice gardeners often make the mistake of not preparing the soil adequately before planting. Our Transformational Gardening method avoids this problem entirely by teaching our gardeners to use 100% microbe-rich compost instead of conventional soil. Preparing food garden soil conventionally can be difficult and time consuming for beginners depending on which method is used. It can also be confusing since there are so many methods and so many brands of bagged soils sold at garden centers. Most of these commercial bags don’t have the correct ingredients for a truly successful garden year after year. But, if you do have a bed filled with conventional soil you can amend it with our microbe-rich compost and worm castings.
Follow the No Till, No Dig, No Pull rule. Never extensively till or dig your soil as is recommended by conventional gardening books and teachers. Tilling the soil destroys the wonderful structures created by our soil microbes to be healthy and expand their populations. Conventional soil that is too compacted or too sandy can prevent plants from growing properly, leading to stunted growth and poor yields. But the extensive and constant tilling, digging and mixing compost into soil to improve its texture and nutrient content just makes the problem worse. Review our Transformational Gardening method to learn the correct way to prepare soil.
Planting at the wrong time
Another common mistake made by beginner food gardeners is planting their crops at the wrong time of year. Each plant has a specific growing season, and planting outside of that time can lead to poor growth and low yields. To avoid this mistake, gardeners should research the ideal planting times for each crop they wish to grow and plant accordingly. They should also consider their local climate and weather patterns when planning their planting schedule. Read our climate zone and planting calendar posts. Also read our post about frost protection when you plant each in the spring.
Over or under-watering
Watering is critical for plant growth, but novice gardeners often make the mistake of over or under-watering their plants. Over-watering can lead to root rot and other water-related diseases, while under-watering can cause plants to wilt and die. To avoid these problems, gardeners should water their plants consistently and deeply, providing enough water to reach the roots without creating standing water. They should also adjust their watering schedule according to the weather conditions, with more frequent watering during hot and dry periods. Read our blog post on Deep Watering.
Failing to control pests and diseases
Pests and diseases are a common problem in food gardens, and novice gardeners often fail to take the necessary steps to control them. They may not recognize the signs of an infestation or may not know how to treat it effectively. To prevent pests and diseases, gardeners should monitor their plants regularly, looking for any signs of damage or disease. They should also practice good garden hygiene, removing any dead or diseased plants, and keeping the garden free of debris that can attract pests. Also sterilize your gardening tools with dilute bleach (1:10). Finally, they should research natural pest control methods or use organic pesticides, rather than relying on harsh chemicals that can harm the environment. Read our blog post on Environmental Pest Management.
About fertilizing
The Best Way to Feed Your Plants—Naturally and Effortlessly
Many beginner gardeners struggle with fertilizing—what to use, how much, and when to apply it. Conventional gardening methods make fertilizing a complicated guessing game, with endless choices of synthetic and organic fertilizers, each requiring precise timing and application to avoid harming plants.
With Transformational Gardening, you can forget the fertilizer charts, measuring cups, and constant adjustments. Instead, we take a completely different approach—one that works with nature, not against it.
The Secret to Healthy, Thriving Plants
The key to our method is microbe- and nutrient-rich compost and microbe-rich worm castings. These natural fertilizers provide everything your plants need to grow strong and healthy—without the risk of burning roots, throwing off soil balance, or harming the environment.
Instead of trying to micromanage soil nutrients with conventional fertilizers, simply add fresh compost and worm castings. Our method ensures a steady, natural nutrient supply that supports soil microbes, improves plant immunity, and promotes deep, resilient root systems.
Why Our Method is Easier and More Effective
1. No Guesswork or Complicated Schedules
Conventional gardening requires precise fertilization at different plant stages. With Transformational Gardening, our compost and worm castings naturally provide a season-long nutrient supply—no need for constant adjustments.
2. Stronger, More Resilient Plants
The beneficial microbes in our compost and worm castings help plants absorb nutrients more efficiently, reducing the risk of deficiencies or imbalances. This means better growth, deeper roots, and greater resistance to disease and pests.
3. No Risk of Over-Fertilizing
Traditional fertilizers can burn plants if applied incorrectly. Our natural fertilizers are gentle, safe, and impossible to overuse. The more you add, the better your soil becomes over time.
4. Healthier Soil, Year After Year
Unlike synthetic fertilizers, which degrade soil quality over time, our compost-based method builds soil fertility, ensuring that your garden improves with each season.
How to Feed Your Garden the Right Way
Forget synthetic fertilizers, chemical soil tests, and complicated feeding schedules. Just follow these simple steps:
• Replenish your soil with worm castings and fresh compost at the start of each growing season.
• Add more compost and worm castings mid-season for an extra nutrient boost.
• Use gentle, natural supplements like fish emulsion for an occasional fast-acting boost, if needed.
• Let microbes do the work—they ensure your plants get what they need, when they need it.
For more details on using this method effectively, check out these blog posts:
By following Transformational Gardening, you’re not just feeding your plants—you’re creating a self-sustaining, thriving ecosystem that will reward you with stronger, healthier crops year after year, with less work.
Happy Gardening!
By following the Deep Roots Project’s transformational gardening methods through the seasons, you will create a thriving, nutrient-rich garden that supports both your plants and the soil. See the full list of our Grow Your Own Food blog posts. Each post is assigned ”tags” which are under the post title.
Deep Roots online store
See our online store for details about prices, ordering and delivery of raised beds, planter boxes, microbe-rich compost, worm castings, leaf mulch and more. We don’t sell traditional soil, since we use 100% compost as our growing medium. Our online store has 2 sections – (1) raised beds and planter boxes and (2) compost, worm castings, fertilizer.
Please contact our customer support team before placing an order online so we can assist you with the details and answer your gardening questions. You can pay by credit card in the store or by check.
(708) 655-5299 and support[at]deep-roots-project.org
Please leave your cell phone number when you sign up for our eNewsletter, if you want text message announcements now and then.
Donations help us provide organic kitchen gardening education to individuals, organizations, and entire communities. Thank you in advance for contributing to our community and for sharing our website and blog with friends and family.

Planning Your Food Garden
Starting a food garden can be an exciting and rewarding experience. Although it takes planning and effort, the rewards are well worth it. With a little bit of know-how and some careful planning, you can enjoy fresh, delicious produce right from your own backyard. You also get to reap the benefits of physical activity and time spent outdoors.
Starting a food garden can be an exciting and rewarding experience. Although it takes planning and effort, the rewards are well worth it. With a little bit of know-how and some careful planning, you can enjoy fresh, delicious produce right from your own backyard. You also get to reap the benefits of physical activity and time spent outdoors. Learn more in our Benefits of Food Gardening post.
However, to be successful in growing your own food, it's important to have a plan in place. Here are some key steps to consider when starting a food garden.
Gardening supplies: Learn about the supplies you will need when you use our Transformational Gardening method. Read our blog post Setup Your Food Garden.
Site selection: One of the most important factors to consider when starting a food garden is site selection. Look for a location that receives optimal sunlight throughout the day. Most vegetables require at least six hours of sunlight per day and prefer 8 hours. So choose an area that is not shaded by trees or buildings. If your yard doesn't get enough sun, consider growing crops that will grow with less sunlight. View our blog post Optimizing Sunlight.
Plant selection: Choose crops that are well-suited to your climate. Some vegetables, like tomatoes and peppers, require warm temperatures to grow, while others, like leafy greens and root vegetables, can tolerate cooler temperatures. Consider planting a mix of smaller crops in raised beds and larger crops in containers to maximize your space. View our blog posts about popular vegetables – brassica (cabbage) family, root veggies, tomatoes and more to come.
Trellising: Some crops, like beans, peas, and cucumbers, require a trellis for support systems to grow properly. Consider the size and weight of the crop when selecting a trellis, and make sure it is sturdy enough to support the plant as it grows. There are many trellis designs to choose from. View our blog post about Growing Vertically with a Trellis.
Planting and harvesting schedule: Knowing when to plant your crops is key to a successful harvest. Consider your local climate and the specific needs of the plants you are growing when determining planting times. Some crops, like tomatoes and peppers, should be started indoors several weeks before the last frost date, while others can be planted directly in the ground. View our Planting Calendar for Zone 6a (Chicago area for planting dates, days to harvest, links to vegetable specific details on temperature tolerances, pests, harvesting and more.
Biodiversity planting method: Planting a mix of crops can help improve soil health, prevent disease, and attract beneficial insects like bees and butterflies. Consider planting a mix of fruits, vegetables, herbs, and flowers to create a diverse and beautiful garden. View our blog post Biodiversity Planting.
Careful utilization of space: Be mindful of how much space each plant needs to grow properly. Some crops, like tomatoes and squash, can take up a lot of room, while others, like lettuce and radishes, can be planted in smaller spaces. Consider using trellises, vertical gardening, and other space-saving techniques to maximize your growing area.
Choosing seed starting or transplants: Decide whether to start your plants from seeds or buy transplants. Starting plants from seeds can be more cost-effective and allows you to choose from a wider variety of plants, but requires more time, effort and experience. Buying healthy transplants can be a good option if you don't have the time, space or equipment to start seeds indoors. Beginners should start by planting easy veggies directly into your beds and containers in the spring. View our 2 blog posts on seeds and seedlings for beginners and for seeds and seedlings: next level.
Harvest tips and timing: Knowing when to harvest your crops is crucial for getting the best flavor and nutrition. Each crop has a different harvest time, so be sure to research and track when your plants are ready to be harvested. Our veggie growing tip posts include harvesting tips for each veggie.
“Grow Your Own Food” blog posts
See the full list of our Grow Your Own Food blog posts. The posts are divided in 6 categories, Each category has its own page with a photo and a short summary for each post. If you need a quick answer to a gardening question give us a call or send a text to our customer support team – support[at]deep-roots-project.org AND 708-655-5299.
Deep Roots online store
See our online store for details about prices, ordering and delivery of raised beds, planter boxes, microbe-rich compost, worm castings, leaf mulch and more. We don’t sell traditional soil, since we use 100% compost as our growing medium. Our online store has 2 sections – (1) raised beds and planter boxes and (2) compost, worm castings, fertilizer.
Please contact our customer support team before placing an order online so we can assist you with the details and answer your gardening questions. You can pay by credit card in the store or by check.
(708) 655-5299 and support[at]deep-roots-project.org
Sign up for our newsletter
Please leave your cell phone number when you sign up for our eNewsletter, if you want text message announcements now and then.
Donations help us provide organic kitchen gardening education to individuals, organizations, and entire communities. Thank you in advance for contributing to our community and for sharing our website and blog with friends and family.

Regenerative & Organic Farming
Deep Roots innovative method “Transformational Gardening” combines the best practices of “Organic Farming” and “Regenerative Farming” and applies them to kitchen gardens with raised beds and large containers. Integrating the two systems addresses their shortcomings and adapts them to small growing spaces and raised beds. The result is a robust and resilient natural gardening system that promotes soil and crop biodiversity.
Deep Roots innovative method “Transformational Gardening” combines the best practices of “Organic Farming” and “Regenerative Farming” and applies them to kitchen gardens with raised beds and large containers. Integrating the two systems addresses their shortcomings and adapts them to small growing spaces and raised beds. The result is a robust and resilient natural gardening system that promotes soil and crop biodiversity.
Regenerative farming methods
“No-till, no-dig, no pull” rule preserves the integrity of mycelial (fungal) networks in the soil and maximizes health of all the soil micro-organisms. Regenerative farmers and gardeners plant seeds by disturbing the soil as little as possible. When harvesting they cut the stem at soil level and leave the roots with billions of beneficial microorganisms undisturbed. Minimal disruption of the soil when harvesting root veggies like carrots is fine. Pulling weeds out by their roots also disturbs the fungal networks which are precious to soil health. Cut the weed at the soil level and cover the root with mulch, grass clippings and straw to block the sun so the weed doesn’t grow back. Learn more about No till, No dig, No pull rule.
Biodiversity gardening is the practice of unprecedented and imaginative placement of crops, herbs and flowers in a single garden or landscape. A diversity of plants means that the garden is less vulnerable to disease, pests, and environmental stresses, as the different species help to support each other. A diverse range of plants attracts a greater number of pollinators, beneficial insects, and wildlife, which helps to maintain a healthy and thriving ecosystem. Biodiversity planting includes succession planting – not placing the same plants in empty spots after harvesting.
Biodiversity avoids the problems of monocultures – a single crop in a field or a garden bed. Pests prefer large numbers of their favorite plants close together. Raising a single crop increases the risk of disease and pest outbreaks because monocultures lack other plant and animal species that limit the spread of diseases and pests.
Biodiverse gardens provide a greater range of food, medicine, and other resources for humans. Plus, it is more aesthetically pleasing and creates a sense of community and interconnectedness.
Cover crops in a food garden play an important role in maintaining soil health and fertility. It’s important to keep soil covered when crops are not normally growing like in mid-fall through winter in cold climate zones. Common cover crops include mustard, buckwheat, clover, legumes, and cereal grains, such as wheat and oats. Learn more about cover crops in food gardens.
A cover crop will keep the soil protected plus add many other advantages. Cover crops, also known as "green manure," help to improve soil structure, add organic matter to the soil, suppress weeds, reduce erosion, and provide essential nutrients to the soil. They can be grown between main crops, improving soil health and fertility for future crops. Additionally, they provide habitat for beneficial insects, such as ladybugs and lacewings, which help to control pest populations.
But remember, never dig the dead cover crop into the soil since we follow the ”no till, no dig, no pull” rule. Instead cut it down, at soil level and use it as a mulch on top of the soil. And don't let the cover crop go to seed since you don’t want it to sprout when growing your main crop.
History of regenerative farming
Regenerative Ag emerged in the late 20th century. It was stimulated by deplorable soil loss and degradation tied to the dominance of chemo-industrial agriculture. Additionally, extensive nitrogen and phosphorous contamination of aquifers plagued major waterways worldwide.
Gabe Brown, a North Dakota rancher, was inspired to heal his farming practices from deterioration of crop health and farming profits. He applied experimental techniques that have since come to be recognized as regenerative practices. These methods focused on restoring soil health. They include “no-till” practice, intensive and perpetual cover-cropping, and ubiquitous biodiversity. Gabe’s efforts resulted in transformation of his ranch from low productivity and near bankruptcy to a thriving enterprise. Today, Gabe Brown is a leading advocate for Regenerative Farming.
Organic Farming Methods
Organic certification. When you think “organic” you likely think of food that's in accordance with USDA's Certified Organic labeling. OMRI lists organic inputs, but it doesn't certify them. Whereas the USDA certification seal is found on food, feed and fiber products, OMRI seals apply to what is used to make an organic food product – pesticides, fertilizers, livestock care products and anything that may affect the production of a food intended to be identified as organic.
No synthetic fertilizers, pesticides, and other chemicals. In the gardening world, organic is understood to mean the complete abandonment of industrial pesticides and fertilizers, the copious addition of organic matter to the soil, and use of OMRI-approved organic inputs only. OMRI stands for the Organic Materials Review Institute. It relies on natural methods to provide the necessary nutrients and control pests, diseases, and weeds. Organic gardeners work in harmony with nature, promoting healthy soil, healthy plants, and a healthy environment. Organic gardening is a way of growing plants and vegetables that is free from synthetic fertilizers, pesticides, and other chemicals.
Building healthy soil is a key principle of organic farming. Organic farming prioritizes adding “Soil Organic Matter” (SOM) which is any material produced originally by living organisms (plant or animal) that is returned to the soil and goes through the decomposition process. It’s okay to add to soil the leaves and grass clipped (un-decomposed waste) OR the decomposed waste as compost.This organic matter provides food for beneficial microorganisms, which help to break down plant material and release essential nutrients into the soil. Additionally, organic gardeners use techniques such as crop rotation and interplanting to maintain soil health and fertility.
Controlling pests and diseases without the use of chemicals is another important aspect of organic gardening. Organic gardeners use a variety of techniques, including companion planting, natural pest deterrents, and beneficial insects, to keep their plants healthy. For example, planting marigolds near tomatoes can help to deter tomato hornworms, and ladybugs are a natural predator of many garden pests. Safe organically certified garden sprays are also okay. For details, read our blog post Environmental Pest Management (EPM).
Minimize the growth of weeds through careful planning. Gardeners can use mulch to control weeds, or remove-weeds as needed. Some organic gardeners also use cover crops, such as clover or alfalfa, to suppress weeds and improve soil fertility.
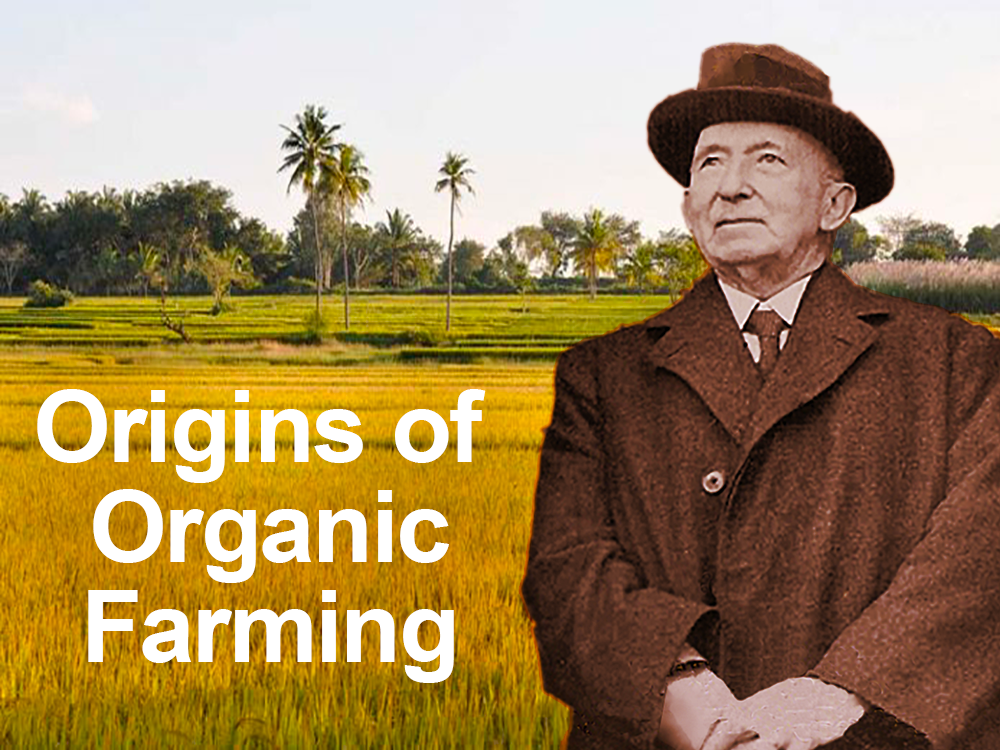
History of organic farming
Organic farming was conceived and originated by Sir Albert Howard at his research farm at Indore, India in the 1920’s. The term “organic” emerged in reference to the farm as an organism, a diverse array of soil, crops, livestock, micro and macro soil organisms. This definition has been the subject of massive revision as organic practices have germinated into a global movement.
Certification of organic production has been legalized universally and has been subject to political influences. In the gardening world, it is understood to mean the complete abandonment of industrial pesticides and fertilizers, the copious addition of organic matter to the soil, and use of approved organic inputs only.
“Grow Your Own Food” blog posts
See the full list of our Grow Your Own Food blog posts. Each post is assigned ”tags” which are under the post title. If you need a quick answer to a gardening question give us a call or send a text to our customer support team – support[at]deep-roots-project.org AND 708-655-5299.
Deep Roots online store
See our online store for details about prices, ordering and delivery of raised beds, planter boxes, microbe-rich compost, worm castings, leaf mulch and more. We don’t sell traditional soil, since we use 100% compost as our growing medium. Our online store has 2 sections – (1) raised beds and planter boxes and (2) compost, worm castings, fertilizer.
Please contact our customer support team before placing an order online so we can assist you with the details and answer your gardening questions. You can pay by credit card in the store or by check.
(708) 655-5299 and support[at]deep-roots-project.org
Sign up for our newsletter
Please leave your cell phone number when you sign up for our eNewsletter, if you want text message announcements now and then.
Donations help us provide organic kitchen gardening education to individuals, organizations, and entire communities. Thank you in advance for contributing to our community and for sharing our website and blog with friends and family.

Optimizing Sunlight
Sun exposure is one of the most important factors for a successful food garden. To find the best sun exposure for your garden, consider the orientation of the garden, the surrounding environment, and the amount of sun that your plants need to grow and produce.
Sun exposure is one of the most important factors for a successful food garden. To find the best sun exposure for your garden, consider the orientation of the garden, the surrounding environment, and the amount of sun that your plants need to grow and produce.
Sunlight is critical factor for plant growth
In this blog post we will explore the best sun exposure for a food garden, what to consider when choosing a location, and how to make the most of the sun in your garden. When possible adjust how much sun each plant receives by using a trellis, shade cloth, choosing the best location in the raised bed and best spot in your garden.
Choose the right location for your garden. Growing a food garden is a rewarding and fulfilling experience, as it allows you to produce your own fresh and healthy produce. However, to ensure a successful harvest, it is important to choose the right location for your garden that provides optimal sun exposure. Sunlight is one of the most important factors for plant growth and development, and without it, your plants may become stunted, yellow, or even die.
6-8 hours of direct sunlight is optimal. The ideal sun exposure for a food garden is 6-8 hours of direct sunlight per day. Most vegetables and fruits require at least 6 hours of direct sunlight to grow and produce well. The hours of direct sunlight your garden receives can vary depending on the time of year and the location of your garden. For example, during the summer months, the sun is higher in the sky, and your garden will receive more direct sunlight than in the winter when the sun is lower in the sky.
You can get by with 6 to 7 hours of full sun for many crops. But 8 to 9 hours of sun is ideal for most edible plants during mid-summer. You can grow some veggies and herbs in shadier areas with 5 hours of sun, although the plants will be smaller. Some crops like lettuce don’t like the full sun in mid summer.
Know how to read the sunlight information on plant labels.
Optimum sun: 7 to 8 hours
Sun: at least 6 hours of direct sun (no shadows).
Part-shade: 4 to 6 hours of direct sun.
Shade: less than 4 hours of direct sun.
Choosing a location for your raised beds.
Consider the orientation of the garden. A south-facing garden will receive the most sun, while a north-facing garden will receive the least. If you have a choice, choose a location that faces south or west, as these orientations will receive the most sun. If you have a north-facing garden, consider planting shade-tolerant plants that can still grow in lower light conditions.
Think about the surrounding environment. Trees and buildings can block the sun from reaching your garden, so look for a location that is not surrounded by large trees or tall buildings. If you already have a garden, pruning or removing trees can help increase the amount of sunlight that reaches your garden.
Tracking the sunlight in your yard
Create a sun tracking chart. Your garden will be more successful if you know how much sun each of your garden spaces gets. There are many online tools that help you make a sun tracking chart of your garden. For example, try out “Sun Mapping Your Garden the Easy Way” by Garden Fundamentals.
Angle of the sun changes. Remember that the angle of the sun is different depending on the season which makes shadows from buildings and trees appear at different times and locations. It’s best to count the hours of sun in your yard from April to September while the trees have their leaves.
Maximizing sun exposure
Place tall plants on the north side of the bed. Once you have found the right location for your food garden, you can use a few strategies to maximize the sun exposure. One way to do this is by planting taller plants on the north side of the garden and shorter plants on the south side. The tall plants won’t block the sun from the short plants.
Trellises or other structures can maximize sun exposure for climbing plants like tomatoes, cucumbers, and beans. They can also help shade the soil, which can keep the soil cooler and prevent the plants from drying out too quickly.
You can also use reflective surfaces like mirrors or aluminum foil to reflect light back into the garden. Reflective surfaces can be placed on walls or fences to direct light into the garden, which can help increase the amount of sunlight that reaches the plants.
You can use shade cloth to reduce the amount of sun that reaches your garden. Shade cloth is a type of fabric that is designed to reduce the amount of light that reaches your garden. You can use shade cloth to create a cooler environment for your plants, which can help them grow and produce more fruit. Some tomato plants shut down fruit production when the temperature is above 85º. Shade cloth can lower a plant temperature too.
Growing in less than 6 hours of sun
Vegetables that can grow in low light conditions, with less than 6 hours of sunlight per day. While these vegetables can grow in low light, they will still grow best and produce a more abundant harvest with 6 or more hours of sunlight per day. Additionally, it's essential to provide adequate water and nutrients to support their growth.
Salad greens such as lettuce, spinach, and mesclun mix. These cool-season crops need about 4 hours of direct light per day.
Root vegetables such as radishes, carrots, beets, and turnips. These crops can tolerate low light but may grow more slowly than with 6 hours of light.
Peas and beans, which are legumes, can grow in low light conditions, but they need more light to flower and set fruit.
Garlic and onions, which are bulbs, do not require much light and can be grown in low-light conditions.
Some herbs such as parsley, cilantro, and chives can also grow in low light conditions.
How to measure sunlight. The most accurate way to measure sunlight is by sketching a map of your yard and marking sun/shade areas every 2–3 hours during a single sunny day. Key times to check are 9:00 am, 12:00 pm, 3:00 pm, and 6:00 pm. Alternatively, using a, SunCalc l tool or smartphone provides quick, automated data on light levels. Key methods for measuring sunlight:
Hourly Mapping (Best Free Method): Draw your yard layout, including trees and structures. Go out every 2–3 hours from morning to evening, marking shaded areas. After 1–2 days, you will see which spots get over 6 hours of sun.
Photo Tracking: Take a picture of your garden from the same spot every hour or two to review how shadows shift throughout the day.
Digital Sunlight Calculators: Devices like the SunCalc are placed in the garden to measure cumulative light over several days.
Smartphone Apps: Tools like Sun Seeker or Sun Surveyor use augmented reality to show the sun's path.
Important Tips: Since season matters a spot with full sun in spring might be shaded by trees in summer. Test when trees have leaves. Check obstructions by taking note of neighbor’s trees fences, and your house, which can cast long shadows. Lateafternoon sun is more intense than morning sun, which matters for heat-sensitive plants.
20 Vegetables and Herbs That Actually Love Shade
Think a shady yard means you cannot grow food? Think again. While many gardeners save their sunniest spaces for vegetables, some crops actually perform better with less direct light. Partial shade can keep plants cooler, reduce water needs, delay bolting, and improve flavor.
Many leafy greens are natural shade lovers. Lettuce stays tender and sweet longer when protected from hot sun. Spinach is less likely to bolt and often produces larger, sweeter leaves in partial shade. Arugula becomes milder and nuttier instead of overly spicy, while kale can grow more tender and less bitter. Swiss chard is another reliable choice, producing colorful stems and crisp leaves for months in lower-light conditions.
Asian greens such as bok choy, mizuna, and tatsoi also thrive in dappled light. In full sun, they often turn tough, spicy, and quick to flower. In shade, they stay mild, tender, and productive.
Herbs can be surprisingly shade-friendly, too. Cilantro often bolts almost immediately in full sun, but partial shade helps it stay leafy for much longer. Parsley grows larger, more tender leaves in cooler conditions. Chives develop a softer, sweeter onion flavor, and mint becomes more aromatic when grown in moist, filtered light.
Some pod crops and root crops also benefit from shade, especially in warm climates. Peas appreciate afternoon shade, which helps extend their harvest. Bush beans may produce more slowly, but often over a longer season. Radishes, beets, turnips, and carrots can all develop better texture and milder flavor when protected from excessive heat.
Even larger brassicas can benefit. Broccoli, cauliflower, cabbage, and celery often struggle in blazing sun, especially during warm weather. Partial shade can help them form better heads, sweeter stalks, and more consistent harvests.
The lesson is simple: shade is not wasted space. It is a garden microclimate. The north side of a house, the area beneath fruit trees, or the edge of a fence can become productive growing space when planted with the right crops.
Try shade-loving vegetables and herbs such as lettuce, spinach, arugula, kale, Swiss chard, Asian greens, cilantro, parsley, chives, mint, peas, beans, radishes, broccoli, cauliflower, cabbage, celery, beets, turnips, and carrots. Your “problem” shade may become one of the most productive parts of your garden.
Safe temperatures for plants
Know the highest and lowest safe temperatures for each crop. Some spring veggies survive only light frosts. Some veggie seeds need certain temperatures to germinate. Some plants like tomatoes, peppers and squash must be planted outside when all danger of frost has passed. Spinach seeds can stay in the ground all winter and germinate in very early spring, plus produce a bigger harvest. See high and low temperature tolerances for popular crops in our blog post Planting Calendars for Zone 6a that contains links to 9 veggie group planting calendars.
Too much direct sunlight. Plants can suffer from sunburn and other types of damage if they are exposed to too much direct sunlight. Additionally, excessive heat can cause water to evaporate more quickly, which can lead to dehydration and other problems for plants. Tomatoes shut down fruit production above 85º. Recovery time varies by tomato variety.
Shade cloth protects plants from too much heat and sun. It can help to protect plants from harsh sunlight and other extreme weather conditions like heavy rain and hail, allowing for better growth and yield. Shade cloth can be used to filter sunlight and create a more moderate, comfortable environment for plants to grow in.
Shade cloth setup. Select the best gauge (thickness) of shade cloth. A thicker material will provide more shade and protection for plants, but may be more expensive. Secure cloth to posts or other structures using clips or ties. Pull tight to prevent it from sagging or touching the plants. Fasten securely to prevent blowing away by the wind. View our blog post Installing Hoops on Raised Beds for how to set up shade cloth and other garden fabrics.
“Grow Your Own Food” blog posts
See the full list of our Grow Your Own Food blog posts. Each post is assigned ”tags” which are under the post title. If you need a quick answer to a gardening question give us a call or send a text to our customer support team – support[at]deep-roots-project.org AND 708-655-5299.
Deep Roots online store
See our online store for details about prices, ordering and delivery of raised beds, planter boxes, microbe-rich compost, worm castings, leaf mulch and more. We don’t sell traditional soil, since we use 100% compost as our growing medium. Our online store has 2 sections – (1) raised beds and planter boxes and (2) compost, worm castings, fertilizer.
Please contact our customer support team before placing an order online so we can assist you with the details and answer your gardening questions. You can pay by credit card in the store or by check.
(708) 655-5299 and support[at]deep-roots-project.org
Sign up for our newsletter
Please leave your cell phone number when you sign up for our eNewsletter, if you want text message announcements now and then.
Donations help us provide organic kitchen gardening education to individuals, organizations, and entire communities. Thank you in advance for contributing to our community and for sharing our website and blog with friends and family.
Setup Your Food Garden
Our Transformational Gardening method is easier & less work than traditional organic gardening, and is perfect for both beginner and experienced gardeners. Our method is as healthy for humans and the environment as it is for the crops. This post lists all the supplies you will need to set up your new food garden. The learning process is a commitment driven by enjoyment and rewards. We are here to support your gardening journey!
Our Transformational Gardening method is easier & less work than traditional organic gardening, and is perfect for both beginner and experienced gardeners. Our method is as healthy for humans and the environment as it is for the crops. This post lists all the supplies you will need to set up your new food garden. The learning process is a commitment driven by enjoyment and rewards. We are here to support your gardening journey! View our blog post Spring Is Peeking Around the Corner.
Start small and learn at your own pace
We give first time food gardeners the basic information and support they need to have an abundant harvest right from the start with less work! Although most of our growing methods work anywhere we add many tips about Climate Zone 5b and 6a for our local community of gardeners in the Chicago area.
Review these key resources:
Before you dive into this post about supplies and setup go to our introduction video and blog post Grow Your Own Food about our innovative method called ”Transformational Gardening.” We adapt the latest soil science to small garden spaces and raised beds.
Then read our blog post Planning Your Food Garden.
Now you are ready to jump into a detailed summary of our method Transformational Gardening Basics. We provide our gardeners with the best products for success. Our method is easier to learn and less work because you will use 100% microbe-rich compost as your “new soil.” Plus, you will use our microbe-rich worm castings (worm poop) instead of most organic fertilizers.
Then come back and continue reading this blog post “Setup Your Food Garden.”
Please contact our support team with questions about the setup process and ordering products. As an educational nonprofit, we are here to give you confidence at all stages of your “Grow Your Own Journey.”
Ready, Set, Grow!
Our online store sells the top quality products that are unique to our innovative food gardening method like microbe-rich compost, microbe-rich worm castings and raised beds. We use 100% compost as our NEW SOIL and worm castings (worm poop) instead of traditional organic fertilizers usually purchased in small bags from a garden center.
Supplies list: Below is a full list of what you will need that includes our online store products as well as items you can buy at a garden center. We also sell dense leaf mulch and topsoil ONLY for use with non-food gardens – flowers, native plants, ornamental plants, shrubs and trees. Learn how to create a soil blend for a native plant garden.
Before ordering online contact Deep Roots customer support at support[at]deep-roots-project.org OR orders[at]deep-roots-project.org and text us at (708) 655-5299. We deliver by truck in Chicagoland raised beds filled with our “new soil” (100% compost). If you are not in the Chicago area, ask our customer support where to buy microbe-rich compost and worm castings similar to ours in your area.
We do additional garden setup work besides delivering filled raised beds. See our store page about general garden labor and talk to our customer support team. We also work with a landscape architect and a native plants specialist if you need a garden design.
What you need to setup a food garden
Find the best location for your raised bed. Know how to choose the best sun exposure. Your garden will be more successful if you know how much sun each of your garden spaces gets. Learn more in our blog post on finding optimal sunlight.
Raised beds, planter boxes, growing containers. We recommend a cedar raised bed along with some large containers (wood or cloth). Some very large plants like squash take up too much space and don’t work well in a raised bed with lots of other crops.
We sell custom-made cedar raised beds and planter boxes in standard sizes and in custom sizes, including beds on legs. Our beds last longer than most wood beds because we make them from thicker cedar boards and use a special design that resists cracking from expansion of freezing soil during winter.
You can buy raised beds from another source or make them yourself from wood or bricks. But don’t use treated wood which contains toxic chemicals. We don’t sell cloth planting containers which you can buy at garden centers. Our cedar raised beds come filled with compost. View our raised bed store page. View our blog post Why Raised Beds Are Best.
Our microbe-rich compost is your new “soil.” Our microbe-rich compost is better than topsoil, soil blends and conventional organic soil for filling raised beds. Food crops love it. It is also the best compost for enriching your beds annually and for planting new crops. It is made from plant waste and animal manure using heat-loving microbes that kill off weeds and pathogens. The heat process makes more nutrient-rich materials available.
We fill all our raised bed orders with compost. If you provide your own beds, fill them to the top since it will settle a few inches. Add more compost in the fall after the harvest or at the start of every season. We also deliver bulk compost to fill YOUR raised beds that you set up yourselves.
Commercially bagged soil and compost are not your friend. Bagged soil and compost that you purchase from garden centers AND the soil in your yard lack the optimal amount of microflora and nutrients for a healthy, vibrant successful food garden. Many commercially bagged composts don’t have the best ingredients for healthy plants.
How to find microbe rich compost in your local area. To be safe use Deep Roots compost or a similar compost (made with heat and containing manure) that you locate in your area. The U.S. Composting Council (USCC) has a database of the vendors they certify that lists the compost ingredients AND if thermophilic heat process was used. Make sure the vendors don't use wood chips or tree waste.
View our compost, worm castings and mulch store page. Learn more about this product in our blog post Compost, Microbes and Soil Science. We sell microbe-rich compost in bulk at a lower price than the same product sold in cubic foot bags. We deliver bulk compost and also sell bagged compost that you can pickup from our Oak Park workshop.. We deliver and fill cedar raised beds and cedar planter boxes with our 100% compost.
Enrich your beds with compost in fall and spring. Spread a 2-inch layer of our compost over your raised beds and containers in fall after harvest and/or spring before planting starts. Use a mixture of half and half compost and worm castings when planting seedlings and seeds. This is the same compost you used to fill the beds and containers.
Worm castings (worm poop, also called vermicompost) is rich with micro organisms and nutrients and is used when planting seeds and seedlings (also called transplants). All worm castings are not equal. Our worm castings from a Wisconsin farmer has more densely packed nutrients and micro-organisms than our compost. View our worm castings store page and worm castings blog post.
Fish emulsion is a liquid organic fertilizer made from fish waste that is rich in nitrogen. It works on vegetables, perennials, shrubs and trees. We don’t sell it in our online store. It should contain 5% nitrogen, 1% phosphorus and 1% potassium. It supplies the primary and secondary nutrients plants need to grow healthy and strong. It also nourishes the beneficial micro-organisms that are in the soil. The right nutrition delivered at the right time is so important for the health of your plants. Make sure you buy 100% organic fish emulsion fertilizer that is certified by the Organic Materials Review Institute (OMRI). Read more on our fish emulsion blog post.
Also remember that healthy happy plants are more resistant to disease and insect pressures. Tomatoes that have been fertilized with fish emulsion can grow up to two times larger than non-fertilized plants. Applying fish emulsion is easy. Just use a watering can. Dilute according to the instructions on the label. Apply every three weeks during the growing season.
Seedlings and seeds. Buy the correct seedlings and seeds for spring, summer and fall for your climate zone. Get tips and planting dates in our Planting Calendar for Chicago area which works also for areas with climate zone 5b and 6a. Learn more in our blog posts on planting crops for beginner gardeners and experienced gardeners. View our blog post about the fast growing veggies from seed.
A water filter for your hose is needed if you are using municipal water containing chlorine which kills beneficial microflora. Buy it at garden centers or online.
Drip Irrigation is great if you have many raised beds and/or are out of town often. It’s healthier for plants, a more reliable way to water and uses less water. Ask our support team about our custom irrigation kits.
Dense leaf mulch is sold on our online store for creating edible landscapes that include native plants, flowers, shrubs and ornamental plants. BUT… don’t use this type of mulch on your raised bed food gardens. As it decomposes, it doesn’t provide the microbes and nutrients that food crops need. It decomposes and shrinks too slowly. You quickly run out of raised bed space to enrich the soil with fresh compost.
Straw mulch is one of many materials we recommend for mulching food gardens to suppress weeds and keep moisture in the soil. But we recommend that you place a half inch layer of our compost around your plants before applying the straw. Or apply this double layer of compost and straw over the entire bed.
Organic pest prevention sprays we recommend are OMRI certified fungicides, Neem Oil, BT (Bacillus thuringensis), and Pyrethrum. We also recommend Diatomaceous Earth powder for slugs. We don’t sell them in our online store. See our blog post on Environmental Pest Management (EPM) for more details. We use sprays in limited amounts along with our biodiversity planting system to prevent and manage pests.
“Floating Row Cover” (optional) is a white light-weight gardening fabric used to warm spring seeds and seedlings when the temperature dips below what some plants can’t handle. Temperatures in the Chicago area can be unpredictable in the spring during climate change. It is also used to keep flying pests like cabbage moths and squash vine borer out of your beds. Look for this product online.
A drip irrigation kit (optional) is strongly recommended. The Deep Roots kit is simple to set up and affordable. Correct and consistent watering is extremely critical to successful gardening – especially for beginners, large gardens and gardeners who are out of town frequently. Talk to the Deep Roots support team about drip irrigation options. View our blog post Deep Watering Is Best.
Your local food garden information service is an essential part of your food gardening tool kit. Deep Roots uses the Chicago Botanic Garden Plant Information Service. This indispensable service is FREE and convenient. They are staffed by about a hundred volunteer master gardeners. They answer questions by phone or by email. Their hours vary depending on the season. Send them photos of your pest problems. Since they use traditional organic growing practices, remind them that Deep Roots gardeners grow in 100% compost and use worm castings instead of commercial organic fertilizers.
Chicago Botanic Garden Plant Information Service contact information: website, Email: plantinfo[at]chicagobotanic.org, Phone: (847) 835-0972. Plus, here is a sample of useful information on their website: Tomato talk - Pests and Diseases
“Grow Your Own Food” blog posts
See the full list of our Grow Your Own Food blog posts. Each post is assigned ”tags” which are under the post title. If you need a quick answer to a gardening question give us a call or send a text to our customer support team – support[at]deep-roots-project.org AND 708-655-5299.
Deep Roots online store
See our online store for details about prices, ordering and delivery of raised beds, planter boxes, microbe-rich compost, worm castings, leaf mulch and more. We don’t sell traditional soil, since we use 100% compost as our growing medium. Our online store has 2 sections – (1) raised beds and planter boxes and (2) compost, worm castings, fertilizer.
Please contact our customer support team before placing an order online so we can assist you with the details and answer your gardening questions. You can pay by credit card in the store or by check.
(708) 655-5299 and support[at]deep-roots-project.org
Sign up for our newsletter
Please leave your cell phone number when you sign up for our eNewsletter, if you want text message announcements now and then.
Donations help us provide organic kitchen gardening education to individuals, organizations, and entire communities. Thank you in advance for contributing to our community and for sharing our website and blog with friends and family.