Fish Emulsion Fertilizer
Using fish emulsion in a food garden is an excellent way to support the health of soil microorganisms and crops. It provides essential nutrients, beneficial microorganisms, and a balanced pH, all while being a natural and sustainable fertilizer option. By incorporating fish emulsion into your gardening routine, you can help to create a healthy and thriving ecosystem in your garden.
Using fish emulsion in a food garden is an excellent way to support the health of soil microorganisms and crops. It provides essential nutrients, beneficial microorganisms, and a balanced pH, all while being a natural and sustainable fertilizer option. By incorporating fish emulsion into your gardening routine, you can help to create a healthy and thriving ecosystem in your garden.
For healthy soil, microorganisms & crops
Supporting the soil microbes is the priority: Deep Roots uses fish emulsion to support healthy growing microbe populations and not to feed our plants directly. Although fish emulsion does contain some helpful nutrients it’s the microbes’ ability to feed these nutrients in our compost and worm castings to the plant roots that matters most in our Transformational Gardening method.
Fish emulsion is a natural fertilizer that has been used for centuries to improve soil health and crop yields. It is made by fermenting fish parts, such as bones, skin, and organs, in water, and then straining the resulting liquid to create a nutrient-rich fertilizer.
Supplies slow release nutrients. The use of fish emulsion in a food garden can support the health of soil microorganisms and crops in several ways. First, fish emulsion is a rich source of nitrogen, phosphorus, and potassium, which are essential nutrients for plant growth. Nitrogen is needed for leafy growth, phosphorus is important for root development, and potassium helps plants resist disease and stress. These nutrients are released slowly over time, providing a consistent source of nutrition to the soil and plants.
Fish emulsion contains beneficial microorganisms, such as bacteria and fungi, that help to break down organic matter in the soil and release nutrients. These microorganisms also improve soil structure, which promotes healthy root growth and improves water and nutrient uptake. By adding fish emulsion to the soil, you are supporting the growth and activity of these important microorganisms.
Balance the pH of the soil. Fish emulsion can help to balance the pH of the soil. Soil pH affects the availability of nutrients to plants, and many plants prefer a slightly acidic soil. Fish emulsion has a pH of around 6.5, which is in the ideal range for many crops. By adding fish emulsion to the soil, you can help to maintain the pH at a level that is optimal for plant growth. Our microbe-rich compost and microbe-rich worm casting also keep soil pH in balance. Even though we don’t worry about testing for pH in the Transformational Gardening method, this is a good tip to know.
Environmentally friendly fertilizer. Fish emulsion is a natural and environmentally friendly fertilizer. It is made from a renewable resource, and it does not contain harmful chemicals or synthetic additives. By using fish emulsion in your food garden, you can support the health of your soil and crops without causing harm to the environment.
How to Apply Fish Emulsion Liquid Fertilizer
Dilution: Fish emulsion is a versatile and powerful liquid organic fertilizer that can be used in two main ways: poured around the base of plants or sprayed directly onto their leaves. Either way, it must be diluted with water before use. A typical dilution is one tablespoon of fish emulsion per gallon of water, though it’s always best to follow the instructions on your specific product label.
Plant needs vary: Before measuring out the fertilizer, be sure to shake the bottle well, as fish emulsion tends to separate when it sits. Once shaken, mix it thoroughly with water. The standard dilution works well for most plants, but you can adjust the concentration depending on your garden’s needs. Some delicate plants may benefit from a weaker solution, while hardier varieties might thrive with a slightly stronger mix.
Application methods: There are two primary methods for applying fish emulsion. The first is a soil drench, where you pour the diluted mixture directly onto the soil around the base of your plants. This helps the nutrients reach the root zone where they are most needed. The second method is a foliar spray, where the diluted fertilizer is sprayed onto the leaves. This can provide a more immediate nutrient boost, as plants are able to absorb some nutrients through their foliage.
Frequency of application: Fish emulsion is typically applied every two to three weeks during the growing season, but the exact frequency can vary based on your plant types, soil conditions, and the product you’re using. Always monitor how your plants respond and adjust as needed.
Apply at coolest part of the day: For best results, apply fish emulsion during the cooler parts of the day—early morning or late afternoon—to avoid leaf burn from sun exposure.
Water thoroughly: After applying, give your plants a thorough watering to help distribute the nutrients and prevent any residue buildup..
Don’t apply too much: As with any fertilizer, it’s important not to overdo it. Too much fish emulsion can harm your plants rather than help them. If you’re applying it for the first time or are unsure about the right dosage, start with a lighter dilution and increase gradually if your plants seem to need more. Keep in mind that some plants—especially leafy greens like kale, lettuce, and Swiss chard—tend to benefit more from fish emulsion than others. Watch for signs of over-fertilization, such as browning leaf tips, slowed growth, or a white crust forming on the soil surface.
The strong odor fades quickly: Be aware that fish emulsion does have a strong smell, but according to “The Spruce” and other gardening sources, the odor usually fades quickly after application
Support healthy plants all season
By using fish emulsion correctly and thoughtfully, you can support healthy, vibrant plant growth throughout the season, all while feeding your garden with a natural and sustainable fertilizer.
Join the Deep Roots movement
We’re not just about gardening; we’re about changing the way people grow food. Whether you have a tiny balcony or a full backyard, we’ll help you grow like a pro.
Stay in the loop: Signup for our email newsletter. If you also provide your phone number you will get text message updates that link to our best blog posts.
Get involved: Attend a free workshop, become a volunteer, grab a raised bed, or simply follow along for expert tips. Contact our support team any time you have a question at 708-655-5299 and support@deep-roots-project.org.
Learn. Share. Grow. Volunteer: We invite you to be a part of our sustainable movement right here in our own backyards! We want all our volunteers to have fun and learn while they contribute to expanding the Deep Roots community. We can customize a volunteer assignment to your time, interests and skills. Learn more on our Volunteer page
Dive Deeper
Click on the Blog Posts below for more about our Innovative methods.
Beautify Your Garden with Our Cedar Raised Beds!
Our Deep Roots handcrafted cedar raised beds are designed to endure outdoors while adding a touch of style to your yard. As a bonus, they are the perfect depth to hold just the right amount of our nutrient-rich compost growing medium, which comes free with each bed.
Deep Roots Supports Gardeners
We provide our gardeners with the best products for success – like cedar raised beds, microbe-rich compost and microbe-rich worm castings.
Call our customer support team with any questions or help with calculations. Then place your order online. If you need help or have a question contact us at support[at]deep-roots-project.org and 708-655-5299.
See our online store for details about prices, ordering and delivery of raised beds, planter boxes, microbe-rich compost, worm castings, leaf mulch and more. We don’t sell traditional soil, since we use 100% compost as our growing medium. Our online store has 2 sections
Signup for Our Newsletter
Please leave your cell phone number when you sign up for our eNewsletter, if you want text message announcements now and then.
Donations help us provide organic kitchen gardening education to individuals, organizations, and entire communities. Thank you in advance for contributing to our community and for sharing our website and blog with friends and family.

Foods Banned Elsewhere But Not in US
Did you know that many ingredients still found in U.S. grocery stores are banned in other countries due to health risks? Look at this list of dangerous ingredients and additives!
Why Are These 11 Foods Banned in Other Countries, But Still Eaten in the U.S.?
Did you know that many ingredients still found in U.S. grocery stores are banned in other countries due to health risks?
Unlike the European Union, which bans or restricts additives until they’re proven safe, the U.S. assumes they’re safe until proven otherwise. That leaves consumers responsible for researching their own food — and often eating things that other countries won’t allow.
Examples of banned foods or ingredients
Here are 11 examples of foods or ingredients still used in the U.S. that have been banned or heavily restricted elsewhere:
1. Bleached Flour
Treated with chemicals like chlorine or benzoyl peroxide, bleached flour may contain alloxan, a compound that damages pancreatic cells. Banned in the EU, UK, and China.
2. Dough Conditioners
Potassium bromate and azodicarbonamide are used to improve bread texture but are linked to cancer and respiratory issues. Banned in countries including Brazil, India, and most of Europe.
3. Propylparaben
Used as a preservative, this chemical disrupts hormones and may affect fertility and breast tissue. Banned in the EU and set to be banned in California starting 2027.
4. BHA and BHT
These synthetic preservatives extend shelf life but can disrupt hormones and are possibly carcinogenic. Limited in Europe, especially in foods for children.
5. Synthetic Food Dyes
Common dyes like Red 40 and Yellow 5 have been linked to behavioral problems in children and even cancer in animal studies. Many are banned or restricted in Europe and Australia. California has begun phasing them out of schools.
6. GMOs & Glyphosate
Most U.S. corn, soy, and canola are genetically modified and sprayed with glyphosate — a herbicide linked to cancer. Over 60 countries ban or require labeling of GMOs.
7. Antibiotics in Meat
Despite a 2017 ban on using antibiotics to promote growth in animals, they are still used in overcrowded factory farms to prevent illness. This contributes to antibiotic resistance and is banned in many countries.
8. Harmful Pesticides
Chlorpyrifos, a pesticide linked to developmental delays in children, was banned by the EPA but reinstated by a court in 2023. It’s still used on U.S. crops, unlike in the EU.
9. Olestra (Olean)
Used in “fat-free” chips and snacks, Olestra can cause digestive distress and block vitamin absorption. Banned in Canada and Europe.
10. Synthetic Hormones in Dairy
Hormones like rBGH increase milk production but are linked to cancer risk and infections in cows. Banned in the EU and Canada.
11. PFAS in Packaging
These “forever chemicals” resist grease and heat but build up in our bodies and environment, causing cancer and immune damage. Banned in the EU; partially phased out in some U.S. states.
What Can You Do?
Eat whole, organic, and homegrown food whenever possible.
Avoid processed foods with long ingredient lists.
Support local regenerative farmers and food producers.
Read labels carefully and learn the hidden names for harmful additives.
Speak out: Sign petitions and support policies that protect food safety.
At Deep Roots Project, we teach people how to grow safe, nutrient-rich food using only compost and natural inputs. It’s one of the most powerful things you can do for your health and the planet.
Let’s grow food we can trust — right in our own backyards.
Join the Deep Roots movement
We’re not just about gardening; we’re about changing the way people grow food. Whether you have a tiny balcony or a full backyard, we’ll help you grow like a pro.
Stay in the loop: Signup for our email newsletter. If you also provide your phone number you will get text message updates that link to our best blog posts.
Get involved: Attend a free workshop, become a volunteer, grab a raised bed, or simply follow along for expert tips. Contact our support team any time you have a question at 708-655-5299 and support@deep-roots-project.org.
Learn. Share. Grow. Volunteer: We invite you to be a part of our sustainable movement right here in our own backyards! We want all our volunteers to have fun and learn while they contribute to expanding the Deep Roots community. We can customize a volunteer assignment to your time, interests and skills. Learn more on our Volunteer page
Dive Deeper
Click on the Blog Posts below for more about our Innovative methods.
Beautify Your Garden with Our Cedar Raised Beds!
Our Deep Roots handcrafted cedar raised beds are designed to endure outdoors while adding a touch of style to your yard. As a bonus, they are the perfect depth to hold just the right amount of our nutrient-rich compost growing medium, which comes free with each bed.
Deep Roots Supports Gardeners
We provide our gardeners with the best products for success – like cedar raised beds, microbe-rich compost and microbe-rich worm castings.
Call our customer support team with any questions or help with calculations. Then place your order online. If you need help or have a question contact us at support[at]deep-roots-project.org and 708-655-5299.
See our online store for details about prices, ordering and delivery of raised beds, planter boxes, microbe-rich compost, worm castings, leaf mulch and more. We don’t sell traditional soil, since we use 100% compost as our growing medium. Our online store has 2 sections
Signup for Our Newsletter
Please leave your cell phone number when you sign up for our eNewsletter to get gardening and seasonal text messages announcements now and then.
Donations help us provide organic kitchen gardening education to individuals, organizations, and entire communities. Thank you in advance for contributing to our community and for sharing our website and blog with friends and family.
Allium Planting Calendar
Planting Calendar for the Alliums family.
Planting & Setup
Alliums are cool-season vegetables grown for their flavorful bulbs, stems, and leaves. This family includes garlic, onions, shallots, leeks, scallions, and chives — crops that depend on good timing, steady growth, and healthy soil to size up well. Unlike most heavy-feeding garden vegetables, alliums do best in loose, balanced soil with good drainage and moderate fertility, because too much rich compost can interfere with proper bulb development. In the Deep Roots system, alliums are grown in a carefully balanced mineral topsoil blend that supports strong roots, clean bulb formation, and excellent flavor.
HOW TO PLANT guide for the column below:
Direct = Directly sow your seeds in your outdoor soil at the correct depth
Transplant = Plant seedlings ("transplants") that were grown indoors
Either = Direct sow seeds or plant seedlings
| Crop Name | How To Plant | Spring Planting | Fall Planting | Germinate Indoors |
|---|---|---|---|---|
| Onions | Either | 3/25–5/15 | None | Yes (6–8 wks before) |
| Garlic | Transplant | None | 10/10–11/5 | No |
| Leeks | Transplant | 4/1–5/20 | None | Yes (8–10 wks before) |
| Shallots | Transplant | 3/25–5/15 | 10/1–10/30 | No |
| Chives | Either | 4/1–6/1 | 8/1–9/15 | Yes (4–6 wks before) |
| Scallions | Either | 3/25–5/30 | 8/1–9/15 | Optional |
Growing Conditions
| Crop Name | Sunlight | Temperature Tolerances | Ideal Soil Temp | Seed Depth | Days to Harvest |
|---|---|---|---|---|---|
| Onions | Full sun | 20°F–85°F | 60–75°F | 0.25 in. | 90–120 |
| Garlic | Full sun | 0°F–85°F | 45–65°F | 2 in. | 240–270 |
| Leeks | Full sun | 20°F–80°F | 55–70°F | 0.5 in. | 100–120 |
| Shallots | Full sun | 20°F–85°F | 55–70°F | 1 in. | 90–120 |
| Chives | Full–part | 20°F–85°F | 55–75°F | 0.25 in. | 50–80 |
| Scallions | Full–part | 20°F–85°F | 60–75°F | 0.25 in. | 50–70 |
Chives (and Garlic Chives) are perennials and the easiest alliums to grow. Chives are popular, mild-flavored, with grass-like leaves and edible purple flowers.. They offer a delicate, onion-like flavor, milder than other Allium species
Timing: Alliums prefer cool to moderate soil temperatures. Garlic + shallots benefit from fall planting. Leeks require long indoor start time. Scallions = flexible + fast crop
Beginners: Garlic, scallions, and chives are the easiest allium choices for beginners.
Weeding and watering: Keep beds well weeded, since alliums have shallow roots and do not compete well. Before harvest stop watering about two weeks earlier for better curing and storage.
Spring top-dressing: Use small amounts of compost and worm castings as a light spring top-dressing, cover the allium planted area, not just around each seedling.
Onions, leeks, shallots: Shallots are planted as bulbs 1-3 inches deep and 4-8 inches apart. Leeks grow best from transplants set 4-6 inches deep for blanching, while scallions can be grown from seeds or by planting leftovers Short video
Garlic: Plant in mid-October and mulch with straw garlic after fall planting. Remove hardneck scapes in spring to increase bulb size. Garlic is ready to harvest in mid-summer (usually July) when the bottom 2–3 leaves turn brown, or when 50-70% of the plant has turned yellow and the leaves begin to fall over.
Green onions (scallions) are perennials. To grow green onions from the grocery store, place the white bulb ends into a small jar of water, changing it daily until roots grow, or plant them directly in soil with 2 inches spacing.
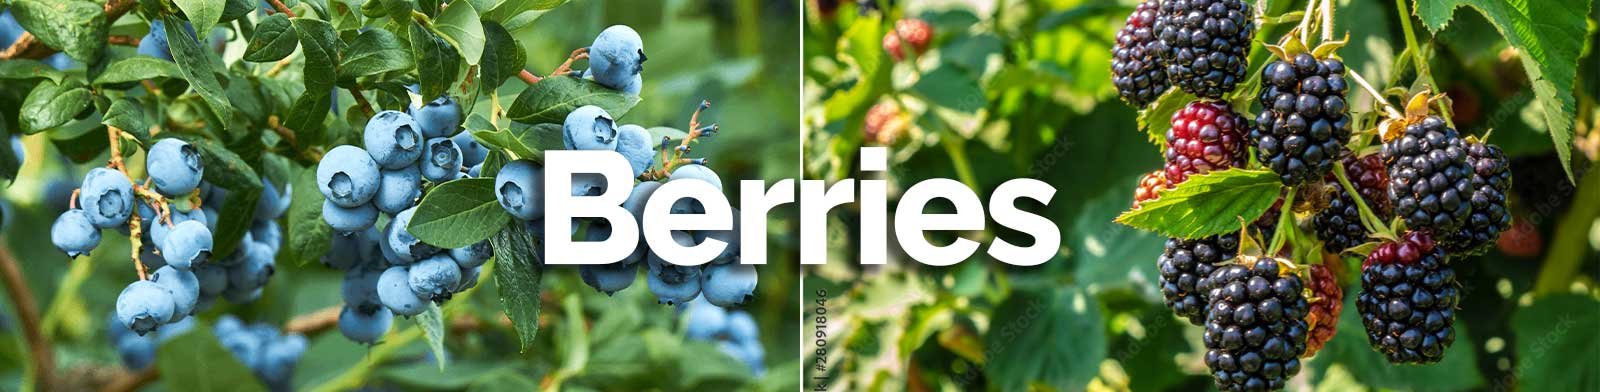
Berries Planting Calendar
Planting Calendar for Berries.
Planting & Setup
Berries are long-term crops that can produce for many years when properly established. Unlike annual vegetables, they require long term planning, good soil preparation, and consistent care. Strawberries, raspberries, blueberries, and other berries thrive in well-drained soil and full sun. Once established, they can become some of the most productive plants in your garden. Because they are perennial, it’s important to choose their location carefully and maintain them season after season. Read our blog post on pruning berry bushes.
HOW TO PLANT guide for the column below:
Direct = Directly sow your seeds in your outdoor soil at the correct depth
Transplant = Plant seedlings ("transplants") that were grown indoors
Either = Direct sow seeds or plant seedlings
| Crop Name | How To Plant | Spring Planting | Fall Planting | Germinate Indoors |
|---|---|---|---|---|
| Strawberries | Transplant | 4/15–5/30 | 9/1–10/1 | No |
| Blueberries | Transplant | 4/15–6/1 | 9/1–10/1 | No |
| Raspberries | Transplant | 4/15–6/1 | 9/1–10/1 | No |
| Blackberries | Transplant | 4/15–6/1 | 9/1–10/1 | No |
| Ground Cherries | Transplant | 5/15–6/15 | None | Yes (6–8 wks before) |
| Honeyberries | Transplant | 4/1–5/15 | 9/1–10/1 | No |
| Elderberries | Transplant | 4/1–5/15 | 9/1–10/1 | No |
| Currants | Transplant | 4/1–5/15 | 9/1–10/1 | No |
| Gooseberries | Transplant | 4/1–5/15 | 9/1–10/1 | No |
| Goji Berries | Transplant | 5/1–6/15 | 9/1–10/1 | Optional |
Growing Conditions
| Crop Name | Sunlight | Temperature Tolerances | Ideal Soil Temperature | Seed Depth | Days to Harvest |
|---|---|---|---|---|---|
| Strawberries | Full sun | 25°F–85°F | 60–75°F | 0.125 in. | 60–90 |
| Blueberries | Full sun | 20°F–85°F | 60–75°F | 0.125 in. | 90–150 |
| Raspberries | Full sun | 20°F–90°F | 60–75°F | 0.25 in. | 90–120 |
| Blackberries | Full sun | 20°F–90°F | 65–80°F | 0.25 in. | 90–120 |
| Ground Cherries | Full sun | 50°F–95°F | 70–85°F | 0.25 in. | 70–90 |
| Honeyberries | Full–part | -40°F–75°F | 50–70°F | 0.25 in. | 60–90 |
| Elderberries | Full–part | 20°F–90°F | 60–75°F | 0.25 in. | 90–120 |
| Currants | Full–part | 20°F–80°F | 55–70°F | 0.25 in. | 80–120 |
| Gooseberries | Full–part | 20°F–80°F | 55–70°F | 0.25 in. | 80–120 |
| Goji Berries | Full sun | 20°F–95°F | 65–85°F | 0.25 in. | 90–120 |
Choose a sunny spot — most berries need at least 6–8 hours of direct sunlight daily. Strawberries and blueberries are especially sun-hungry.
Plan for space: Raspberries, blackberries) spread aggressively. Give them dedicated beds with clear boundaries. Container growing works well for blueberries and strawberries if space or soil quality is limited.
Watering: Drip irrigation keeps foliage dry (reducing disease) while delivering moisture directly to roots. Water deeply and consistently during fruit development; irregular watering leads to cracking and poor flavor.
Mulch heavily (3–4 inches of wood chips or straw) to retain moisture, suppress weeds, and regulate soil temperature.
Pest & Disease Management: Bird netting is essential — birds will beat you to a ripe harvest every time. Rotate strawberry beds every 3–4 years to prevent soil-borne disease buildup.
Extend your harvest: Stagger your varieties (early, mid, and late season) to extend your harvest window across the whole summer. Keep a garden journal noting which varieties performed best in your micro-climate.
Harvests increase every year: Patience pays off. Most berries reach peak production in their 3rd–5th year. Resist the urge to give up early!
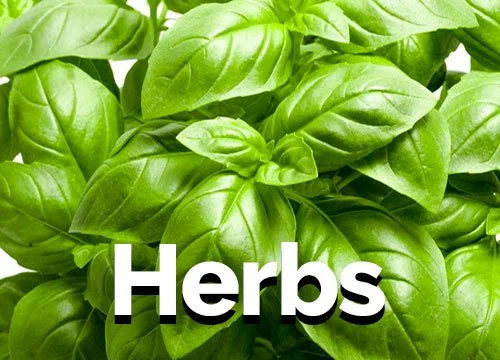
Herbs Planting Calendar
Planting Calendar for Herbs.

Planting & Setup
Herbs are among the easiest and most rewarding plants to grow. Many are highly adaptable and can thrive in a variety of conditions. Basil is especially valuable in the garden as a companion plant for tomatoes, helping with pest management and improving overall growth. Dill and cilantro benefit from staggered planting to maintain a continuous supply. Many herbs, such as oregano and sage, are perennial and will return year after year with proper care. Others, like basil, thrive in warm weather and need to be replanted each season.
HOW TO PLANT guide for the column below:
Direct = Directly sow your seeds in your outdoor soil at the correct depth
Transplant = Plant seedlings ("transplants") that were grown indoors
Either = Direct sow seeds or plant seedlings
| Crop Name | How To Plant | Spring Planting | Fall Planting | Germinate Indoors |
|---|---|---|---|---|
| Basil | Either | 5/15–6/30 | None | Yes (4–6 wks before) |
| Cilantro | Direct | 3/25–5/15 | 8/15–9/30 | No |
| Dill | Direct | 4/1–6/15 | 8/1–9/15 | No |
| Oregano | Transplant | 5/15–6/30 | None | Yes (6–8 wks before) |
| Sage | Transplant | 5/15–6/30 | None | Yes (6–8 wks before) |
| Parsley | Either | 4/1–5/30 | 8/1–9/15 | Yes (4–6 wks before) |
| Lavender | Transplant | 5/15–6/30 | None | Yes (8–10 wks before) |
| Chives | Either | 4/1–6/1 | 8/1–9/15 | Yes (4–6 wks before) |
Growing Conditions
| Crop Name | Sunlight | Temperature Tolerances | Ideal Soil Temperature | Seed Depth | Days to Harvest |
|---|---|---|---|---|---|
| Basil | Full sun | 50°F–95°F | 70–85°F | 0.25 in. | 50–70 |
| Cilantro | Full–part | 25°F–75°F | 55–70°F | 0.25 in. | 40–60 |
| Dill | Full sun | 30°F–85°F | 60–75°F | 0.25 in. | 40–60 |
| Oregano | Full sun | 40°F–90°F | 65–80°F | 0.25 in. | 80–100 |
| Sage | Full sun | 40°F–90°F | 65–80°F | 0.25 in. | 75–90 |
| Parsley | Full–part | 30°F–80°F | 55–70°F | 0.25 in. | 60–80 |
| Lavender | Full sun | 40°F–95°F | 65–85°F | 0.125 in. | 90–120 |
| Chives | Full–part | 20°F–85°F | 55–75°F | 0.25 in. | 50–80 |
Perennial Herbs (Plant Once, Return Yearly): These can be planted in early spring (as soon as the ground can be worked) or in the fall.
Chives: Plant in early spring. They are very hardy and return bigger each year.
Oregano: Thrives in full sun. Plant in spring.
Sage: Hardy perennial, best planted in spring. Does well with Mediterranean herbs.
Lavender: In Zone 6, select English or French varieties. Plant in a spot with fast-draining soil in early spring.
Rosemary: Note: Often dies over winter in Zone 6. Treat as an annual or plant in a pot to bring indoors over winter.
Annual & Tender Herbs (Replant Yearly): Plant these after all danger of frost has passed (late May is safest).
Basil: Very tender. Plant after the soil warms up, typically late May or early June. Basil loves heat.
Cilantro: Prefers cool weather. Direct sow seeds in mid-April (early spring) and again in early September for fall. It bolts (goes to seed) in hot summer weather.
Dill: Direct sow in the garden in mid-April through mid-May. Re-seed every few weeks for continuous harvest.
Parsley: Although technically a biennial, it is usually treated as an annual. Can be planted in early spring (April).
Succession Planting: To keep fresh Cilantro and Dill all season, sow new seeds every 2–3 weeks.
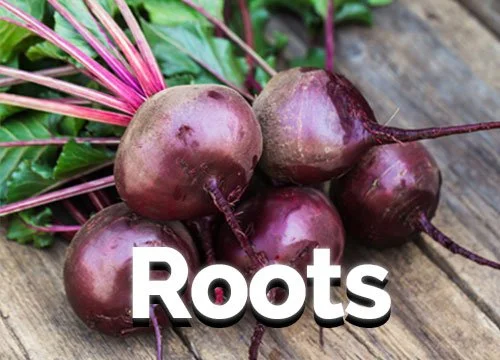
Root Crops Planting Calendar
Planting Calendar for Root Crops.

Planting & Setup
Root crops grow underground and require a different soil environment than most other vegetables. This group includes carrots, beets, radishes, potatoes, turnips, and parsnips. They develop best in loose, mineral sandy topsoil with low nitrogen levels. Since root veggies don’t like high nutrient soil, too much compost can lead to poor root development, even when plants look healthy above ground. In the Deep Roots system, root crops are grown in dedicated mineral soil beds with PhoSul fertilizer to support proper root formation with phosphorus. Note - Alliums (onions, garlic, and leeks) are not root veggies and like higher nutrient soil.
HOW TO PLANT guide for the column below:
Direct = Directly sow your seeds in your outdoor soil at the correct depth
Transplant = Plant seedlings ("transplants") that were grown indoors
Either = Direct sow seeds or plant seedlings
Seed Pieces = Plant cut sections of seed potatoes directly in the ground
Slips = Plant rooted sweet potato shoots grown from a mother tuber
| Crop Name | How To Plant | Spring Planting | Fall Planting | Germinate Indoors |
|---|---|---|---|---|
| Beets | Direct | 3/25–5/15 | 8/1–9/15 | No |
| Carrots | Direct | 3/20–5/15 | 8/1–9/15 | No |
| Parsnips | Direct | 3/20–5/1 | None | No |
| Radishes | Direct | 3/15–5/30 | 8/15–10/1 | No |
| Turnips | Direct | 3/25–5/30 | 8/1–9/15 | No |
| Rutabagas | Direct | 4/1–5/30 | 7/15–8/15 | No |
| Potatoes | Seed Pieces | 4/1–5/15 | None | No |
| Sweet Potatoes | Slips | 5/20–6/20 | None | Optional |
Growing Conditions
| Crop Name | Sunlight | Temperature Tolerances | Ideal Soil Temperature | Seed Depth | Days to Harvest |
|---|---|---|---|---|---|
| Beets | Full–part | 25°F–85°F | 60–75°F | 0.5 in. | 50–70 |
| Carrots | Full–part | 25°F–80°F | 60–70°F | 0.25 in. | 60–80 |
| Parsnips | Full sun | 20°F–75°F | 55–70°F | 0.5 in. | 90–120 |
| Radishes | Full–part | 25°F–85°F | 60–75°F | 0.25 in. | 25–40 |
| Turnips | Full–part | 20°F–85°F | 60–75°F | 0.5 in. | 40–60 |
| Rutabagas | Full sun | 20°F–75°F | 60–70°F | 0.5 in. | 80–100 |
| Potatoes | Full sun | 40°F–85°F | 60–70°F | 4 in. | 80–110 |
| Sweet Potatoes | Full sun | 55°F–95°F | 70–85°F | 4 in. | 90–120 |
Root crops play by different rules. Instead of trying to grow fast above ground, they want to store energy underground. They only do that when the soil sends the right signal: nutrients are present, but not excessive. In rich compost-based soil, especially manure compost, nitrogen levels are often too high. The plant responds by putting energy into leaves instead of roots, which is why gardeners sometimes get beautiful tops but small, disappointing roots.
Beets: Thin early for baby beets and harvest the rest when full size. Beets love sheep manure fertilizer.
Carrots: Over winter in the bed to optimize sweetness. Very tiny seeds are tricky to plant. Keep seeds and new sprouts moist constantly. Great tips in video How to sow carrot seeds that includes protecting seeds with a board or a layer of vermiculite until they germinate. To harvest carrots find one whose top is sticking out of the soil. If it pulls out easily it is ready to harvest. They will not be ready all at the same time.
Parsnip: Over-winter in the bed to optimize sweetness.
Radish: Fastest crop to grow to maturity.
Sweet potatoes need different soil than the other root veggies – one part compost to 2 parts topsoil. They are not planted with seeds. Instead plant “slips” which are seedlings grown on a sweet potato sitting in water – not in soil. In Zone 6a, plant sweet potato slips outdoors in late May to early June, generally 3–4 weeks after the last spring frost once the soil has warmed to at least 65º F and nights are consistently above 55º F. Slips are extremely tender, so they should not be planted until all danger of frost has passed. Video Grow Sweet Potato Slips blog post.
Alliums are root bulb veggies like garlic, onions and leeks are NOT true root veggies, They have different growing requirements like higher nutrient soil. Check our blog post on Garlic, Onions & Alliums.
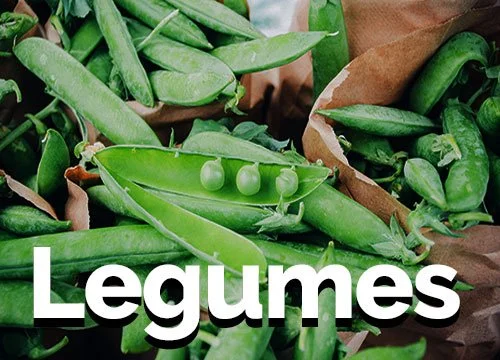
Legumes Planting Calendar
Planting Calendar for Legumes.

Planting & Setup
Legumes are unique in the garden because they improve soil health while producing food. This group includes peas, beans, lentils, and chickpeas, which have the ability to fix nitrogen from the air and add it to the soil. Cool-season legumes like peas can be planted early, while warm-season beans require warmer soil. In the Deep Roots system, legumes are excellent for crop rotation and help prepare soil for future plantings.
HOW TO PLANT guide for the column below:
Direct = Directly sow your seeds in your outdoor soil at the correct depth
Transplant = Plant seedlings ("transplants") that were grown indoors
Either = Direct sow seeds or plant seedlings
| Crop Name | How To Plant | Spring Planting | Fall Planting | Germinate Indoors |
|---|---|---|---|---|
| Fava Beans | Direct | 3/15–4/15 | 9/1–10/1 | No |
| Shell Peas | Direct | 3/15–4/20 | 8/15–9/15 | No |
| Snap Peas | Direct | 3/15–4/20 | 8/15–9/15 | No |
| Snow Peas | Direct | 3/15–4/20 | 8/15–9/15 | No |
| Lentils | Direct | 3/20–4/20 | None | No |
| Chickpeas | Direct | 4/1–5/1 | None | No |
| Bush Beans | Direct | 5/10–7/1 | None | No |
| Pole Beans | Direct | 5/10–6/20 | None | No |
| Edamame | Direct | 5/15–6/30 | None | No |
| Lima Beans | Direct | 5/15–6/30 | None | No |
| Southern Peas | Direct | 5/20–7/1 | None | No |
Growing Conditions
| Crop Name | Sunlight | Temperature Tolerances | Ideal Soil Temperature | Seed Depth | Days to Harvest |
|---|---|---|---|---|---|
| Fava Beans | Full sun | 20°F–75°F | 50–65°F | 1–2 in. | 75–100 |
| Shell Peas | Full–part | 25°F–75°F | 50–65°F | 1 in. | 60–70 |
| Snap Peas | Full–part | 25°F–75°F | 50–65°F | 1 in. | 60–70 |
| Snow Peas | Full–part | 25°F–75°F | 50–65°F | 1 in. | 60–70 |
| Lentils | Full sun | 25°F–80°F | 55–70°F | 1 in. | 80–100 |
| Chickpeas | Full sun | 30°F–85°F | 60–75°F | 1–2 in. | 90–100 |
| Bush Beans | Full sun | 50°F–95°F | 65–85°F | 1 in. | 50–60 |
| Pole Beans | Full sun | 50°F–95°F | 65–85°F | 1 in. | 60–75 |
| Edamame | Full sun | 50°F–95°F | 70–85°F | 1–2 in. | 70–90 |
| Lima Beans | Full sun | 55°F–95°F | 70–85°F | 1–2 in. | 70–90 |
| Southern Peas | Full sun | 55°F–100°F | 70–90°F | 1–2 in. | 60–90 |
Popular legumes for backyard gardens, beyond standard beans and peas, include Edamame (soybeans), Lima beans (butterbeans), Southern peas (cowpeas/black-eyed peas), and versatile Runner beans. These heat-loving options thrive in summer, while lentils and chickpeas can be tried for variety.
Edamame (Soybeans): A nutritious, high-protein snack, often planted in early summer for a late summer harvest.
Lima Beans (Butterbeans): Both bush and pole types thrive in warmer soil, offering a rich, creamy flavor.
Southern Peas (Cowpeas/Black-eyed Peas): Highly productive in hot, humid weather, providing both leafy greens and peas.
Runner Beans (Scarlet Runner): Known for stunning red flowers and edible, large beans, they handle slightly cooler summers better than limas.
Chickpeas (Garbanzo Beans): Can be grown, though they require a long, dry, warm season.
Asparagus Beans (Yard-long Beans): Related to cowpeas, these are productive, heat-loving, and best grown on a trellis.
Timing: Plant heat-lovers (Edamame, Limas, Cowpeas) after all danger of frost has passed, usually mid-April to May.
Trellis: Use trellises for pole varieties to save space.Providing proper support is essential, especially for climbing varieties. Regular planting of bush beans can provide a continuous summer harvest.
Leafy Greens Planting Calendar
Planting Calendar for Leafy Greens.
Planting & Setup
Leafy greens are fast-growing, nutrient-dense crops that can be planted multiple times throughout the season. This group includes lettuce, spinach, chard, kale, collards, and other greens that thrive in cooler weather, as well as heat-tolerant options like amaranth and red malabar spinach. Many leafy greens perform best in spring and fall, when temperatures are mild. In the Deep Roots system, leafy greens grow best in compost-rich soil that supports rapid, healthy growth. In zones 5 and 6 you can diversify cool weather hardy greens and heat-tolerant leafy greens to ensure a continuous harvest from spring through fall.
HOW TO PLANT guide for the column below:
Direct = Directly sow your seeds in your outdoor soil at the correct depth
Transplant = Plant seedlings ("transplants") that were grown indoors
Either = Direct sow seeds or plant seedlings
| Crop Name | How To Plant | Spring Planting | Fall Planting | Germinate Indoors |
|---|---|---|---|---|
| Amaranth | Direct | 5/15–7/1 | None | No |
| Collard Greens | Either | 4/1–5/30 | 8/1–9/1 | Optional |
| Kale | Either | 3/25–5/30 | 8/1–9/15 | Optional |
| Lettuce | Direct | 3/20–5/15 | 8/15–9/30 | No |
| Red Malabar Spinach | Direct | 5/20–7/1 | None | No |
| Spinach | Direct | 3/15–5/1 | 8/15–9/30 | No |
| Swiss Chard | Either | 4/1–6/1 | 8/1–9/1 | Optional |
| Asian Greens | Either | 3/25–5/15 | 8/15–9/30 | Optional |
Growing Conditions
| Crop Name | Sunlight | Temperature Tolerances | Ideal Soil Temperature | Seed Depth | Days to Harvest |
|---|---|---|---|---|---|
| Amaranth | Full sun | 50°F–100°F | 70–90°F | 0.25 in. | 30–50 |
| Collard Greens | Full–part | 20°F–85°F | 60–75°F | 0.5 in. | 50–70 |
| Kale | Full–part | 15°F–80°F | 60–70°F | 0.5 in. | 50–70 |
| Lettuce | Full–part | 28°F–75°F | 55–70°F | 0.125 in. | 30–60 |
| Red Malabar Spinach | Full–part | 55°F–100°F | 75–90°F | 0.5 in. | 60–80 |
| Spinach | Full–part | 20°F–70°F | 50–65°F | 0.5 in. | 30–50 |
| Swiss Chard | Full–part | 25°F–90°F | 60–75°F | 0.5 in. | 50–60 |
| Asian Greens | Full–part | 25°F–75°F | 55–70°F | 0.25 in. | 30–50 |
Kale and collards greens are considered leafy green vegetables and are, in fact, among the most nutrient-dense options in that category. Both are dark green, cruciferous vegetables, making them excellent sources of vitamins A, C, and K, as well as fiber, iron, calcium, and antioxidants
Red malabar spinach is a “fake spinach” that is a prolific vining plant that loves summer heat.
Lacinato and dinosaur kale are the exact same with dark blue-green, bumpy, crinkled leaves. Curly kale is best grown in spring and fall for a sweet taste after a frost.
Kale (Lacinato/Dino, Curly): Highly frost-resistant and thrives in early spring and fall. Flavor often improves after a light frost.
Arugula: Fast-growing, peppery green that loves the cool spring and fall. It can be harvested in as little as three weeks.
Mustard Greens (Red Giant, Green Wave): Heat-tolerant enough for summer, providing a spicy kick to salads. Pick young for less heat.
Collard Greens: One of the hardiest greens, suitable for spring, summer, and late fall.
Asian Greens (Tatsoi, Mizuna, Bok Choy): Excellent for quick spring or fall succession planting. They are fast-growing and hold up well in cool weather.
Beet Greens: You can plant beets primarily for their leafy greens, which are nutritious and fast-growing.
New Zealand Spinach: A fantastic heat-tolerant alternative to traditional spinach that thrives in summer.
Orach (Mountain Spinach): A colorful, heat-tolerant relative of spinach that doesn't bolt quickly in summer.
Sorrel: A perennial green with a tangy, lemon-like flavor that can be harvested early in spring and late into autumn.
Zone 6 Planting Schedule
Early Spring (March-April): Direct sow spinach, kale, lettuce, arugula, and Swiss chard as soon as the soil can be worked.
Summer (June-July): Plant heat-loving greens like Malabar spinach, Amaranth, New Zealand spinach, and Swiss chard.
Fall Garden (August-September): Resow arugula, lettuce, spinach, kale, and mustard greens for harvests that can continue into November.
Tips for Zone 6 Greens
Succession Planting: Sow new seeds every 2-3 weeks for a continuous supply.
Shade Cloth: Use shade cloth in July and August to prevent greens from bolting.
Overwintering: Kale and spinach can often survive the winter with a little protection, providing very early spring greens.
Lettuce Varieties
Different lettuce varieties have distinct planting dates and maturity timings, largely based on their heat tolerance and type.
Fast-growing leaf lettuces mature in 40–60 days, while
heading types (Romaine, Crisphead) take 70–100+ days.
Early spring/fall plantings favor cool-weather types, while
summer planting requires heat-tolerant, slow-bolting varieties.
Maturity Timing by Type:
Loose-leaf: Fast (40–60 days).
Butterhead/Boston: Medium (55–75 days).
Romaine/Cos: Slower (70–85 days).
Crisphead/Iceberg: Longest (70–100 days).
Planting Dates & Strategies:
Spring: Plant as soon as the soil can be worked.
Summer: Use heat-resistant varieties (e.g., Summer Crisp) to avoid bitter taste and premature bolting.
Fall: Plant in late summer to early fall (Aug–Oct) for a late harvest.
Succession Planting: Plant new seeds every 2–3 weeks for a continuous, steady harvest.
Key Considerations:
Loose-leaf and butterhead varieties can be harvested as "cut-and-come-again" at almost any stage.
Crisphead is the most challenging and requires a long, cool season.
Pair varieties with the season: cold-hardy for early spring/late fall, and heat-tolerant for summer.