
Tomato Growing Tips
A fresh ripe tomato is one of the most delicious and simple foods available to us. And it’s the most nutritious when eaten from a local organic garden or farm. Plus, there are so many tomato varieties all with their own unique colors and flavors. It's time to unlock the pleasure of eating real food again without spending big bucks at the organic market. Deep Roots wants to guide you through the steps of learning to grow your own tomatoes at a fraction of the grocery store cost. With a correct watering and a lot of sun, tomato plants will bear fruit all summer long. Tomatoes are fragrant and nutrient-rich. The taste of a freshly picked homegrown tomato is a joy.

You’re not alone on your “Grow Your Own” journey
Grow your own food advantages: We all know that the taste of any store-bought tomato (even organic ones) cannot compare to homegrown tomatoes. It is also great to be able to experiment with so many different varieties – each with its own unique flavor.
The Deep Roots innovative growing method is designed to make food gardening successful for beginners and all gardeners year after year. We accomplish this by following a new soil science that first supports the beneficial soil microbes. We don’t fill our raised beds with conventional soil and instead use 100% Microbe-Rich Compost. We use top quality “worm castings” (worm poop) instead of commercial organic fertilizers. The microbes in our compost and in our worm castings feed the plants.
Below are links to our growing method.:
Plant tomato seeds or seedlings?
Buy or grow seedlings (transplants). Most new gardeners prefer to buy young starter plants called “seedlings” or ”transplants.” Advanced gardeners grow their own seedlings from seeds.
Beginner gardeners in Chicago area (climate zone 6a) should plant seedlings no earlier than mid May to avoid cold nights. Some neighborhoods in Chicago are warmed by the “lake effect” (climate zone 6b) and can plant in early May.
Tips for buying seedlings (transplants): Always buy seedlings immediately after they are delivered to the store. Don’t buy seedlings with yellowing leaves. If you have tiny seedlings in very small pots and are not ready to plant yet, move them immediately to larger sterilized pots. Soak used pots in water with 10% bleach for 20 minutes and soak for 20 minutes in fresh water. Place the newly potted seedlings in a bright southern window or under grow lights.
Tomatoes are sensitive to temperature
Understanding the temperature tolerances of the vegetables you grow is crucial for their growth and productivity. By providing the optimal temperature conditions, you can ensure healthy plants and a bountiful harvest. Peppers and eggplants have similar sensitivities. Most tomato seedlings survive cold nights (temperatures between 40º and 50º). Severe damage occurs under 40º. Learn about season extension techniques to protect tomatoes from extreme cold and heat. See our blog post: Season Extension.
Cherry tomatoes are warm-season plants and prefer temperatures between 70°F to 80°F. They can tolerate slightly cooler temperatures but don't grow well in temperatures below 50°F. If temperatures exceed 95°F, cherry tomato plants may drop their flowers and fruits.
Roma tomatoes are also warm-season plants and prefer temperatures between 70°F to 85°F. They can tolerate slightly cooler temperatures but don't grow well in temperatures below 55°F. Like cherry tomatoes, Roma tomatoes may drop their flowers and fruits if temperatures exceed 95°F.
Heirloom tomatoes are also warm-season plants and prefer temperatures between 70°F to 85°F. They can tolerate slightly cooler temperatures but don't grow well in temperatures below 55°F. If temperatures exceed 95°F, heirloom tomato plants may drop their flowers and fruits.
Spring temperatures are very unpredictable during climate change. Most Zone 6a and 6b experienced gardeners prefer to plant tomato seedlings within the official planting date (May 1-15). Experienced gardeners have some tricks to protect against unexpected later frosts. Be patient when planting tomatoes and other very cold-sensitive crops that should never be exposed to under 50º F. To be safe beginners should plant on May 18 a little later than the official last frost date.
How to plant tomato seedlings
Preparing the soil: If your bed is filled with our 100% compost and you have added 2” fresh compost after the previous growing season, just add 1 cup of worm casting to your hole. But, if your bed is filled with conventional soil, dig a bigger hole to make room for several cups of half-and-half compost and worm castings mixture. Another option if you are planting in conventional soil is to dig out the top 4 to 6 inches of the soil and replace it with our Microbe-Rich Compost.
Planting the seedling: Use biodiversity planting – only one or two tomatoes per bed – 2 feet apart to get air flow that prevents dampness that promotes fungi and blight. Fill the spaces on the edges and between the tomatoes with other plants.
Give your tomato seedling an amazing head start. Prune bottom leaves and plant deep. If it’s a large seedling prune the bottom leaves off and dig an extra deep hole. Plant the roots extra deep so a lot of stem is covered by soil. The hair on the buried stem will become roots and produce a healthier tomato plant. View this excellent tomato planting video – but remember we use top quality worm castings instead of traditional fertilizers.
Add mulch and water deeply, but don’t over water
Watering tips from Oak Park’s Tomato Lady (Lissa Dysart): “Don’t water very much, other than at the beginning to help them get settled in. I’m a tough-love gardener, so I don’t pamper them. Watering a little bit every day is a mistake, because you’re frequently only watering on the surface and because the water evaporates really quickly. If you need to water due to heat or new plants, try to water every other day or every several days, but water really deeply when you do. If there’s been no rain, I’ll water to keep a medium level of hydration on the plant, especially when they’ve set fruit, to avoid cracking. When it hasn’t rained for a while and the plant has fully formed fruit, the sudden influx of water from a rainstorm can cause the fruit to rapidly increase volume, and then crack, so I will give them a drink in a period of no water to avoid that issue. Generally speaking, the less you water your tomatoes, the denser the flavor, so I err on the side of less watering.” – Tomato Lady
For more about the Tomato Lady (and more tips) see this article: Oak Park’s Tomato Lady.
Sunlight and temperatures
Tomatoes always want morning sun. The sooner the sun strikes their leaves in the morning, the faster the dew will evaporate and the healthier the plants will be. Choose the sunniest spot in your garden. Too much sun can be a problem to your tomatoes caused by intense, direct sunlight for extended periods during very hot weather. Historically this is not an issue in the Chicago area, but climate change has made intense, days-long extreme heat more common in our area.
Extreme heat is bad for tomatoes: Excessively hot temperatures - over 90 degrees consistently during the day and 75 degrees or higher overnight - stress tomato plants. Most tomatoes stop producing blossoms and fruit, and simply concentrate on surviving. The 2 Chicago heat waves in July 2022 shut down 12 hybrid tomato plants in the Deep Roots experimental garden in Oak Park, IL for the rest of the growing season. Protect tomato plants during high heat with shade cloth. View this excellent video about heat protection of crops.
Determinate OR indeterminate
Determinate and indeterminate tomatoes. Your plants are either determinate (meaning they will grow to a certain height, often about 3-5 feet tall, and then produce their fruit all at once), or they are indeterminate (they just keep on growing and producing fruit as they grow). They stop growing when cold weather hits.
Growing cherry tomatoes is easier. Most cherry tomatoes are indeterminate and have a large, sprawling growth habit that requires pruning and support. When space is limited, many gardeners choose determinate varieties as they grow in a more compact, bush-like shape. They ripen in small batches throughout the season. You usually don’t have to protect them from squirrels in the Chicago area. They don’t require as much careful pruning. Kids and adults love to eat them right off the plant.
Pruning tomatoes
Pruning helps maintain balance between vegetative (leaves and stems) and reproductive (flowers and fruits) growth, improves airflow to prevent disease, and can even help your plants produce larger fruit. As the plant grows, remove the shoots or "suckers" (see diagram below) which develop between the main stem and the leaves, up to the first flower/fruit. Above the first fruit cluster, let the shoots develop two leaves and then pinch off the tips.
Indeterminate and determinate tomatoes are pruned differently. The self-pruning gene causes determinate tomato plants to stop the growth of their shoots once blossoms form at their ends. On the other hand, indeterminate tomatoes, which lack the self-pruning gene, will simply flower blossoms along its shoots, and continue to grow throughout the appropriate season. Determinate tomatoes need no pruning other than removing all suckers below the first flower cluster because pruning won't affect their fruit size or plant vigor. If you do any pruning at all above the first flower cluster on determinate tomatoes, you'll only be throwing away potential fruit.
How to prune video we like is prune your tomato plants. See more pruning tips in the vertical growing section below.

Growing tomatoes vertically
Is growing vertically always the best option? Vertical growing is always needed when space is limited. The University of IL Agricultural Extension says: “Tomatoes can be grown successfully either on the ground or staked, but plants grown on the ground require less work, produce more per plant, and are less susceptible to blossom-end rot. The advantages of staking are cleaner fruits, no loss from soil rot or anthracnose and, sometimes, easier picking. If you grow tomatoes on the ground, mulching with clean fresh straw will reduce anthracnose and fruit rots, and help to keep the fruits clean. Also, the mulch will conserve moisture and control weeds.”
Trellis or staking: Most people grow indeterminate tomatoes which will need a trellis, staking, a tomato cage, or another way to keep the plant from collapsing. Most large determinate tomatoes need a cage or will need to be staked. There are many ways to trellis tomatoes. A wooden or metal frame with wire or netting grid attached secured to the raised bed is best. Traditional trellis designs assume you are growing all the tomatoes in one spot close together. BUT, we strongly recommend you put at least 2 feet or more between tomato plants or grow them in separate large containers.

Tomato cage: Since it’s very important to space the tomatoes 2 feet apart we suggest a tomato cage for each plant. Large tomato plants can topple over if their only support is a tomato cage. Before you plant your seedlings, secure your tomato cage with a sturdy 50-60 inch tall stake down the middle of the cage. Secure the main stem to the stake as it grows. Contact Deep Roots support if you want to borrow some of our extra large tomato cages stored at our Deep Roots garden in Oak Park, IL.
There are several methods of staking and pruning tomatoes.
Tips from University of IL Agricultural Extension website:
Start early with the staking. Shortly after transplanting, drive a stake about 6 feet long and 1½ inches in diameter into the soil 8 to 10 inches deep and 3 inches away from each plant.
Tie a string tightly around the stake and loosely around the plant. Tie a knot just below a branch so that the plant cannot slide down.
When the plants are 12 to 15 inches high, remove all but one or two main stems and tie them loosely to the stake, using soft twine or cloth.
As the plant grows, remove the shoots or "suckers" (see diagram above) which develop between the main stem and the leaves, up to the first fruit cluster.
Above the first fruit cluster, let the shoots develop two leaves and then pinch off the tips.
Tie the plant loosely to the stake every 10 to 12 inches.
Squirrel protection
There are several ways to deal with squirrels biting your tomatoes. They are interested in the juice mainly,
Place heavy-duty deer netting, chicken wire or other wire fencing around the tomato plants to keep the squirrels from spreading diseases and ruining tomatoes. Make sure the netting does NOT touch the plants.
Plant only cherry tomatoes since squirrels rarely bother them.
Protect individual ripening fruits with a small brown paper lunch bag tied to the plant when the tomato turns from green to beige.
Bring tomatoes indoors when they just start to ripen. Speed up the ripening process in a paper bag that includes several green tomatoes and an apple. Ethylene gas released by apples, bananas and tomatoes naturally ripen fruit. This is the preferred method used by many Deep Roots experienced gardeners.
How to harvest tomatoes
“Harvest the fruits when they are pink except during periods when the daily mean temperature is above 70° F. At such high temperatures pick the fruits just as they are turning color and keep them at 68° F. for further coloring. These fruits will be firmer and have better flavor than those ripened on the vine when temperatures are high. Fruits exposed to direct sunlight will reach a temperature 20 degrees higher than that of shaded fruits.
In the fall just before the first frost, pick the large green fruits as well as the riper fruits. Ripen these fruits at about 60° to 70° F. in the dark. By sorting them out every 2 or 3 days you will have a gradual supply for about a month.” – University of IL Agricultural Extension
Environmental Pest Management (EPM)
An integrated approach is key
Diseases in tomatoes can be greatly reduced by good cultural practices and carrying out a fungicide dust or spray program. EPM for organic food gardening is responsible environmental stewardship. EPM is modeled after the older Integrated Pest Management (IPM) that allowed use of toxic chemicals for extreme pest invasions.
Use the organic safe sprays we recommend in our EPM post (link below). We practice these EPM principles for all of your vegetables. Details are in our EPM post. Contact your local botanic garden information service OR state university agricultural extension for help identifying and treating pest problems.
Our Innovative Food Gardening Method
Learn more in our two recently revised blog posts.
Our online store
See our online store for details about prices, ordering and delivery of raised beds, compost, worm castings and more. Please contact our customer support team before placing an order online so we can assist you with the details and answer your gardening questions.
QUESTIONS? COMMENTS?
Contact us at (708) 655-5299 or support[at]deep-roots-project.org.
Stay in touch
Please include your cell phone number when you sign up for our eNewsletter, if you would like to receive occasional text message gardening tips and reminders.
Donations help us provide organic kitchen gardening education to individuals, organizations, and entire communities. Thank you in advance for contributing to our community and for sharing our website and blog with friends and family.
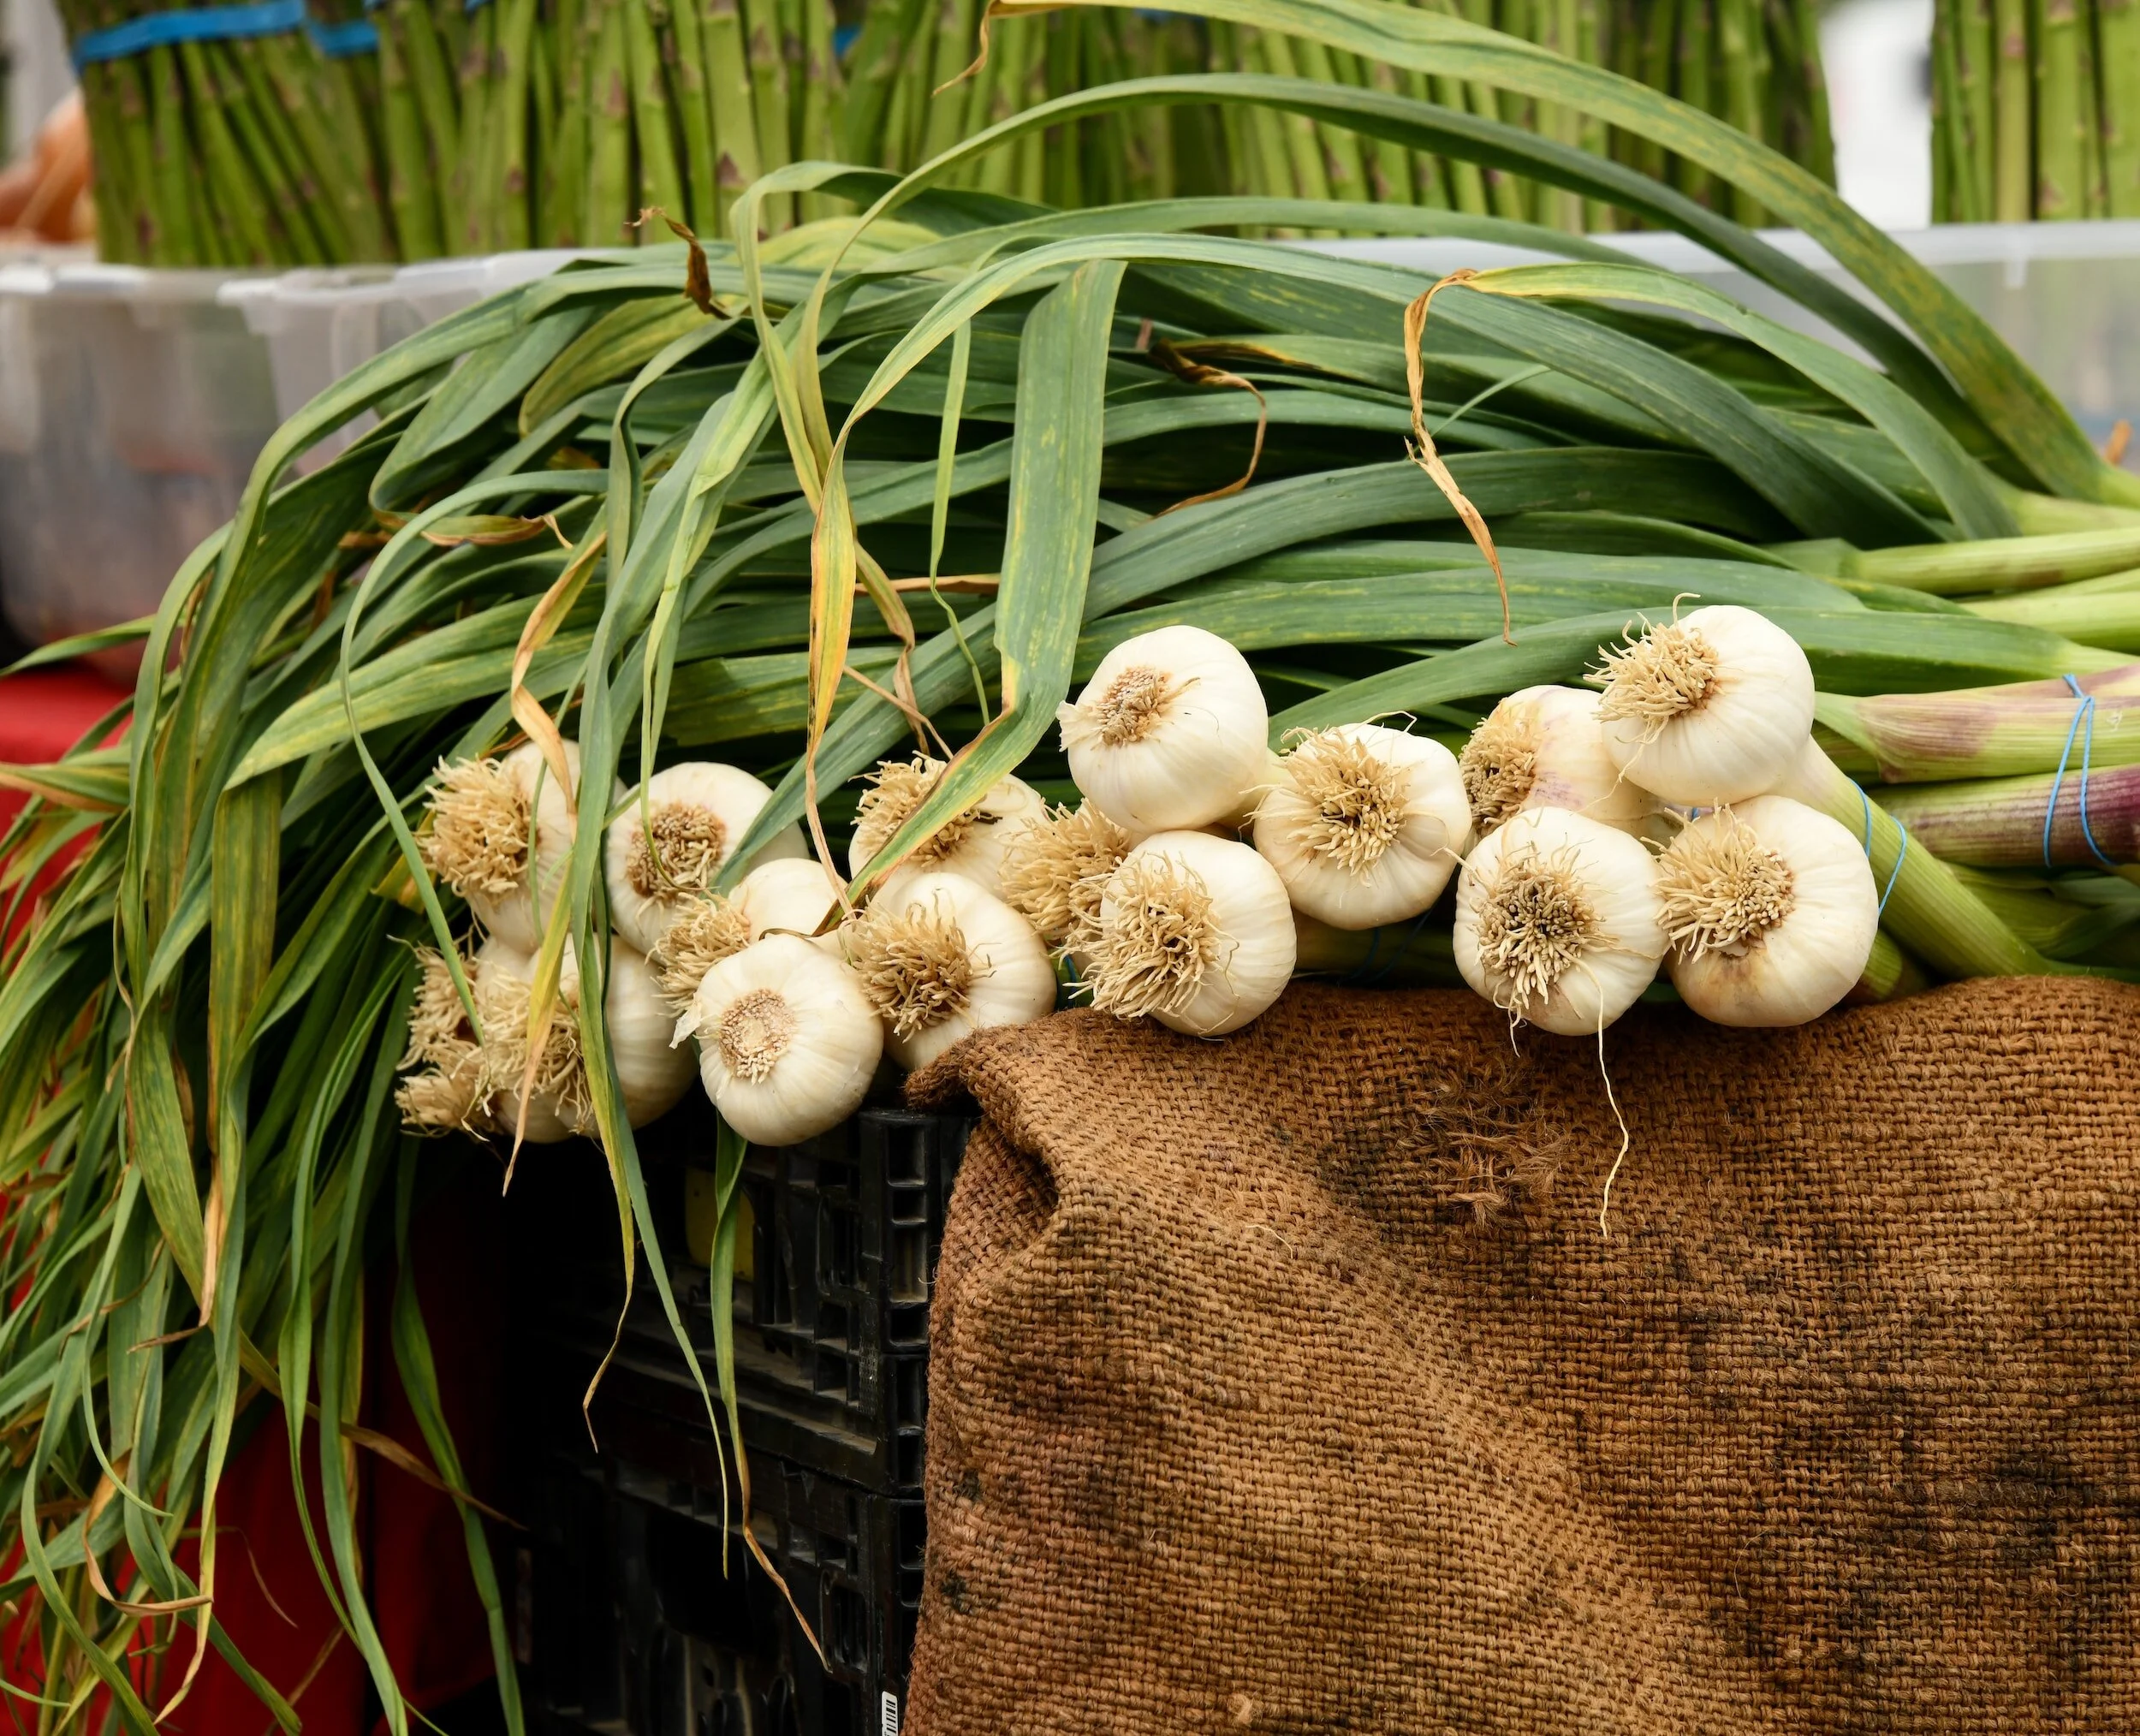
Planting Garlic in Fall
Garlic is best planted in fall or a bountiful harvest next summer. It sprouts in spring and is harvested in July. However garlic is relatively carefree when given a well-drained site, our compost as your soil, with full sun, good air circulation and worm castings as fertilizer.

Best planting times
Garlic is best planted in mid-October for a bountiful harvest next summer. Exact best days vary depending on if you are in Chicago city (in Zone 6a, plant Oct. 17 to 31) or suburbs (in Zone 5b, plant Oct. 13 to 21), Garlic sprouts in spring and is harvested in July. Don’t plant garlic after the first day of freezing temperatures around Oct 30th. Check latest weather predictions of first night time freeze. Garlic is relatively care-free when given a well-drained site, our compost as your soil, with full sun, good air circulation and worm castings as fertilizer.
Grow Hardneck garlic in Zones 5 and 6
Hardneck garlic is the preferred choice for Chicago area climates because it needs a significant cold period to mature. Plant in late fall (October/November) to ensure it gets the necessary weeks of cold exposure. It produces a stiff central stalk and has a more robust flavor, with large, easy-to-peel cloves.
Softneck garlic can grow in Zones 5 and 6, but may struggle. Most Softneck varieties are more suited to warmer climates (Zones 8-12), but you can find some softneck varieties that are suitable for colder temperatures and can be grown in Zone 5 and 6 - for example: Inchelium Red, Nootka Rose, and Pioneer. Be sure to plant them 4-6 weeks before the first frost.
Best cloves to plant: It’s worth the extra dollars sowing the biggest and healthiest organic garlic and shallot bulbs you can find. You’ll reap that much more when you harvest. There is a direct relationship between the size of bulbs and cloves you plant the size of the bulbs and cloves you’ll harvest.
Buy garlic to plant from farmers markets: Locally grown garlic is the best. We get our planting cloves from our current year’s crop or from a farmers market - using only the largest bulbs and large cloves. Last day for Oak Park Farmers Market is Oct. 25 in 2025.
There are many varieties of garlic. A few good varieties are Carpathian, Inchelium Red, Idaho Silverskin and Persian Star, and the best sources of planting stock are mail-order and internet specialty seed companies and diverse garden centers.
Growing Tips
Soil: Best to use our 100% microbe-rich compost as your soil. Every fall enrich the soil with 2 inches of our microbe-rich compost. Don’t work it into the existing soil. Tilling and digging your soil for any reason other than planting seeds and seedlings damages microbial structures and the health of your soil. Add a half cup of worm castings as a fertilizer in each planting hole.
Planting: Best to plant large garlic cloves about 5-8 inches apart, root side down and pointy end up. You can plant a single row or several rows with four to eight inches between plants, planting at least 3 inches below the surface. Mulch with a good four inches of straw or shredded leaves. If you're not planning to mulch, sow at least five inches deep.
Care: In spring and early summer weeds can be invasive and should be controlled. Mulch the soil with straw or other organic materials soon after planting. This will also help to alleviate winter soil frost heaving that can damage new roots. Remove the straw once top growth is evident in the spring, or excess moisture may rot bulbs.
Remove any flower stalks (scapes) that emerge, as they can divert energy away from the bulbs. If allowed to mature to seed, they can reduce bulb size. Young garlic scapes are considered a garden delicacy and can be chopped into fresh salads.
Watering: Garlic needs consistent moisture to develop strong bulbs, especially during dry spells. Water deeply when the soil begins to dry out, but avoid keeping the soil soggy, as excessive moisture can cause rot. Fertilize with worm castings in early spring to boost nutrient availability. Once the bulbs begin to mature in early summer and the lower leaves start to yellow, stop watering completely to help the bulbs cure and prevent splitting.
Harvest: Harvest garlic before the tops completely die down, preferably with 4 to 6 green leaves still attached. Dig up the bulbs carefully, being careful not to damage them.
Storage: Remove excess soil, but do not wash, and lay whole plants on screens or hang in small bunches to dry. Allow it to cure completely in a warm, well-ventilated room, but not in direct sunlight. Watch for rotting bulbs, remove these and increase air circulation if needed using a box fan.
Curing will take about 4 to 6 weeks. After that, roots and tops can be trimmed, and outer dirty skins can be removed. Store cured garlic in a cool dry place. Remember all garlic varieties taste the same at harvest time, but after curing and a few weeks of storage time, individual variety flavors will come out.
Join the Deep Roots movement
We’re not just about gardening; we’re about changing the way people grow food. Whether you have a tiny balcony or a full backyard, we’ll help you grow like a pro.
Stay in the loop: Signup for our email newsletter. If you also provide your phone number you will get text message updates that link to our best blog posts.
Get involved: Attend a free workshop, become a volunteer, grab a raised bed, or simply follow along for expert tips. Contact our support team any time you have a question at 708-655-5299 and support@deep-roots-project.org.
Learn. Share. Grow. Volunteer: We invite you to be a part of our sustainable movement right here in our own backyards! We want all our volunteers to have fun and learn while they contribute to expanding the Deep Roots community. We can customize a volunteer assignment to your time, interests and skills. Learn more on our Volunteer page
Dive Deeper
Click on the Blog Posts below for more about our Innovative methods.
Beautify Your Garden with Our Cedar Raised Beds!
Our Deep Roots handcrafted cedar raised beds are designed to endure outdoors while adding a touch of style to your yard. As a bonus, they are the perfect depth to hold just the right amount of our nutrient-rich compost growing medium, which comes free with each bed.
Deep Roots Supports Gardeners
We provide our gardeners with the best products for success – like cedar raised beds, microbe-rich compost and microbe-rich worm castings.
Call our customer support team with any questions or help with calculations. Then place your order online. If you need help or have a question contact us at support[at]deep-roots-project.org and 708-655-5299.
See our online store for details about prices, ordering and delivery of raised beds, planter boxes, microbe-rich compost, worm castings, leaf mulch and more. We don’t sell traditional soil, since we use 100% compost as our growing medium. Our online store has 2 sections
Signup for Our Newsletter
Please leave your cell phone number when you sign up for our eNewsletter to get gardening and seasonal text messages announcements now and then.
Donations help us provide organic kitchen gardening education to individuals, organizations, and entire communities. Thank you in advance for contributing to our community and for sharing our website and blog with friends and family.
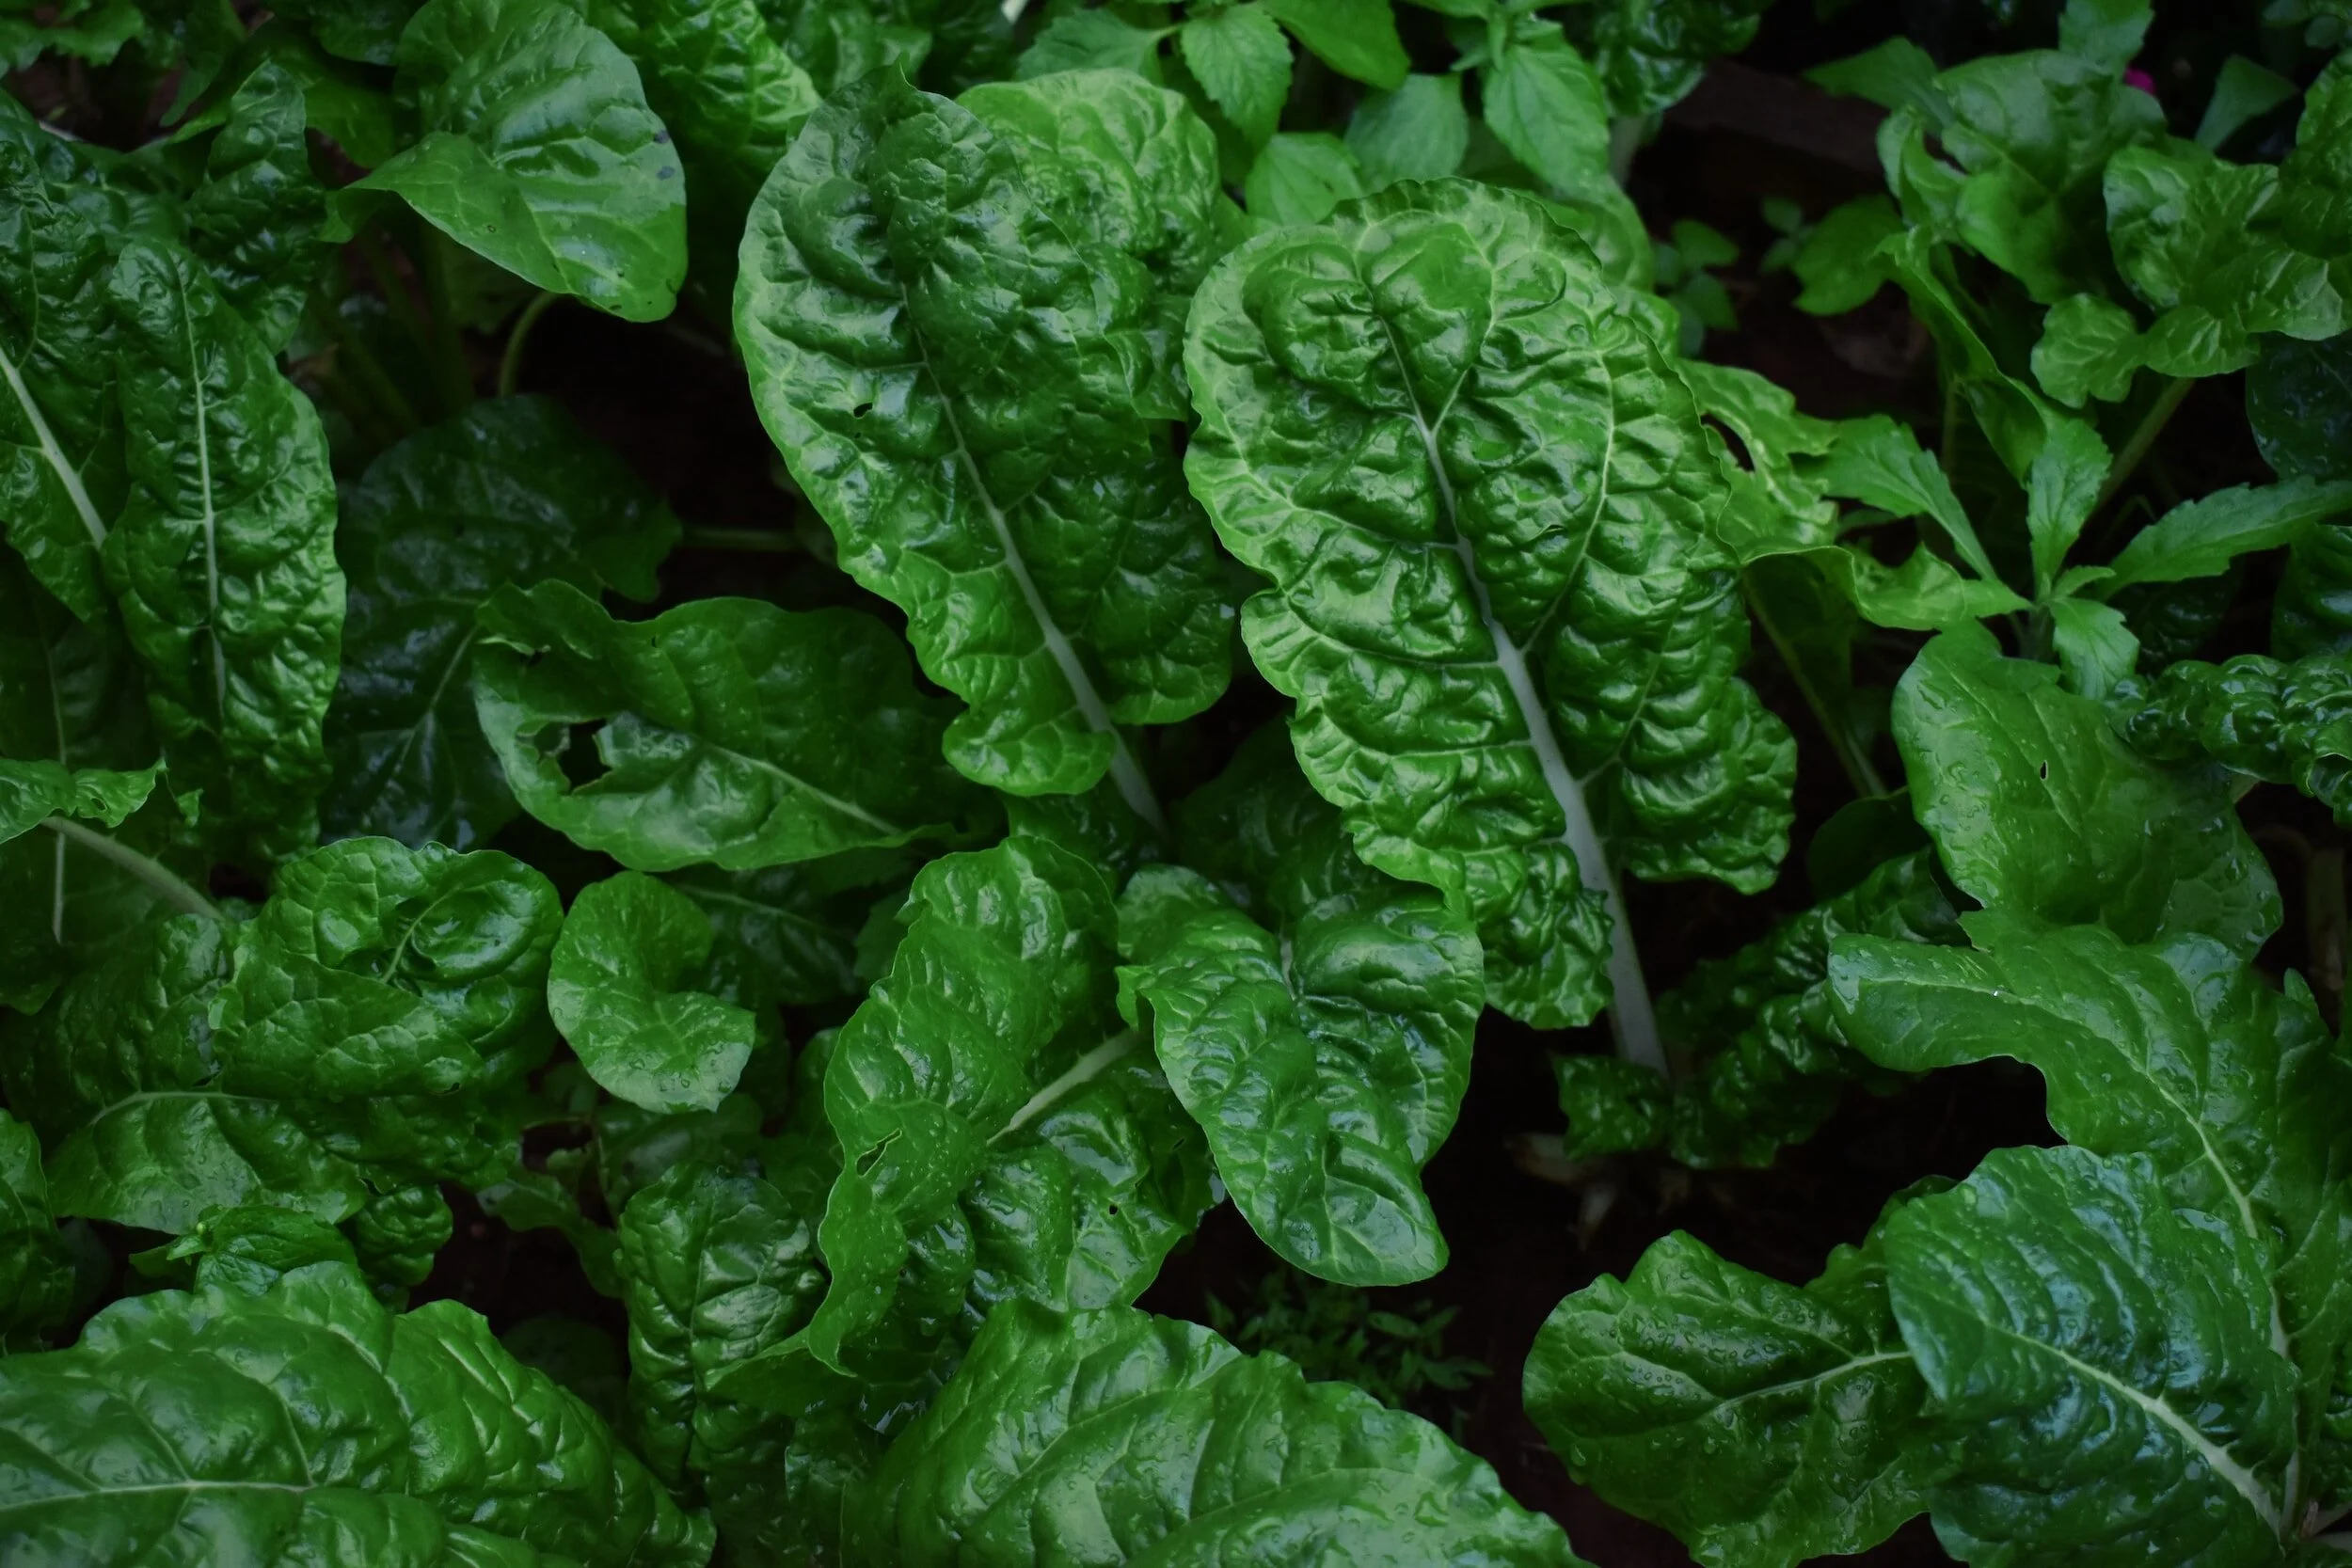
Plant Spinach Seeds in Fall
Plant seeds Nov. 15 to 30 for spring germination
Get a larger crop with much less work if you plant the seeds in November for germination in the spring. Early November is unpredictably warm. Better to plant in late November when temperatures are reliably colder. The seeds and new spring sprouts like snow. You can also plant more seeds in late February/early March.

Plant seeds Nov. 15 to 30 for spring germination
Get a larger crop with much less work if you plant the seeds in November for germination in the spring. Early November is unpredictably warm. Better to plant in late November when temperatures are reliably colder. Spinach seeds like the cold and snow. You can also plant more seeds in late February/early March.
It’s important to remember that Mother Nature does not have formulas that work every time because the temperature and climatic conditions change from year to year. Gardening teaches you patience, flexibility and adaptability.
STEP-BY-STEP growing your spinach:
Spread 2 inches of our microbe-rich compost before planting your seeds. If your bed is mostly traditional soil spread 3 or 4 inches of our compost.
Our favorite variety is Bloomberg spinach. Store your extra seeds for next year in an airtight plastic bag in the refrigerator with moisture absorbing pouches.
We suggest planting seeds in rows or small clusters. Add worm castings in the seed holes or seed furrows.
Sow seeds one at a time, ½-inch to 1-inch deep and 5 inches apart.
When you have finished planting your row of seeds, lightly sprinkle some compost over them so that the birds don’t eat them.
No watering needed. Spring rains provide the water to make them happy.
In spring harvest before the warm weather starts to avoid leaves “bolting” and turning bitter. Bolted leaves have pointy tips. Start by harvesting the biggest leaves one at a time,
Benefits of Eating Spinach
Cooking spinach drastically reduces oxalic acid. Since raw spinach contains more oxalic acid than other leafy greens, eat spinach both cooked and raw. Too much oxalic acid causes kidney stones in some people. Learn more about its nutrients and the best way to cook spinach.
Rich in Nutrients: Spinach is a powerhouse of vitamins and minerals, including vitamin K, vitamin A, vitamin C, folate, magnesium, and iron. Spinach is loaded with antioxidants like quercetin, which can combat oxidative stress and reduce inflammation in the body.
Eye Health: Spinach contains lutein and zeaxanthin, two carotenoids known to promote eye health and reduce the risk of age-related macular degeneration.
Heart Health: The potassium and magnesium in spinach can help regulate blood pressure levels, thus promoting heart health.
Bone Health: The vitamin K in spinach plays an essential role in bone health by helping in calcium regulation and bone mineralization.
Cancer Prevention: Spinach contains compounds like chlorophyll and other antioxidants which have been studied for their potential cancer-preventative properties.
Improved Digestion: Spinach has high fiber content which can aid in digestion and promote a healthy gut.
Blood Building: Iron content in spinach can assist in red blood cell formation and combat iron-deficiency anemia.
Skin and Hair Health: Vitamins A and C in spinach promote healthy skin and hair. Vitamin A is necessary for sebum production, which keeps hair moisturized.
Red Malabar - A Heat Loving Spinach Alternative
Red Malabar is a spinach alternative that is pest-resistant, heat loving, and can grow all summer long. See our blog post for more details: Red Malabar Spinach.
Since Red Malabar is a heat loving plant and not a true spinach, it is not suitable for the fall seed spreading technique described in this blog post. Red Malabar seeds should be directly sown, or seedlings planted only after the last frost has passed in the spring.
“Grow Your Own Food” blog posts
See the full list of our Grow Your Own Food blog posts. Each post is assigned ”tags” which are under the post title. If you need a quick answer to a gardening question give us a call or send a text to our customer support team – support[at]deep-roots-project.org AND 708-655-5299.
Deep Roots online store
See our online store for details about prices, ordering and delivery of raised beds, planter boxes, microbe-rich compost, worm castings, leaf mulch and more. We don’t sell traditional soil, since we use 100% compost as our growing medium. Our online store has 2 sections – (1) raised beds and planter boxes and (2) compost, worm castings, fertilizer.
Please contact our customer support team before placing an order online so we can assist you with the details and answer your gardening questions. You can pay by credit card in the store or by check.
(708) 655-5299 and support[at]deep-roots-project.org
Please leave your cell phone number when you sign up for our eNewsletter, if you want text message announcements now and then.
Donations help us provide organic kitchen gardening education to individuals, organizations, and entire communities. Thank you in advance for contributing to our community and for sharing our website and blog with friends and family.

Growing squash in a suburban garden
Growing squash in a suburban garden in zone 6a can be highly rewarding with the right approach. Here are some tips to help you succeed, along with information on pollination and improving it.
Growing squash in a suburban garden in zone 6a can be highly rewarding with the right approach. Here are some tips to help you succeed, along with information on pollination and improving it.

Tips for Growing Squash in Zone 6a
Choose the Right Varieties: Select varieties of squash that are well-suited to your growing season and climate. Both summer squash (like zucchini) and winter squash (like butternut) can thrive in zone 6a.
Planting Time: Plant squash seeds or seedlings after the last frost date for your area. In zone 6a, this is typically around mid-May. Squash seeds can be started indoors about 3-4 weeks before transplanting.
Soil Preparation: Squash prefers well-drained, nutrient-rich soil. Amend your soil with plenty of compost to ensure it is fertile and retains moisture well.
Spacing: Squash plants need plenty of space to grow. Space them about 3-4 feet apart to allow for proper air circulation and growth.
Watering: Keep the soil consistently moist but not waterlogged. Squash plants need about 1-2 inches of water per week. Water at the base of the plants to avoid wetting the leaves, which can lead to disease.
Mulching: Use mulch around the base of the plants to help retain moisture, suppress weeds, and keep the soil temperature consistent.
Support: For vining varieties, consider using a trellis to save space and improve air circulation around the plants.Storing: Winter squash is best stored at temperatures between 50°F to 55°F (10°C to 13°C). This range helps preserve the squash for several months, allowing it to stay firm and flavorful. Store the squash in a cool, dry place with good ventilation, such as a basement, cellar, or pantry, where humidity levels are relatively low to avoid rot. Make sure to keep the squash off the cold floor and avoid storing it in the fridge, as temperatures below 50°F can lead to faster spoilage.
Squash Pollination
Squash plants produce both male and female flowers. Male flowers typically appear first, followed by female flowers, which have a small swelling at the base that will develop into the fruit once pollinated.
How to Improve Pollination
Attract Pollinators: Squash is primarily pollinated by bees. To attract more bees to your garden, plant flowers that bloom throughout the growing season. Native wildflowers, marigolds, and sunflowers are great choices.
Hand Pollination: If natural pollination is inadequate, you can hand-pollinate. Use a small paintbrush or simply pick a male flower and gently transfer pollen to the stigma of the female flower. This is best done in the morning when flowers are fully open.
Avoid Pesticides: Minimize or avoid using pesticides, especially during the flowering period, as these can harm pollinators.
Companion Planting: Planting herbs like basil, mint, or flowers like marigolds and nasturtiums near your squash can help attract pollinators and beneficial insects.
Provide Water Sources: Pollinators need water. Provide a shallow water source in your garden, such as a shallow dish with stones for the bees to land on.
By following these tips and ensuring good pollination practices, you can enjoy a bountiful squash harvest in your suburban garden.
“Grow Your Own Food” blog posts
See the full list of our Grow Your Own Food blog posts. Each post is assigned ”tags” which are under the post title. If you need a quick answer to a gardening question give us a call or send a text to our customer support team – support[at]deep-roots-project.org AND 708-655-5299.
Deep Roots online store
See our online store for details about prices, ordering and delivery of raised beds, planter boxes, microbe-rich compost, worm castings, leaf mulch and more. We don’t sell traditional soil, since we use 100% compost as our growing medium. Our online store has 2 sections – (1) raised beds and planter boxes and (2) compost, worm castings, fertilizer.
Please contact our customer support team before placing an order online so we can assist you with the details and answer your gardening questions. You can pay by credit card in the store or by check.
(708) 655-5299 and support[at]deep-roots-project.org
Please leave your cell phone number when you sign up for our eNewsletter, if you want text message announcements now and then.
Donations help us provide organic kitchen gardening education to individuals, organizations, and entire communities. Thank you in advance for contributing to our community and for sharing our website and blog with friends and family.